CREATING LAYOUTS FOR SCRAP TAGS & PAGES
FROM SKETCHES
PSP8/9/X
This tutorial was
written by Jemima ~ 2008
Copyright © 2008 ~ Jemima
~ All rights reserved
********************************
I recommend you read THIS first if you are new to digital scrapping.
********************************
This was created using PSP9 but can be adapted for other versions of PSP.
You will need the
following to complete this tutorial
Materials
RIGHT CLICK >>> SAVE TARGET AS
Sketchlayout
Save to a folder on your computer
Pen/pencil & paper
********************************
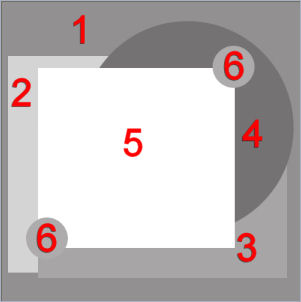
We'll create a usable layout from a sketch.
i.e: Create layers to work from.
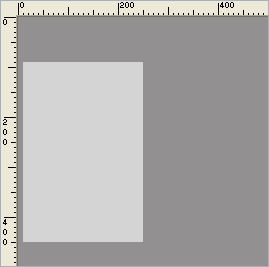
Open up the Sketchlayout in your PSP workspace

Well be creating the workable layout in the order shown below.
This is where you need your pen/pencil and paper if you want to
create this exactly as in the sketch.
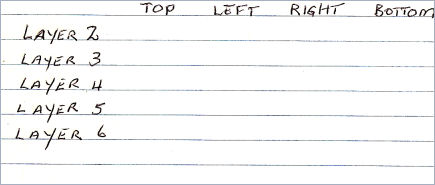
Write down the layers in a column on the left.
Across the top write TOP LEFT RIGHT BOTTOM
Choose your SELECTION TOOL
Selection Type = Rectangle
Mode = Replace
Feather = 0
Antialias = UNchecked
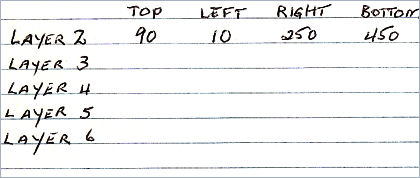
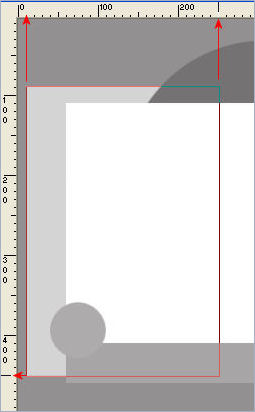
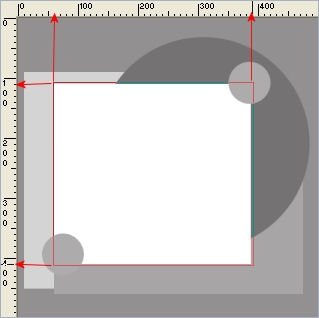
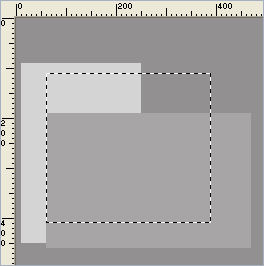
Draw a rectangle over the layer 2 in the sketch
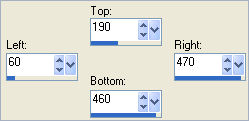
note the TOP, LEFT, RIGHT and BOTTOM positions on your paper
in this case....
 . . 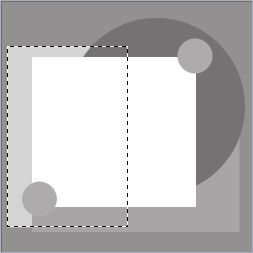
DESELECT
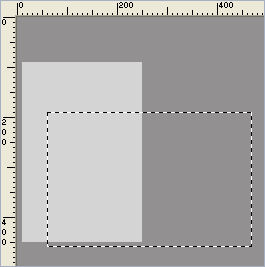
Now let's do the same with Layer 3
Using your SELECTION TOOL
Same settings
Draw a rectangle on Layer 3 in the sketch
and note the positions on your paper
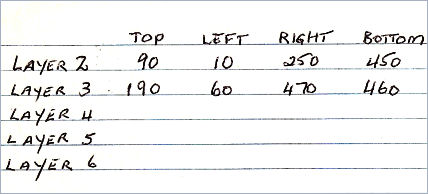

DESELECT
We'll leave 4 and 6 alone for the moment since they are circles
and we need a central point to start.
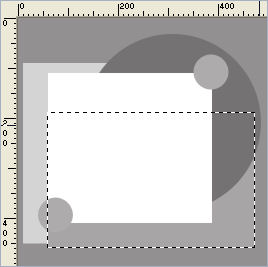
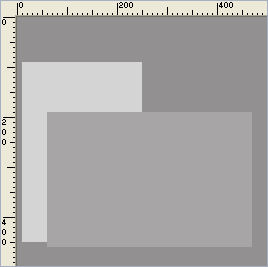
Let's do Layer 5
Using your SELECTION TOOL
Same settings
Draw a rectangle on Layer 5 in the sketch
and note the positions on your paper
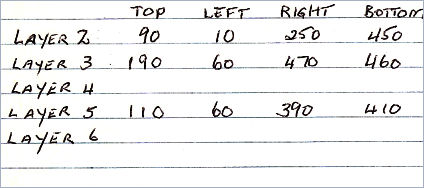
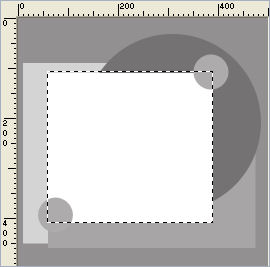
DESELECT
*-*-*-*-*-*-*-*-*
Create a new image the same size.. in this case 500 x 500
Transparent background
PSPX: Colour Depth = 8bits/channel
Using your EYEDROPPER left click on the background of the sketch
to load the dark grey in your MATERIAL PALETTE foreground.
Flood fill your NEW image with the DARK GREY
This is layer 1... on the sketch
In your LAYER PALETTE rename this layer "Background"
*-*-*-*-*-*-*-*-*
LAYERS >>> NEW RASTER LAYER
This is Layer 2 on the sketch
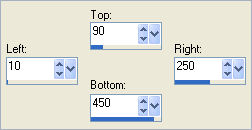
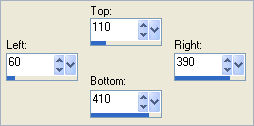
Choose your SELECTION TOOL then click on the CUSTOM SELECTION
symbol
Enter the co-ordinates from your notes for Layer 2
Using your EYEDROPPER left click on the Layer 2 section of the sketch
to load the light grey in your MATERIAL PALETTE foreground.
Flood fill the selected area on your NEW image with the LIGHT GREY
DESELECT
In your LAYER PALETTE rename this layer "Paper 2 "
DESELECT
*-*-*-*-*-*-*-*-*
LAYERS >>> NEW RASTER LAYER
This is Layer 3 on the sketch
Choose your SELECTION TOOL then click on the CUSTOM SELECTION symbol
Enter the co-ordinates from your notes for Layer 3
Using your EYEDROPPER left click on the Layer 3 section of the sketch
to load the light grey in your MATERIAL PALETTE foreground.
Flood fill the selected area on your NEW image with the MID GREY
DESELECT
In your LAYER PALETTE rename this layer "Paper 3 "
*-*-*-*-*-*-*-*-*
LAYERS >>> NEW RASTER LAYER
In your LAYER PALETTE rename this layer "Large Circle "
We will leave this blank for the moment
*-*-*-*-*-*-*-*-*
LAYERS >>> NEW RASTER LAYER
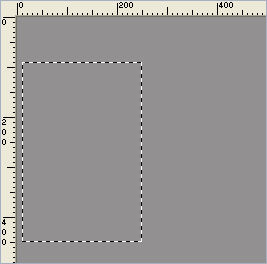
This is Layer 5 on the sketch
Choose your SELECTION TOOL then click on the CUSTOM SELECTION symbol
Enter the co-ordinates from your notes for Layer 5
Flood fill with WHITE
DESELECT
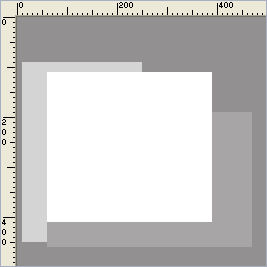
In your LAYER PALETTE rename this layer "Paper 5 "
*-*-*-*-*-*-*-*-*
LAYERS >>> NEW RASTER LAYER
This is Layer 6 on the sketch
In your LAYER PALETTE rename this layer "Small Circles "
We will leave this blank for the moment
*-*-*-*-*-*-*-*-*
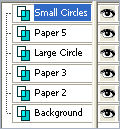
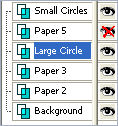
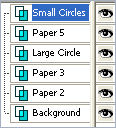
This is how your LAYER PALETTE should look now
*-*-*-*-*-*-*-*-*
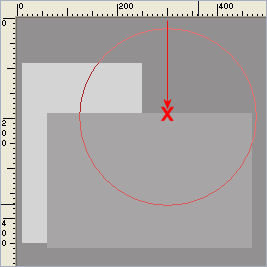
OK let's do the Large Circle now.
In your LAYER PALETTE
CLOSE Paper 5
ACTIVATE the "Large Circle" layer
Choose your SELECTION TOOL
Selection Type = CIRCLE
Mode = Replace
Feather = 1
Antialias = Checked
Position your cursor on top of the MID GREY area and 250 pixels from the left...
Draw a circle as shown.
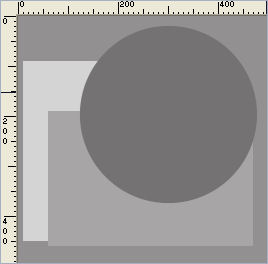
Flood fill with DARK GREY " #747273 "
DESELECT
In your LAYER PALETTE
OPEN Paper 5
ACTIVATE the "Small Circle" layer
Choose your SELECTION TOOL
Same settings
Place you cursor on the corner of the white area
and draw a small circle
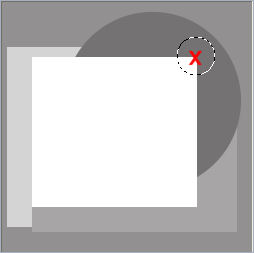
Flood fill with GREY "
#adabac "
DESELECT

Right click on the Title Bar and select COPY from the options
Right click on the Title Bar of your frame image
and select PASTE AS NEW SELECTION from the options.
Position as shown

DESELECT
Save as a .psp image and name it
Layout_Template1_your intitials.psp
Mine would be " Layout_Template_1_JF.psp "
Now you can use this template over and over....
Go to the next page to see how we can use this template
NEXT PAGE
Page designed by

for
http://www.artistrypsp.com/
Copyright ©
2000-2008 Artistry In PSP / PSP Artistry
All rights reserved.
Unless specifically made available for
download,
no graphics or text may be removed from
this site for any reason
without written permission from Artistry
In PSP / PSP Artistry
|
