USING LAYOUTS FOR SCRAP TAGS & PAGES
PSP8/9/X
PAGE 2
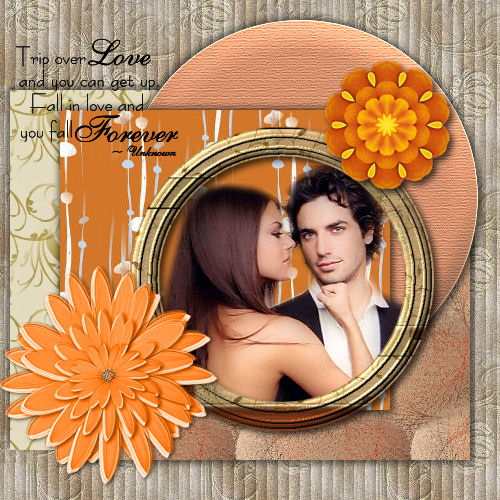
This tutorial was
written by Jemima ~ 2008
Copyright © 2008 ~ Jemima
~ All rights reserved
********************************
This was created using PSP9 but can be adapted for other versions of PSP.
You will need the
following to complete this tutorial
Materials
The Tag Layout you just created
RIGHT CLICK >>> SAVE TARGET AS
JF57.jpg
nox18.jpg
nox20.jpg
ivy_assortgold1.jpg
Save to a "Backgrounds" folder on your computer
JF_Flower33.psp
JF_Flowers_orange.psp
Save to a "Scrap_Flowers" folder on your computer
jf_nature_frame4.psp
Save to a "Scrap_Frames" folder on your computer
TUBE
rystaltubed_848.psp
DX07_wordart2.psp
Save to a folder on your computer
Plugins
** EYE CANDY3 **
http://www.pircnet.com/downloads.html
OR
http://www.fleursauvage.be/utilitaire/filtres/filtres.htm
********************************
Open all the background images in your PSP workspace and minimize.
Have your newly created layout open in your PSP workspace
WINDOW >>> DUPLICATE
Close the original Image

In your MATERIALS PALETTE load the nox18 pattern in the foreground
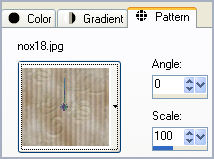
Activate the background layer on your image
SELECTIONS >>> SELECT ALL
Flood fill with the nox18 pattern
DESELECT
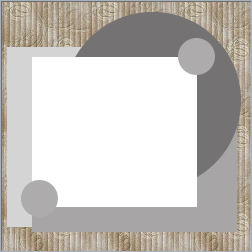
Activate the "Paper 2" layer
In your MATERIALS PALETTE load the ivy_assortgold1 pattern in the foreground
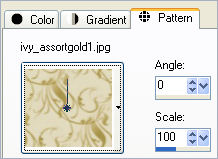
SELECTIONS >>> SELECT ALL
SELECTIONS >>> FLOAT
Flood fill with the ivy_assortgold1pattern
EFFECTS >>> PLUGINS >>> EYE CANDY 3 >>> DROP SHADOW
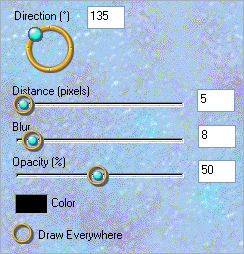
DESELECT
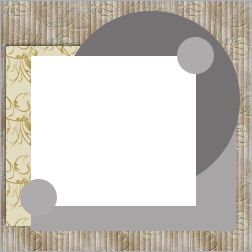
Activate the "Paper 3 " layer
In your MATERIALS PALETTE load the nox20 pattern in the foreground
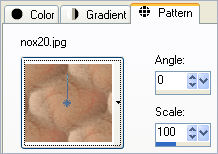
SELECTIONS >>> SELECT ALL
SELECTIONS >>> FLOAT
Flood fill with the nox20 pattern
EFFECTS >>> PLUGINS >>> EYE CANDY 3 >>> DROP SHADOW
Change DIRECTION to 315
DESELECT
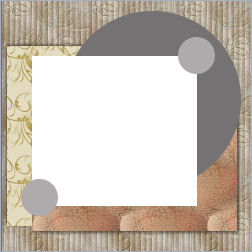
Activate the "Paper 5" layer
In your MATERIALS PALETTE load the JF57 pattern in the foreground
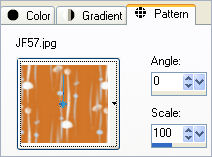
SELECTIONS >>> SELECT ALL
SELECTIONS >>> FLOAT
Flood fill with the JF57pattern
EFFECTS >>> PLUGINS >>> EYE CANDY 3 >>> DROP SHADOW
Same settings
EFFECTS >>> PLUGINS >>> EYE CANDY 3 >>> DROP SHADOW
Change DIRECTION to 130
DESELECT
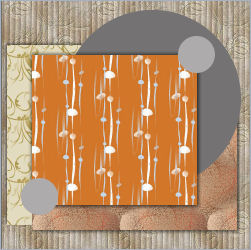
In your MATERIALS PALETTE
load SOLID TAN " #cb8a6a" in the background
Activate the "Large Circle " layer
SELECTIONS >>> SELECT ALL
SELECTIONS >>> FLOAT
Flood fill with the background colour.
EFFECTS >>> TEXTURE EFFECTS >>> TEXTURE
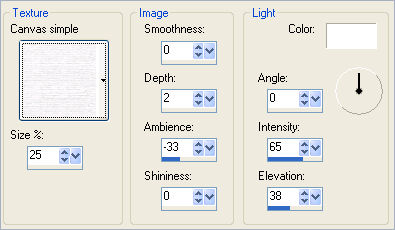
EFFECTS >>> EDGE EFFECTS >>> ENHANCE
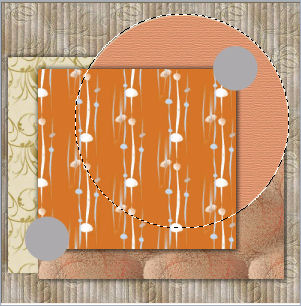
EFFECTS >>> 3D EFFECTS >>> INNER BEVEL
COLOUR = WHITE

EDIT >>> Repeat Inner Bevel
EFFECTS >>> PLUGINS >>> EYE CANDY 3 >>> DROP SHADOW
Same settings
EFFECTS >>> PLUGINS >>> EYE CANDY 3 >>> DROP SHADOW
Change DIRECTION to 315
DESELECT

Activate 'Paper 5' layer
Open the " jf_nature_frame4 " in your PSP workspace
Right click on the Title Bar and select COPY from the options
Right click on the Title Bar of your scrap tag image
and select PASTE AS NEW LAYER from the options.
IMAGE >>> RESIZE = 65%
Ensure "Resize all layers" is UNCHECKED
Resample using - WEIGHTED AVERAGE
Reposition with your MOVER TOOL

Activate 'Paper 5' layer
Open up the ÷rystaltubed_848.psp image in your PSP workspace
Right click on the Title Bar and select COPY from the options
Right click on the Title Bar of your scrap tag image
and select PASTE AS NEW LAYER from the options.
Reposition with your MOVER tool
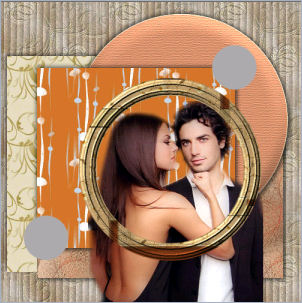
Activate Raster 1 (the frame)
With your MAGIC WAND
Mode = Replace
Match Mode = RGB Value
Tolerance = 0
Feather = 0
Antialias = UNchecked
Sample Merged = UNCHECKED
PSP9/X: Check CONTIGUOUS
PSPX: There is no " Sample Merged"
PSPX: Use all layers = UNChecked
Select the CENTRE transparent area of the frame.
SELECTIONS >>> MODIFY >>> EXPAND = 4
SELECTIONS >>> INVERT
Activate Raster 2
EDIT >>> CLEAR
DESELECT
EFFECTS >>> PLUGINS >>> EYE CANDY 3 >>> DROP SHADOW
Change the OPACITY to 70%
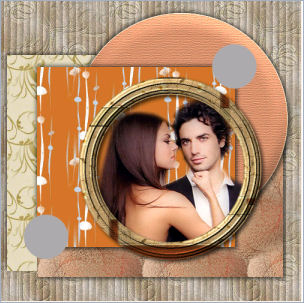
Activate the "Small Circles" layer
Open up the JF_Flower33.psp image and the
JF_Flowers_orange.psp image in your PSP workspace.
Right click on the Title Bar of the JF_Flower33.psp image
and select COPY from the options.
Right click on the Title Bar of your scrap tag image
and select PASTE AS NEW SELECTION from the options.
IMAGE >>> RESIZE = 35%
Ensure "Resize all layers" is UNCHECKED
Position over the top right grey circle.
EFFECTS >>> PLUGINS >>> EYE CANDY 3 >>> DROP SHADOW
Same settings
DESELECT
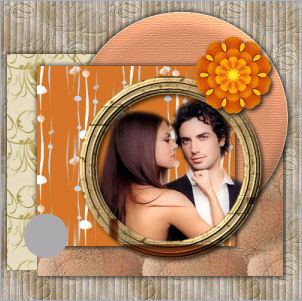
Right click on the Title Bar of the JF_Flowers_orange.psp image
and select COPY from the options.
Right click on the Title Bar of your scrap tag image
and select PASTE AS NEW SELECTION from the options.
IMAGE >>> RESIZE = 45%
Ensure "Resize all layers" is UNCHECKED
Position over the bottom left grey circle.
DESELECT
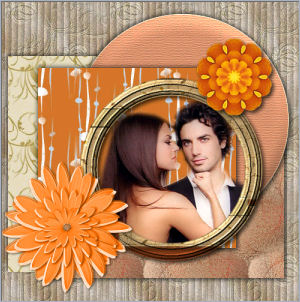
Now we can add some wordart.
Open up the
@DX07~wordart2 image in your PSP workspace
WINDOW >>> DUPLICATE
Close the original Image
IMAGE >>> RESIZE = 45%
Ensure "Resize all layers" is UNCHECKED
LAYERS >>> DUPLICATE (3 times)
LAYERS >>> MERGE >>> MERGE VISIBLE
Right click on the Title Bar and select COPY from the options
Right click on the Title Bar of your scrap tag image
and select PASTE AS NEW LAYER from the options.
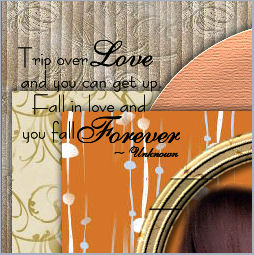
LAYERS >>> MERGE >>> MERGE ALL (Flatten)
Save as .jpg image
Page designed by

for
http://www.artistrypsp.com/
Copyright ©
2000-2008 Artistry In PSP / PSP Artistry
All rights reserved.
Unless specifically made available for
download,
no graphics or text may be removed from
this site for any reason
without written permission from Artistry
In PSP / PSP Artistry
|