
GLASS FRAMED
KITTY
This tutorial was
written by Jemima ~ 12 May 2003..
Copyright © 2003 ~
Jemima ~ All rights reserved
This
isn't a "challenging tutorial"
... I just thought it was nice effect *S*
**********
You
will need the following for this
tutorial:
The EYE CANDY 3 plugin
Download and extract
to your PSP Plugins Folder.
The EYE CANDY
4000
plugin
Download and extract
to your PSP Plugins Folder.
************************************
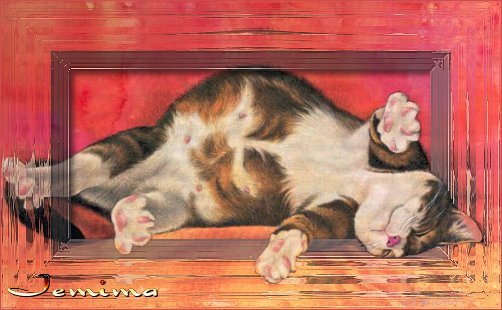
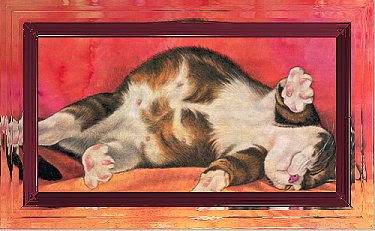
Click on the image
below to be taken to the larger image
Right click that image and save to a
folder on your computer.

*********************************************
Open up your Kitty image in PSP.
Go to WINDOW
>>> Duplicate
Duplicate twice and close the original.
Minimize one of the duplicated images
and select the other as your active
image.
Go to Selections >>> Select All
Go to EFFECTS >>> Plugins
>>> Eyecandy 4000 >>>
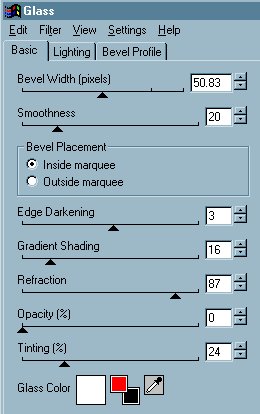
Glass
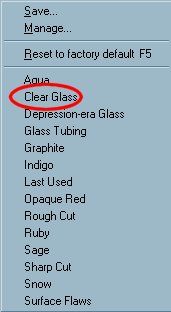
Click on the SETTINGS tab
click on Clear Glass
This will give the default settings....
change the Bevel width to 50.83
Click OK
REPEAT Glass effect
Go to Effects >>> Sharpen
>>> Sharpen
Go to SELECTIONS >>> Modify
>>> Contract = 50
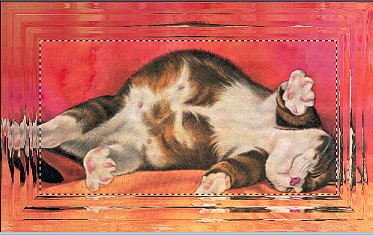
Go to SELECTIONS >>> Invert
Change your background colour to #892D3C
Go to EFFECTS >>> 3D Effects
>>> Chisel
Size = 18
Background = Checked
Deselect
With your MAGIC WAND
Settings:
Match Mode = RGB
Tolerance = 12
Feather = 0
Smaple Merged = UNchecked
Select the area created by the 'chisel'
effect.
You will have to hold down your SHIFT key
so as to include the corner sections.
Go to EFFECTS >>> Plugins
>>> Eye Candy 4000 <<<
Glass
Use the same settings as before
EXCEPT... Change the
OPACITY to 14
Go to Effects >>> Sharpen
>>> Sharpen more
Repeat the 'Glass' effect
Go to Effects >>> Sharpen
>>> Sharpen
DESELECT
Go to LAYERS >>> Promote to
layer
NEXT
Page designed by

Copyright © 2000-2003 Jemima
All rights reserved.
Unless specifically made available for
download,
no graphics or text may be removed from
this site for any reason
without written permission from Jemima
http://www.artistrypsp.com/
|