ANIMATED EASTER
BUNNY
Page 2
This
tutorial was written by Jemima ~ December
2003..
Copyright © 2003 ~
Jemima ~ All rights reserved
********************************
Now we have
to work on the eyelashes
With your ERASER Tool
use the same settings as before
Erase the excess unwanted area aound the
eyelashes
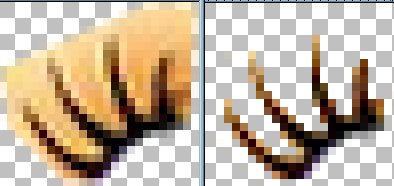
Do the same with the other eyelashes..
though ONLY the excess at the right need
be removed
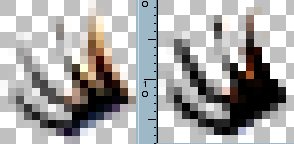
Then....
Co to COLOURS >>> Adjust
>>> Gamma Correction
Settings...
Red, Blue and Green all = 0.24
On your main image
Go to LAYERS >>> New Raster
Layer
Right click on the title bar of the Left
Eye image
(The SMALL one directly above these
instructions)
Select COPY from the options
Right click on the title bar of the Bunny
image
Select PASTE AS NEW SELECTION
from the options
Go to IMAGE >>> Rotate = Left
110%
Position eyelashes as shown below
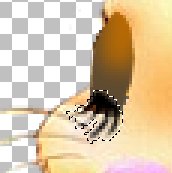
DESELECT
Right click on the title bar of the Right
Eye image
Select COPY from the options
Right click on the title bar of the Bunny
image
Select PASTE AS NEW SELECTION
from the options
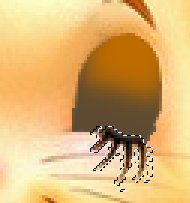
Go to IMAGE >>> Rotate = Left
130%
Position eyelashes as shown below
DESELECT
Go to LAYERS >>> Merge
>>> Merge Visible
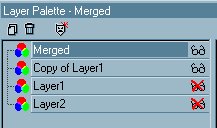
Go to your LAYER PALETTE
Open "Copy of Layer 1"
Go to LAYERS >>> Merge
>>> Merge Visible
Open ALL Layers and Click on Layer1 to
make it active
Go to LAYERS >>>Duplicate
Go to IMAGE >>> Mirror
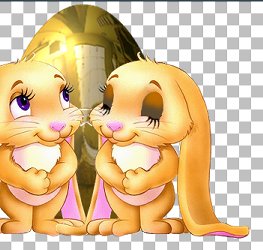
Reposition the mirror image as shown
above
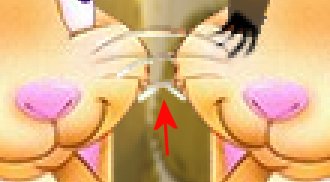
Making sure the whiskers cross as shown
below
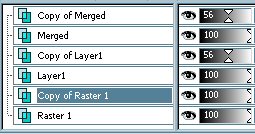
Go to your LAYER PALETTE
Reduce the Layer Opacity on 'Copy of
Layer1' to 56%
Click on the Merged Layer to make it
active
Go to LAYERS >>>Duplicate
Go to IMAGE >>> Mirror
Reposition the mirror image as shown
above
Making sure the whiskers cross as shown
below
and that it is directly above the first
'mirrored image'.
(You can play around
with the opacity of this layer
and the previos mirrored layer to make
sure they are in
exactly the same position)
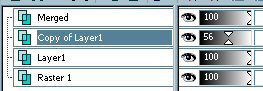
Once they are in position reduce the
opacity of the
'Copy of Merged' Layer to 56%
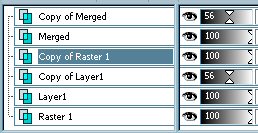
Go to your LAYER PALETTE
Click on Raster 1 to activate (The egg)
Go to LAYERS >>>Duplicate
Go to your LAYER PALETTE
Move(Drag) "Copy of Raster 1"
up under the "Merged" layer
Click on Raster 1 to make it active (egg
layer)
With your MAGIC WAND
select the area around the outside of the
egg
Go to your LAYER PALETTE
Click on "Copy of Layer1" to
activate (reflection/eyes open)
Hit your DELETE key
Go to your LAYER PALETTE
Click on "Copy of Merged" to
activate (reflection/eyes closed)
Hit your DELETE key
DESELECT
This is what you should be seeing right
now (actual size)
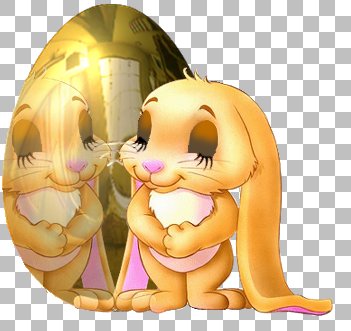
We're nearly there *S*
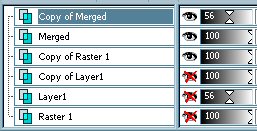
Go to your LAYER PALETTE
CLOSE Layers 2, 1 and Copy of Layer 1.
Highlight
"Copy of Merged"
Go to LAYERS >>> Merge
>>> Merge Visible
Close the Merged Layer
Highlight "Copy of Layer1"

Go to LAYERS >>> Merge
>>> Merge Visible
Finally....
Go to your LAYER PALETTE
and OPEN the Merged Layer
Save your image as a .psp (tube) file
NOW we'll
ANIMATE it... Yaaaay!!!!!
NEXT
Page designed by

for

http://www.artistrypsp.com/
Copyright © 2000-2004 Artistry In PSP / PSP Artistry
All rights reserved.
Unless specifically made available for download,
no graphics or text may be removed from this site for any reason
without written permission from Artistry In PSP / PSP Artistry
|