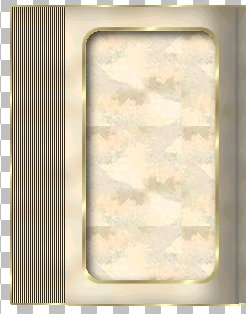
BOOK FRAME
PSP8
Page 2
This
tutorial was written by Jemima ~ October
2004
Copyright © 2004 ~
Jemima ~ All rights reserved
********************************
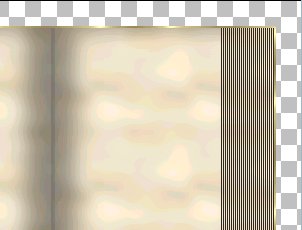
With your MAGIC WAND
Match Mode = RGB Value
Tolerance = 0
Feather = 0
Antialias = UNchecked
select the transparent section
surrounding the Book
Go to SELECTIONS >>> INVERT
Go to SELECTIONS >>> MODIFY
>>> CONTRACT = 2
Go to SELECTIONS >>> INVERT
Go to EDIT >>> CLEAR
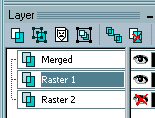
Go to your LAYER PALETTE
Click on Layer 1 to OPEN and activate
Flood fill with the GOLD pattern
Go to SELECTIONS >>> INVERT
Go to SELECTIONS >>> MODIFY
>>> EXPAND = 2
Go to SELECTIONS >>> INVERT
Go to EDIT >>> CLEAR
DESELECT
Go to LAYERS >>> MERGE
>>> MERGE VISIBLE
Go to LAYERS >>> NEW RASTER
LAYER
Go to LAYERS >>> ARRANGE
>>> SEND TO BOTTOM
Once more.....
Go to LAYERS >>> NEW RASTER
LAYER
Go to LAYERS >>> ARRANGE
>>> SEND TO BOTTOM
Go to your LAYER PALETTE
click on the MERGED Layer to activate
Select your SELECTION TOOL
Use these settings

Draw a rectangle from
100 pixels across x 50 pixels down
to
230 pixels across x 300 pixels down
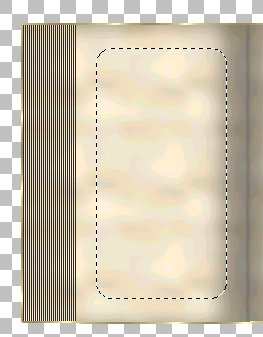
Go to EDIT >>> CLEAR
Go to LAYERS >>>NEW RASTER LAYER
Go to SELECTIONS >>> INVERT
Flood fill with the GOLD pattern
Go to SELECTIONS >>> INVERT
Go to SELECTIONS >>> MODIFY
>>> EXPAND = 3
Go to SELECTIONS >>> INVERT
Go to EDIT >>> CLEAR
DESELECT

Go to LAYERS >>> DUPLICATE
Go to IMAGE >>> MIRROR
With your MAGIC WAND
Match Mode = RGB Value
Tolerance = 0
Feather = 0
Antialias = UNchecked
select the CENTRE section INSIDE the gold
border on the Right hand side
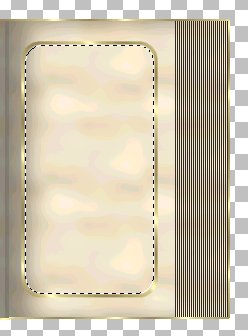
Go to your LAYER PALETTE
click on the MERGED layer to activate

Go to EDIT >>> CLEAR
DESELECT
Go to your LAYER PALETTE
Close the bottom 3 layers and
click on the top layer to activate
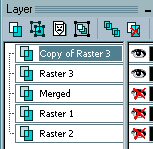
Go to LAYERS >>> MERGE
>>> MERGE VISIBLE
Go to LAYERS >>> DUPLICATE
Go to LAYERS >>> MERGE
>>> MERGE VISIBLE
Go to your LAYER PALETTE
Open the other MERGED layer
Go to LAYERS >>> MERGE
>>> MERGE VISIBLE
With your MAGIC WAND
Select the transparent section of the
left hand page
Go to your LAYER PALETTE
Open Raster 1 and click on it to activate
Go to SELECTIONS >>> MODIFY
>>> EXPAND = 5
Flood fill with the Foreground Pattern
Go to your LAYER PALETTE
Click on the MERGED layer to activate
Go to SELECTIONS >>> MODIFY
>>> Contract = 5
Go to SELECTIONS >>> INVERT
Go to EFFECTS >>> 3D EFFECTS
>>> DROP SHADOW
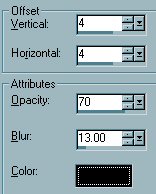
Click OK
DESELECT
With your MAGIC WAND
Select the transparent section of the
RIGHT hand page
Go to your LAYER PALETTE
Click on Raster 1 to activate
Go to SELECTIONS >>> MODIFY
>>> EXPAND = 5
Flood fill with the SOLID TAN Background
Go to your LAYER PALETTE
Click on the MERGED layer to activate
Go to SELECTIONS >>> MODIFY
>>> Contract = 5
Go to SELECTIONS >>> INVERT
Go to EFFECTS >>> 3D EFFECTS
>>> DROP SHADOW
Use same settings
DESELECT

~*~*~*~*~*~*~*
You can duplicate
your image,
then save your duplicated image at this
point
as a .psp (Tube) for future use.
~*~*~*~*~*~*~*
OK.... Let's put something in the
frame... *S*
Maximize the Android Fairy tube
Go to WINDOW >>> DUPLICATE
Close the original
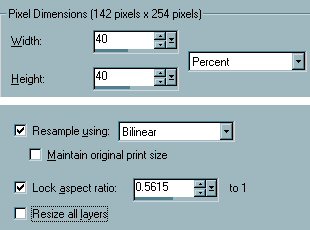
Click on the duplicated Fairy image
Go to IMAGE >>> RESIZE = 40%
Right click on the title bar and
select COPY from the options
Go to your LAYER PALETTE
Click on RASTER 1 to activate
Richt Click on the title bar of your Book
image and
select PASTE AS NEW SELECTION from the
options.
Slide the image into place on the left
hand page

Go to EFFECTS >>> 3D EFFECTS
>>> DROP SHADOW
Use the same settings
DESELECT
NEXT
Page designed by

for

http://www.artistrypsp.com/
Copyright © 2000-2004 Artistry In PSP / PSP Artistry
All rights reserved.
Unless specifically made available for download,
no graphics or text may be removed from this site for any reason
without written permission from Artistry In PSP / PSP Artistry
|