STEP 1
Open a new image 700 x 500
Transparent background
PSPX - X2: Colour Depth = 8bits/channel
PSPX3-X6: Colour Depth RGB = 8bits/channel
Flood fill with BROWN #36150e
|
STEP 2
LAYERS >>> NEW RASTER LAYER
SELECTIONS >>> SELECT ALL
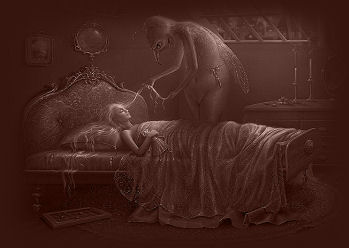
Open up the 0_357c6_2e3f5285_XL image
in your PSP workspace
Right click on the Title Bar and select COPY from the options
Right click on the Title Bar of your tag image
and select PASTE INTO SELECTION from the options.
EFFECTS >>> EDGE EFFECTS >>> ENHANCE
In your LAYER PALETTE change the
BLEND MODE to LUMINANCE (L)
DESELECT
|
|
STEP 3
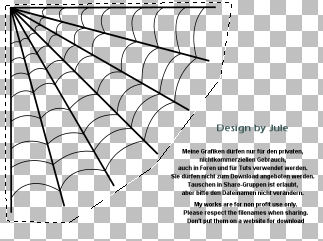
Open up the jule_netz.png image
in your PSP workspace
Choose your FREEHAND SELECTION TOOL
Selection Type = Point to Point
Mode = Replace
Feather = 0
Smoothing = 5
Antialias = UNChecked
Select the spider web |
|
STEP 4
Right click on the Title Bar and select COPY from the options
Right click on the Title Bar of your tag image
and select PASTE AS NEW LAYER from the options.
EFFECTS >>> IMAGE EFFECTS >>> OFFSET
Horizontal Offset = - (minus) 130
Vertical Offset = 35
Edge Mode = Transparent
In your LAYER PALETTE change the OPACITY to 50%
|
|
STEP 5
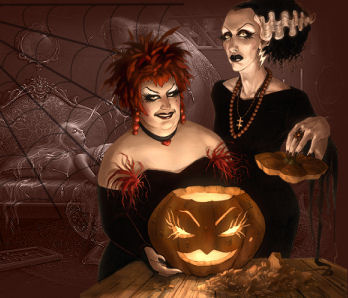
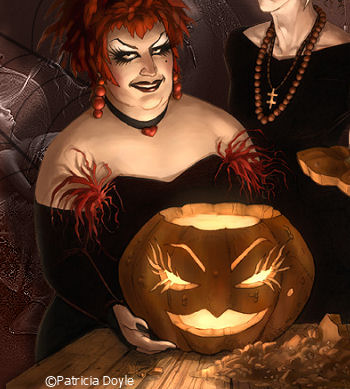
Open up the QueensofHalloween image in your PSP workspace
Right click on the Title Bar and select COPY from the options
Right click on the Title Bar of your tag image
and select PASTE AS NEW LAYER from the options.
EFFECTS >>> IMAGE EFFECTS >>> OFFSET
Horizontal Offset = 125
Vertical Offset = 0
Edge Mode = Transparent |
|
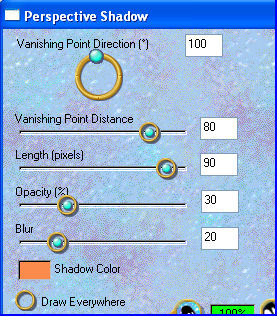
STEP 6
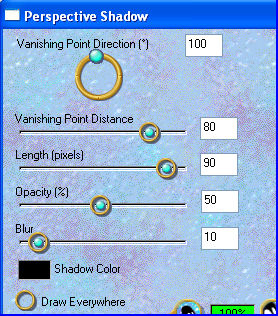
EFFECTS >>> PLUGINS >>> EYE CANDY 3 >>>
PERSPECTIVE SHADOW
|
|
STEP 7
LAYERS >> NEW RASTER LAYER
Select your TEXT TOOL
with font and settings of your choice
add your name
LAYERS >>> MERGE >>> MERGE VISIBLE |
|
STEP 7B
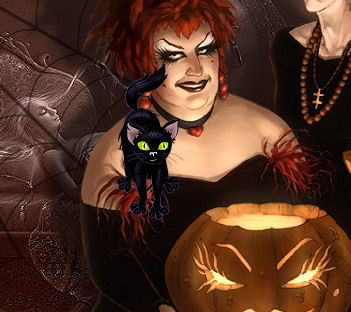
Back to the QueensofHalloween image in your PSP workspace
Open and activate Raster 2
Right click on the Title Bar and select COPY from the options
Right click on the Title Bar of your tag image
and select PASTE INTO SELECTION from the options.
Place in the lower right corner of image
LAYERS >>> MERGE >>> MERGE VISIBLE |
|
STEP 8
Open up the PDTubeSalem704legs image
in your PSP workspace
WINDOW >>> DUPLICATE
Close the original Image
Choose your SELECTION TOOL
Selection Type = Rectangle
Mode = Replace
Feather = 0
Antialias = UNChecked
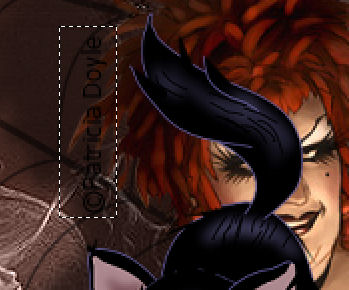
Select the copyright text |
|
STEP 9
Right click on the Title Bar and select COPY from the options
Right click in your PSP Workspace
and select PASTE AS NEW IMAGE from the options
PSP9:IMAGE >>> ROTATE >>> FREE ROTATE = RIGHT 90
Ensure "All layers" is CHECKED
PSPX - PSPX6: IMAGE >>> FREE ROTATE = RIGHT 90
Ensure "All layers" is CHECKED
ADJUST >>> COLOUR BALANCE >>> NEGATIVE IMAGE
PSPX - X6: IMAGE >>> NEGATIVE IMAGE
Right click on the Title Bar and select COPY from the options
Right click on the Title Bar of your tag image
and select PASTE AS NEW LAYER from the options
Reposition with your MOVER tool
LAYERS >>> MERGE >>> MERGE DOWN |
|
STEP 10
Return to your duplicated copy of
the PDTubeSalem704legs image
Delete the copyright text
DESELECT
Right click on the Title Bar and select COPY from the options
Right click on the Title Bar of your tag image
and select PASTE AS NEW LAYER from the options.
IMAGE >>> MIRROR
IMAGE >>> RESIZE = 50%
Ensure "Resize all layers" is UNCHECKED
Resample using WEIGHTED AVERAGE
ADJUST >>> SHARPNESS >>> SHARPEN
|
|
STEP 11
EFFECTS >>> PLUGINS >>> EYE CANDY 3 >>>
PERSPECTIVE SHADOW
COLOUR =
#fb8a4d |
|
STEP 12
EFFECTS >>> IMAGE EFFECTS >>> OFFSET
Horizontal Offset = 25
Vertical Offset = - (minus) 160
Edge Mode = Transparent
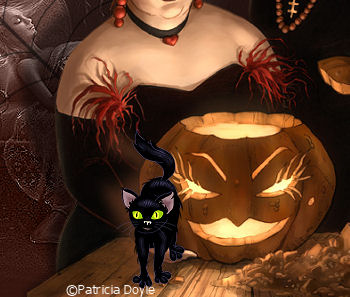
Rename this layer cat1 |
|
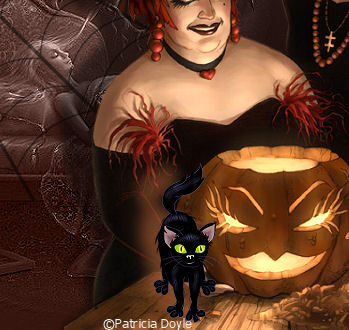
STEP 13
CLOSE cat1 layer
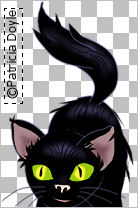
Open up the PDTubeSalem703legs image
in your PSP workspace
Right click on the Title Bar and select COPY from the options
Right click on the Title Bar of your tag image
and select PASTE AS NEW LAYER from the options.
ZOOM IN and using your SELECTION TOOL
Same settings
Select the copyright text and DELETE
*****************
DESELECT
|
|
STEP 14
IMAGE >>> RESIZE = 50%
Ensure "Resize all layers" is UNCHECKED
Resample using WEIGHTED AVERAGE
ADJUST >>> SHARPNESS >>> SHARPEN
EFFECTS >>> PLUGINS >>> EYE CANDY 3 >>>
PERSPECTIVE SHADOW
Same settings
EFFECTS >>> IMAGE EFFECTS >>> OFFSET
Same settings
Rename this layer cat2
|
|
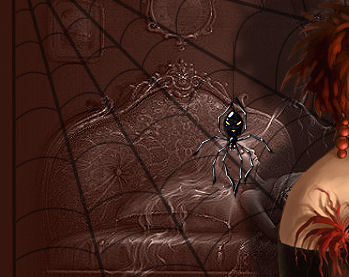
STEP 15
Open up the BridgetE[1].Wilde~MeeeeowWitch~LJT image
in your PSP workspace
Right click on the Title Bar and select COPY from the options
Right click on the Title Bar of your tag image
and select PASTE AS NEW LAYER from the options
IMAGE >>> RESIZE = 40%
Ensure "Resize all layers" is UNCHECKED
Resample using WEIGHTED AVERAGE
ADJUST >>> SHARPNESS >>> SHARPEN MORE .
EFFECTS >>> IMAGE EFFECTS >>> OFFSET
Horizontal Offset = - (minus) 90
Vertical Offset = - (minus) 60
Edge Mode = Transparent
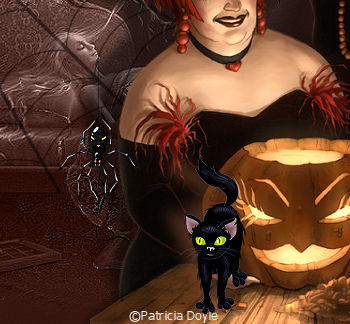
Rename this layer spider1 |
|
STEP 16
LAYERS >>> DUPLICATE
CLOSE spider1 layer
EFFECTS >>> IMAGE EFFECTS >>> OFFSET
Horizontal Offset = 15
Vertical Offset = 70
Edge Mode = Transparent
Rename this layer spider2 |
|
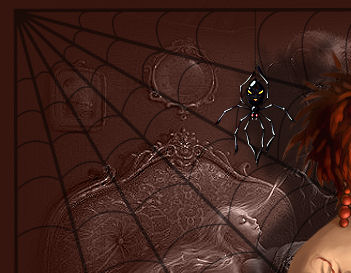
STEP 17
LAYERS >>> DUPLICATE
CLOSE spider2 layer
EFFECTS >>> IMAGE EFFECTS >>> OFFSET
Horizontal Offset = - (minus) 40
Vertical Offset = 50
Edge Mode = Transparent
Rename this layer spider3 |
|
STEP 18
LAYERS >>> DUPLICATE
CLOSE spider3 layer
EFFECTS >>> IMAGE EFFECTS >>> OFFSET
Horizontal Offset = 20
Vertical Offset = 100
Edge Mode = Transparent
Rename this layer spider4 |
|
STEP 19
LAYERS >>> DUPLICATE
CLOSE spider4 layer
EFFECTS >>> IMAGE EFFECTS >>> OFFSET
Horizontal Offset = 25
Vertical Offset = 85
Edge Mode = Transparent
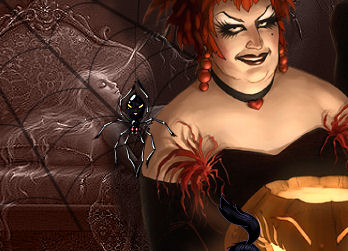
Rename this layer spider5
SAVE YOUR WORK
|
|
| |
| |
| |
|
|
|