STEP 2/01
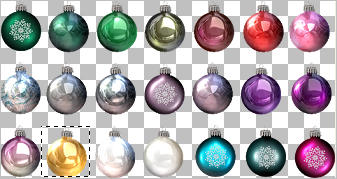
Open up the bulbs1 image
in your PSP workspace
Decide which 4 colours you are going to use.
I'll be using gold, white, red and green
Select your first colour with your SELECTION TOOL
Same settings
Right click on the Title Bar and select COPY from the options
|
|
STEP 2/02
Right click on the Title Bar of your tag image
and select PASTE AS NEW LAYER from the options.
Reposition with your MOVER tool
|
|
STEP 2/03
Right click on the Title Bar of your tag image
and select PASTE AS NEW SELECTION from the options.
and
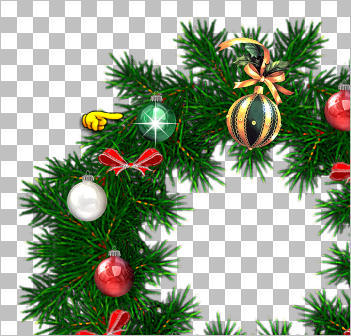
place in another position on the wreath
|
|
STEP 2/04
Right click on the Title Bar of your tag image
and select PASTE AS NEW SELECTION from the options.
and
place in a 3rd position on the wreath
SELECTIONS >>> SELECT NONE
|
|
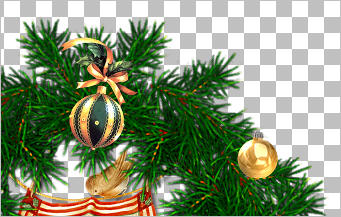
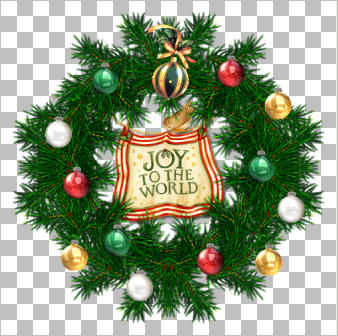
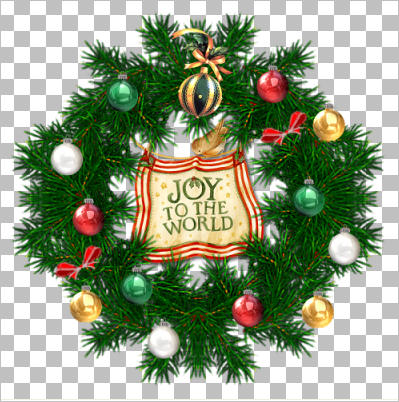
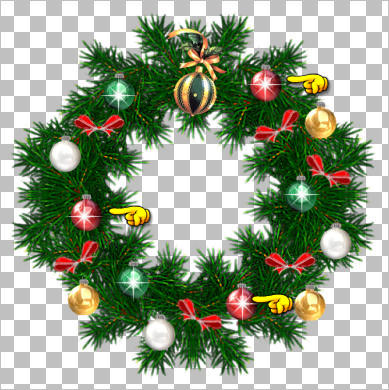
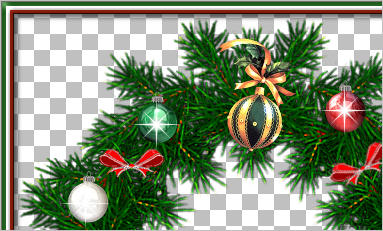
Your image should look something like this |
|
STEP 2/05
Back to the bulbs1 image in your PSP workspace
Select your second colour with your SELECTION TOOL
Same settings
Right click on the Title Bar and select COPY from the options
and
Repeat STEPS 2/02, 2/03 and 2/04 |
|
STEP 2/06
Back to the bulbs1 image in your PSP workspace
Select your third colour with your SELECTION TOOL
Same settings
Right click on the Title Bar and select COPY from the options
and
Repeat STEPS 2/02, 2/03 and 2/04 |
|
STEP 2/07
Back to the bulbs1 image in your PSP workspace
Select your fourth colour with your SELECTION TOOL
Same settings
Right click on the Title Bar and select COPY from the options
and
Repeat STEPS 2/02, 2/03 and 2/04 |
|
STEP 2/08
Open up the misc redbows image in your PSP workspace
With your SELECTION TOOL
Same settings
Select the first bow on the left
Right click on the Title Bar and select COPY from the options
Right click on the Title Bar of your tag image
and select PASTE AS NEW LAYER from the options.
Reposition with your MOVER tool
Right click on the Title Bar of your tag image
and select PASTE AS NEW SELECTION from the options.
and
place in another position on the wreath
SELECTIONS >>> SELECT NONE
|
|
STEP 2/09
Open up the misc redbows image in your PSP workspace
With your SELECTION TOOL
Same settings
Select the middle bow
Right click on the Title Bar and select COPY from the options
Right click on the Title Bar of your tag image
and select PASTE AS NEW LAYER from the options.
Reposition with your MOVER tool
Right click on the Title Bar of your tag image
and select PASTE AS NEW SELECTION from the options.
and
place in another position on the wreath
SELECTIONS >>> SELECT NONE |
|
STEP 2/10
Open up the misc redbows image in your PSP workspace
With your SELECTION TOOL
Same settings
Select the bow on the right
Right click on the Title Bar and select COPY from the options
Right click on the Title Bar of your tag image
and select PASTE AS NEW LAYER from the options.
Reposition with your MOVER tool
Right click on the Title Bar of your tag image
and select PASTE AS NEW SELECTION from the options.
and
place in another position on the wreath
SELECTIONS >>> SELECT NONE |
|
STEP 2/11
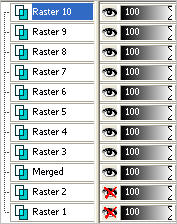
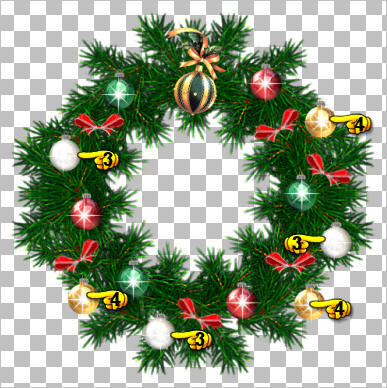
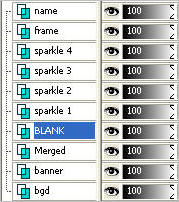
Set up LAYER PALETTE as shown |
|
STEP 2/12
LAYERS >>> MERGE >>> MERGE VISIBLE
LAYERS >>> NEW RASTER LAYER
Open up the MD_Twinkle7 image in your PSP workspace
WINDOW >>> DUPLICATE
Close the original Image
On the duplicated image
IMAGE >>> RESIZE = 50%
Ensure "Resize all layers" is CHECKED
Resample using WEIGHTED AVERAGE
LAYERS >>> DUPLICATE
LAYERS >>> MERGE >>> MERGE VISIBLE
Right click on the Title Bar of the duplicated image
and select COPY from the options
Right click on the Title Bar of your tag image
and select PASTE AS NEW SELECTION from the options.
Reposition with your MOVER tool on top of one of your bulbs
|
|
STEP 2/13
Right click on the Title Bar of your tag image
and select PASTE AS NEW SELECTION from the options.
and place over one of the other bulbs of the same colour.
Right click on the Title Bar of your tag image
and select PASTE AS NEW SELECTION from the options.
and place over the last bulb of the same colour.
DESELECT
Rename this layer sparkle 1
|
|
STEP 2/14
LAYERS >>> NEW RASTER LAYER
Right click on the Title Bar of your tag image
and select PASTE AS NEW SELECTION from the options.
and place over one of the other different coloured bulbs.
Right click on the Title Bar of your tag image
and select PASTE AS NEW SELECTION from the options.
and place over one of the other bulbs of the same colour.
Right click on the Title Bar of your tag image
and select PASTE AS NEW SELECTION from the options.
and place over the last bulb of the same colour.
DESELECT
Rename this layer sparkle 2
|
|
STEP 2/15
LAYERS >>> NEW RASTER LAYER
Repeat STEP 2/14 for your 3rd coloured bulbs
Rename this layer sparkle 3
LAYERS >>> NEW RASTER LAYER
Repeat STEP 2/14 for your 4th coloured bulbs
Rename this layer sparkle 4
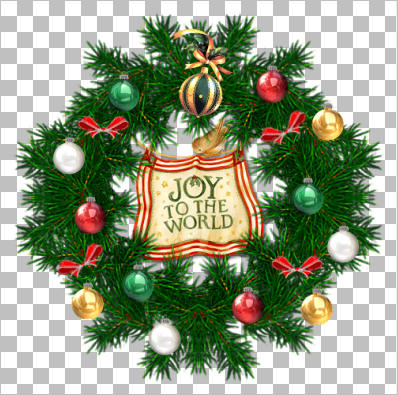
There should be a 'sparkle' over each of the bulbs.
|
|
STEP 2/16
LAYERS >>> NEW RASTER LAYER
Flood fill with GREEN #034500
SELECTIONS >>> SELECT ALL
SELECTIONS >>> MODIFY >>> CONTRACT = 4
EDIT >>> CLEAR
Flood fill with WHITE #ffffff
SELECTIONS >>> MODIFY >>> CONTRACT = 4
EDIT >>> CLEAR
Flood fill with RED #c72b0f
SELECTIONS >>> MODIFY >>> CONTRACT = 4
EDIT >>> CLEAR
EFFECTS >>> 3D EFFECTS >>> DROP SHADOW
Vertical & Horizontal offsets = 1
Colour = Black
Opacity = 70
Blur = 0
Repeat Drop Shadow effect changing
Vertical & Horizontal Offsets to - ( minus ) 1
Click OK
DESELECT
Rename this layer frame
|
|
STEP 2/17
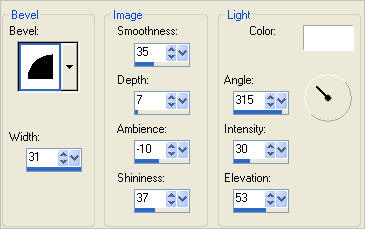
EFFECTS >>> 3D EFFECTS >>> INNER BEVEL |
|
STEP 2/18
EFFECTS >>> 3D EFFECTS >>> DROP SHADOW
Vertical & Horizontal offsets = 4
Colour = Black
Opacity = 50
Blur = 6.00
Repeat Drop Shadow effect changing
Vertical & Horizontal Offsets to - ( minus ) 4
Click OK
|
|
STEP 2/19
LAYERS >> NEW RASTER LAYER
Select your TEXT TOOL
with font and settings of your choice
add your name to the bottom left corner of the layer.
Rename this layer name
|
|
STEP 2/20
OPEN & ACTIVATE RASTER 1
Flood fill with RED #c72b0f
Rename this layer bgd
ACTIVATE RASTER 2
Rename this layer banner
ACTIVATE THE MERGED LAYER
LAYERS >>> NEW RASTER LAYER
Leave this layer blank and rename BLANK
|
|
...... |
| |