In ANIMATION SHOP
The Underwater Effect seems to cause grief in that even if you enter settings
provided in a tutorial you may be doing.... you don't get the same effect.
So here I will try to suggest how you can overcome this problem.
|
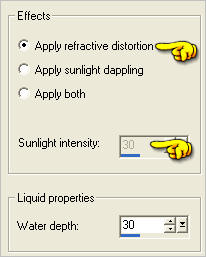
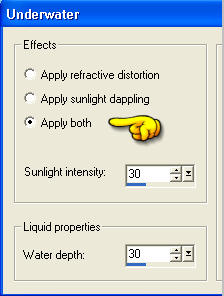
The Underwater Effect customization dialog box
allows you to set the following options:
|
1..... “Apply refractive distortion”
2 ..“Apply sunlight dappling”
3 ...... “Apply both ”
|
STEP 1
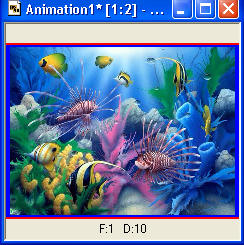
Open up the tropicalfish image in your PSP workspace
Right click on Title Bar and select
Copy from the options
In ANIMATION SHOP
Right click the workspace and select
'Paste As New Animation' from the options
|
|
STEP 2
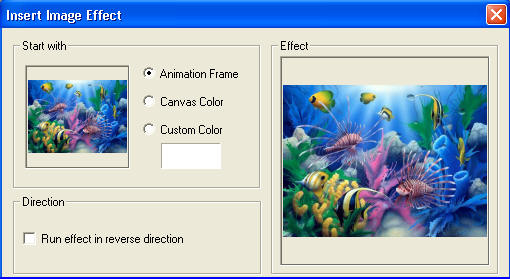
Effects >> Insert Image Effect >>> Underwater
Click the CUSTOMIZE button
Under the EFFECTS option check "Apply both"
Set "Sunlight intensity" to 30
(this will remain as setting throughout this part of the tutorial)
Set "Liquid properties" to 30
(this will remain as setting throughout this part of the tutorial)
Check " Apply refractive distortion”
The "Sunlight intensity" will now be "greyed out".
|
|
STEP 3
We have 2 options to remove any Wave settings
OPTION #1
Click on the 'down arrow' on the "Wave" option and select #1
(You may have different numbers for the X and Y settings in Wave 1... doesn't matter *S*)
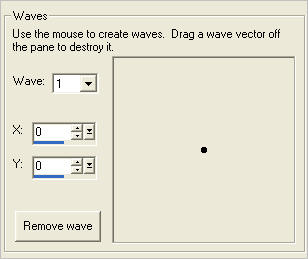
Click the "Remove wave" button
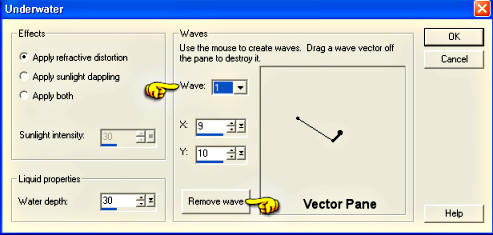
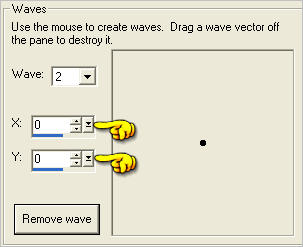
"X" and "Y" will now show zero '0'
|
STEP 4
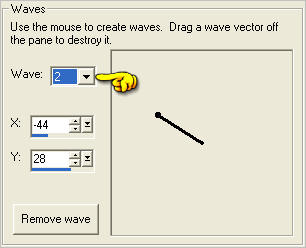
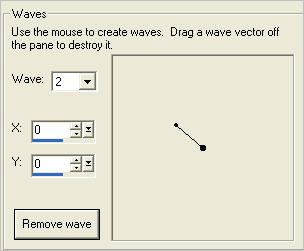
Click on the 'down arrow' on the "Wave" option and select #2
Click the "Remove wave" button
|
|
STEP 5
"X" and "Y" will now show zero '0'
If you still have wave "lines" in your Vector Pane
continue in this manner until you are left
with one central point.
|
|
After following the above instructions, there are no waves selected.
Click OK .... the EFFECT Preview will NOT be animated
|
STEP 6
Click the CUSTOMIZE button
This time check "Apply both"
under the EFFECTS
Leave the settings at 30
for
"Sunlight intensity"
and
"Water depth" |
|
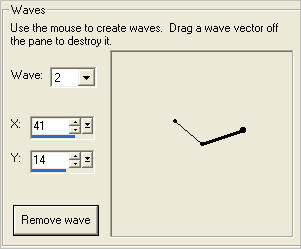
STEP 7
You have the single "centre point" on the Vector Pane.
Select "Wave" #1 from the drop down box
Enter the X and Y settings
|
|
STEP 8
Select "Wave" #2 from the drop down box
"X" and "Y" will show zero '0'
|
|
STEP 9
Enter the X and Y settings
|
|
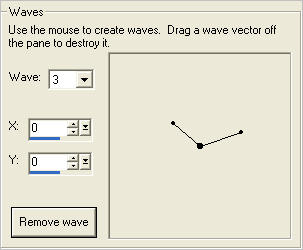
STEP 10
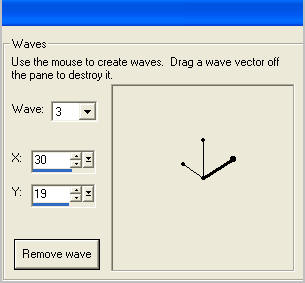
Select "Wave" #3 from the drop down box
"X" and "Y" will show zero '0'
|
|
STEP 11
Enter the X and Y settings |
|
STEP 12
We are NOT going to enter a 4th wave.
Click OK
Set the "Effect length" and "Frames per second"
Set Direction "Run effect in reverse direction"
Your EFFECTS PREVIEW will now show your animated image
|
... |
Practice animation on Page 2... link below...
|
... |
FYI...NOTES
You can use the Vector Pane to insert new waves in the effect
by clicking over the central point and dragging it up, down and outward within the pane.
The vector (line) representing the wave will be completed once you release the mouse.
As you add new waves, the "Wave" drop down box will add a new number to its list.
SEE BELOW
(Creating your own settings)
***********************************************
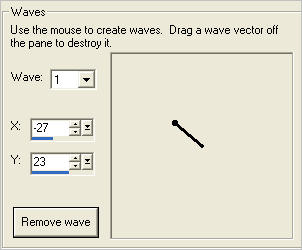
You can also DELETE existing settings
by simply clicking its outer point and drag it outside the vectors panel.
|
To DELETE a Wave setting using this method...
Click on the central points and drag the vector (line) off the panel.
as shown by the red arrows
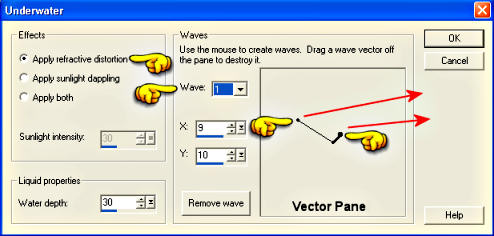
|
"X" and "Y" will now show zero '0' |
|
... |
When creating your own settings
by clicking over the LARGE centre point and dragging it outward.
BEFORE you release your mouse button the
X and Y settings will be visible
|
|
Once you release your mouse the X and Y settings will change to 0
and the Wave drop down box will change to 2
(Waiting for your next settings) |
|
Click on the LARGE centre point and pull up to vertically.
Before you release your mouse the X and Y settings
will be visible for "Wave 2 " |
|
Once you release your mouse the X and Y settings will change to 0
and the Wave drop down box will change to 3
(Waiting for your next settings) |
|
.... |
|
..
|