SYLPH
PSP8 to PSPX3
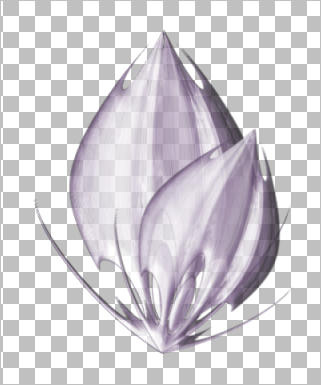
With drop shadow
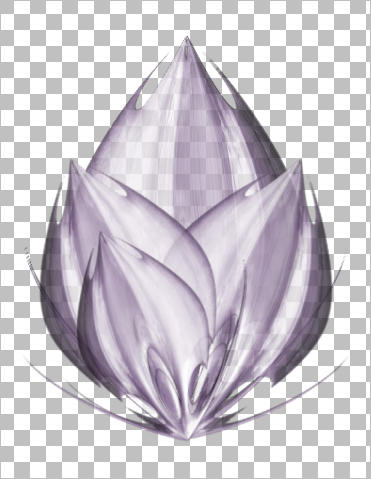
......................................................................... Without drop shadow
  |
This tutorial was written by Jemima ~ APRIL 2011
Copyright © 2011 ~ Jemima ~ All rights reserved
********************************
This was created using PSP9 but can be adapted for other versions of PSP.
You will need the
following to complete this tutorial
Materials
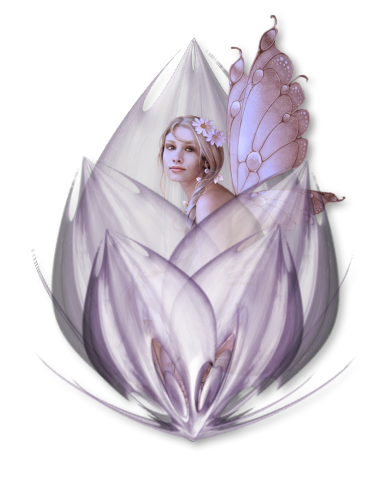
mtfp_351_la_hada_by_ElenaDudina.pspimage
Copyright:
Elena Dudina
elenadudina.deviantart.com
Model: Neriah-Stock
neriah-stock.deviantart.com
PaperButterfly_TubedByGini_07-23-05.tub
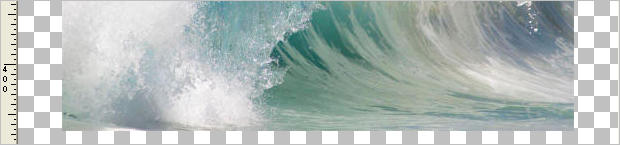
Ocean in Motion.jpg
butterfly-sdh.psp
DF.tub
Save to a folder on your computer
Jemima.ttf
Download HERE
Save to your WINDOWS >>> FONTS folder
or
to a folder where you store your extra fonts.
Plugins
** EYE CANDY3 **
http://pspgroep.seniorennet.be/filterpagina.htm
********************************
This tutorial is to show you that you can create shapes and backgrounds for your
Name Tags from absolutely ANYTHING.
All it takes is experimenting with
EFFECTS
By saving as a .PNG file as opposed to a .JPEG file
it can be used
on any colour background on your web pages or in your emails.
The file of course will be larger in KB's than a .JPEG file
but I think it's worth it.
********************************
Open a new image 600 x 480
Transparent background
PSPX - X2: Colour Depth = 8bits/channel
PSPX3: Colour Depth RGB = 8bits/channel
VIEW >>> RULERS
Open up the Ocean in Motion image in your PSP workspace
Right click on the Title Bar and select COPY from the options
Right click on the Title Bar of your tag image
and select PASTE AS NEW LAYER from the options.
Reposition with your MOVER tool
so the bottom of the image is level with the 465 pixel mark on the left ruler
EFFECTS >>> DISTORTION EFFECTS >>> WARP
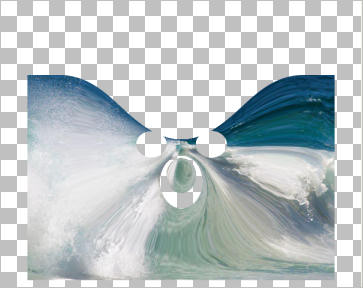
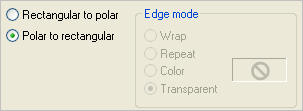
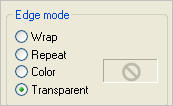
EFFECTS >>> DISTORTION EFFECTS >>> POLAR COORDINATES
EFFECTS>>> GEOMETRIC EFFECTS >>> CIRCLE
EDIT >>> Repeat Circle
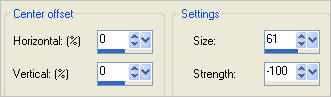
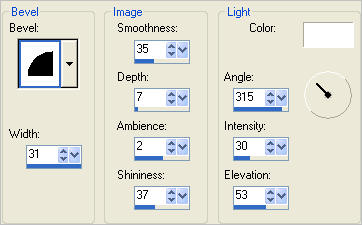
EFFECTS >>> 3D EFFECTS >>> DROP SHADOW
Vertical & Horizontal offsets = 1
Colour = Black
Opacity = 70
Blur = 0
Repeat Drop Shadow effect changing
Vertical & Horizontal Offsets to - ( minus ) 1
Click OK
EFFECTS >>> 3D EFFECTS >>> INNER BEVEL
In your LAYER PALETTE change the OPACITY to 78%
IMAGE >>> RESIZE = 85%
Ensure "Resize all layers" is UNCHECKED
Resample using WEIGHTED AVERAGE
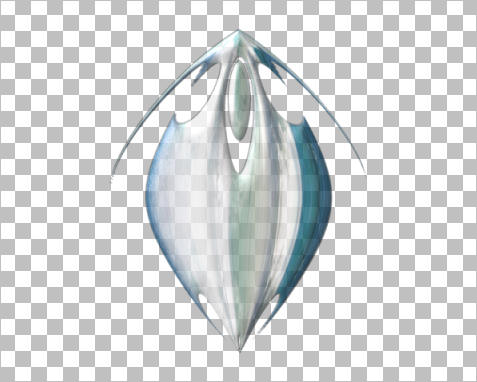
IMAGE >>> FLIP
ADJUST >>> HUE & SATURATION >>> COLORIZE

LAYERS >>> DUPLICATE
IMAGE >>> RESIZE = 75%
Ensure "Resize all layers" is UNCHECKED
Resample using WEIGHTED AVERAGE
PSP8 - PSP9:IMAGE >>> ROTATE >>> FREE ROTATE = RIGHT 22.50
Ensure "All layers" is UNCHECKED
PSPX - PSPX2: IMAGE >>> FREE ROTATE = RIGHT 22.50
Ensure "All layers" is UNCHECKED
Reposition with your MOVER tool
LAYERS >>> DUPLICATE
IMAGE >>> MIRROR
LAYERS >>> DUPLICATE
IMAGE >>> RESIZE = 75%
Ensure "Resize all layers" is UNCHECKED
Resample using WEIGHTED AVERAGE
Reposition with your MOVER tool
LAYERS >>> DUPLICATE
IMAGE >>> MIRROR
ACTIVATE RASTER 2
Open up the mtfp_351_la_hada_by_ElenaDudina image in your PSP workspace
Right click on the Title Bar and select COPY from the options
Right click on the Title Bar of your tag image
and select PASTE AS NEW LAYER from the options.
IMAGE >>> RESIZE = 65%
Ensure "Resize all layers" is UNCHECKED
Resample using WEIGHTED AVERAGE
Reposition with your MOVER tool
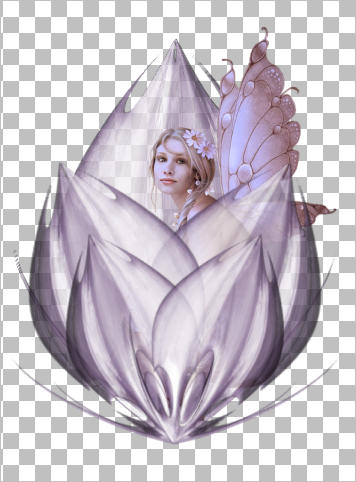
In your LAYER PALETTE change the OPACITY on the layers to match those below.
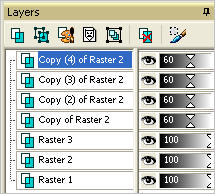
LAYERS >>> MERGE >>> MERGE VISIBLE
Choose your SELECTION TOOL then click on the CUSTOM SELECTION
symbol
and enter these coordinates.

IMAGE >>> CROP TO SELECTION
Save as .png image
PAGE 2
Page designed by

for
http://www.artistrypsp.com/
Copyright ©
2000-2011 Artistry In PSP / PSP Artistry
All rights reserved.
Unless specifically made available for
download,
no graphics or text may be removed from
this site for any reason
without written permission from Artistry
In PSP / PSP Artistry
|