SYLPH
PSP8 to PSPX3
Page 2
This tutorial was written by Jemima ~ APRIL 2011
Copyright © 2011 ~ Jemima ~ All rights reserved
This was created using PSP9 but can be adapted for other versions of PSP.
********************************
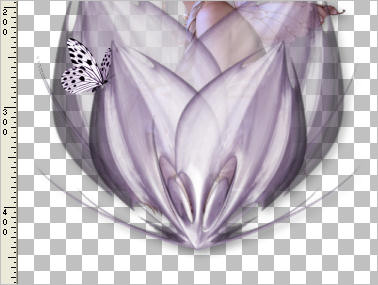
Now we'll add the butterflies to the image for a little extra interest.
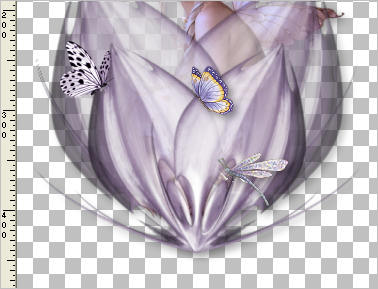
Open up the butterfly-sdh image in your PSP workspace
Right click on the Title Bar and select COPY from the options
Right click on the Title Bar of your tag image
and select PASTE AS NEW LAYER from the options.
IMAGE >>> MIRROR
IMAGE >>> RESIZE = 20%
Ensure "Resize all layers" is UNCHECKED
Resample using WEIGHTED AVERAGE
ADJUST >>> HUE & SATURATION >>> COLORIZE
same settings
Reposition with your MOVER tool
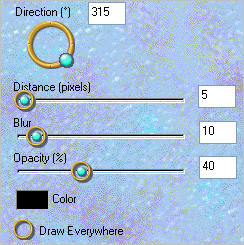
EFFECTS >>> PLUGINS >>> EYE CANDY 3 >>> DROP SHADOW
Open up the PaperButterfly_TubedByGini_07-23-05 image in your PSP workspace
Right click on the Title Bar and select COPY from the options
Right click on the Title Bar of your tag image
and select PASTE AS NEW LAYER from the options.
IMAGE >>> MIRROR
IMAGE >>> RESIZE = 10%
Ensure "Resize all layers" is UNCHECKED
Resample using WEIGHTED AVERAGE
ADJUST >>> SHARPNESS >>> SHARPEN
EFFECTS >>> PLUGINS >>> EYE CANDY 3 >>> DROP SHADOW
same settings
Reposition with your MOVER tool

Open up the DF.tub image in your PSP workspace
Right click on the Title Bar and select COPY from the options
Right click on the Title Bar of your tag image
and select PASTE AS NEW LAYER from the options.
ADJUST >>> SHARPNESS >>> SHARPEN
EFFECTS >>> PLUGINS >>> EYE CANDY 3 >>> DROP SHADOW
same settings
Reposition with your MOVER tool
LAYERS >>> MERGE >>> MERGE VISIBLE
Save as .png image
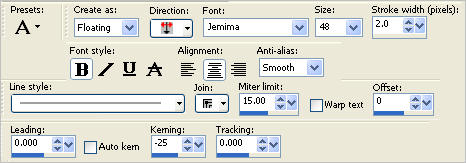
Now you might like to add your name or some other greeting.
I used the font supplied.
LAYERS >>> NEW RASTER LAYER
Select your TEXT tool
PSPX3 TIP: PSPX3 has a very different way of adding text
However if you hold down the shift key when
clicking on the A (Text Tool) the box will show up as other versions
otherwise type the text and then click on the apply changes
(green button in the tools options next to presets)
In your MATERIALS PALETTE
Load PALE LILAC " #f6f4f6" in your foreground
Load PURPLE " #735e7c" in your background
Add your text
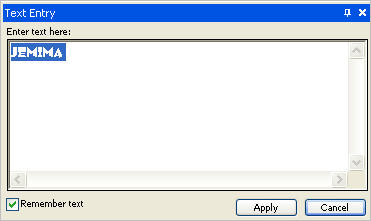
Click APPLY
EFFECTS >>> 3D EFFECTS >>> DROP SHADOW
Vertical & Horizontal offsets = 1
Colour = Black
Opacity = 70
Blur = 0
Reposition with your MOVER tool
DESELECT
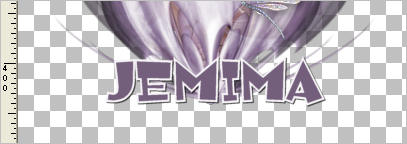
LAYERS >>> MERGE >>> MERGE VISIBLE
Save as .png image
You can add a drop shadow to the entire image if you wish.... or not... *S*
If you do....
EFFECTS >>> PLUGINS >>> EYE CANDY 3 >>> DROP SHADOW
same settings
That's it... ready to add to your emails or web pages *S*
(Tested by Sharon.... many thanks!!)

Page designed by

for
http://www.artistrypsp.com/
Copyright ©
2000-2011 Artistry In PSP / PSP Artistry
All rights reserved.
Unless specifically made available for
download,
no graphics or text may be removed from
this site for any reason
without written permission from Artistry
In PSP / PSP Artistry
|