SPIROGRAPH
PSP8 to PSPX3

This tutorial was written by Jemima ~ SEPTEMBER 2011
Copyright © 2011 ~ Jemima ~ All rights reserved
********************************
This was created using PSP9 but can be adapted for other versions of PSP.
You will need the
following to complete this tutorial
Materials
SS_1483_Misted.pspimage
Mira_oiseaux_fil_a_linge_pcc.pspimage
10pawa.pspimage
Save to a folder on your computer
cloth078.jpg
Save to your PSP Patterns folder
PSP8: C:\Program Files\Jasc Software\Paint Shop Pro 8\Patterns
PSP9: C:\Program Files\Jasc Software\Paint Shop Pro 9\Patterns
PSPX: C:\Program Files\Corel\Corel Paint Shop Pro X\Patterns
PSPXI / X2: C:\Program Files\Corel\Corel Paint Shop Pro Photo X2\Corel_08
PSPX3: C:\Program Files\Corel\X3\PSPClassic\Corel_08
cg-pastels4.jgd
Save to your PSP Gradients folder
PSP8: C:\Program Files\Jasc Software\Paint Shop Pro 8\Gradients
PSP9: C:\Program Files\Jasc Software\Paint Shop Pro 9\Gradients
PSPX: C:\Program Files\Corel\Corel Paint Shop Pro X\Gradients
PSPXI / X2: C:\Program Files\Corel\Corel Paint Shop Pro Photo X2\Corel_06
PSPX3: C:\Program Files\Corel\X3\PSPClassic\Corel_06
********************************
VIEW >>> RULERS
In this tutorial there are NO precise rules once you understand the main principles.
I am giving ruler positions only so that your experiments look like my results.
When doing your own creations the sky is the limit and will be achieved
by trial and error.
If you end up with a result your not happy with, then go to your History Palette
and
UNDO your experimenting and start over again.
These instructions are to give you an idea of what can be accomplished.
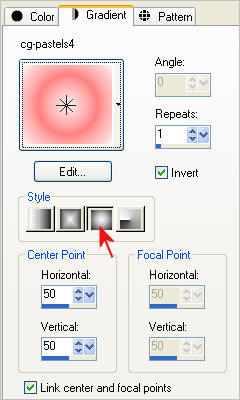
In your MATERIALS PALETTE
Load the ' cg-pastels4 ' gradient in your foreground
using these settings
In your MATERIALS PALETTE load
solid RED #ff0000 in the background
NULL your background for now.
Open a new image 500 x 500
VECTOR background
16 Million Colours (24 bit)
PSPX - X2: Colour Depth = 8bits/channel
PSPX3: Colour Depth RGB = 8bits/channel
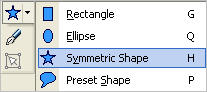
Select your PRESET SHAPES tool ... Symmetric Shape (Star)
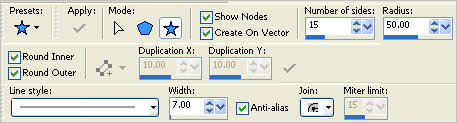
Use these settings
Join = Round Join
Line Style = +Solid
Starting at 50 pixels across and 50 pixels down
drag your cursor to 450 pixels across and 450 pixels down and release.
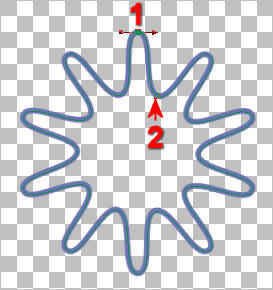
You will see 2 nodes...
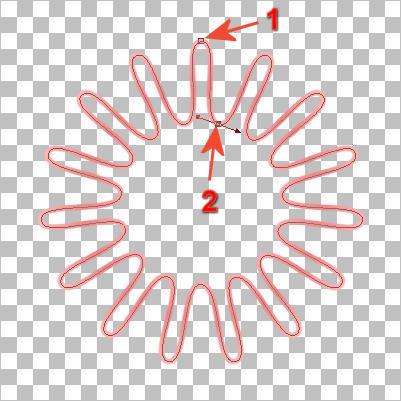
Place your cursor over the top node (1) , the word 'START' will appear.
Click on the node to "Select the Point"
Drag the right side of the arrow down level with the 250 mark on the top ruler
and the 100 mark on the left ruler

Place your cursor over node (2),
push UP so it is level with 280 across (top ruler) and 100 down (left ruler).
Drag the left leg of the arrow down to the 300 mark (left ruler) and 240 across (top ruler)
In your Materials Palette open the background.

In your LAYER PALETTE right click on the Vector layer and select
'Convert to Raster Layer'
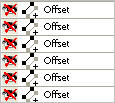
EFFECTS >>> 3D EFFECTS >>> DROP SHADOW
Vertical & Horizontal offsets = 1
Colour = Black
Opacity = 90
Blur = 3.00
Save as .psp image
Now you have your spirograph shape you don't have to stop there....
WINDOW >>> DUPLICATE
Minimize the original Image
Using your duplicated image...
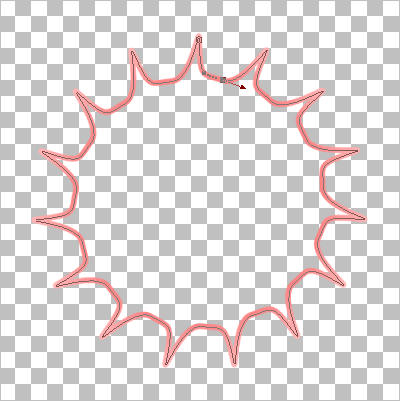
EFFECTS >>> DISTORTION EFFECTS >>> LENS DISTORTION
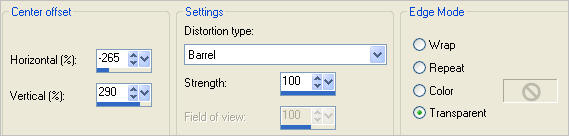
The result
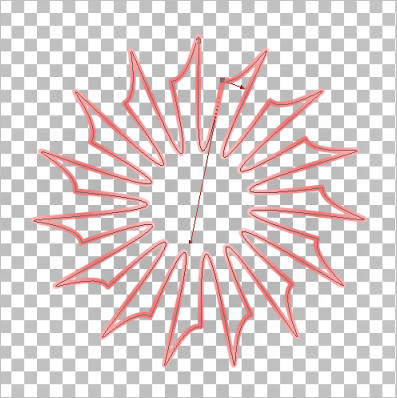
Now try
EFFECTS>>> GEOMETRIC EFFECTS >>> SKEW
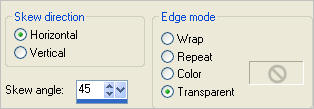
the result...
The possibilities are only restricted to your imagination!! *S*
OK.. lets try another one.
In your MATERIALS PALETTE
Load SOLID PURPLE ' #6c73b2 ' in your foreground
and
Load the ' cloth 078 ' pattern in your background
using the settings below.
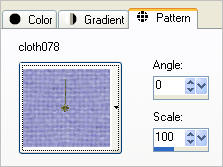
NULL the pattern option for the moment
Select your PRESET SHAPES tool ... Symmetric Shape (Star) same settings
EXCEPT..Change the number of side to = 10
Open a new image 500 x 500
VECTOR background
16 Million Colours (24 bit)
PSPX - X2: Colour Depth = 8bits/channel
PSPX3: Colour Depth RGB = 8bits/channel
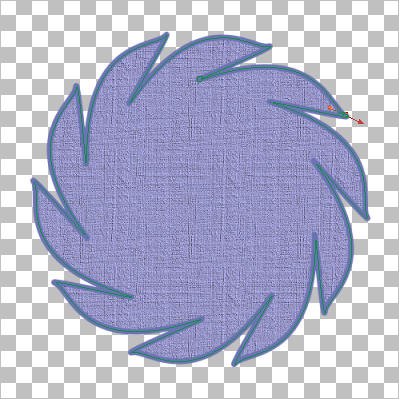
Starting at 100 pixels across and 100 pixels down
drag your cursor to 400 pixels across and 400 pixels down and release.
Select the top node (1) and drag the right part of the arrow to
400 mark on top ruler and 50 mark on left ruler
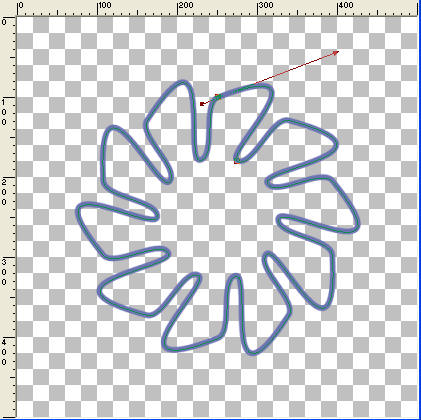
Select the lower node (2) and drag the NODE to
435 mark on top ruler and 145 mark on left ruler
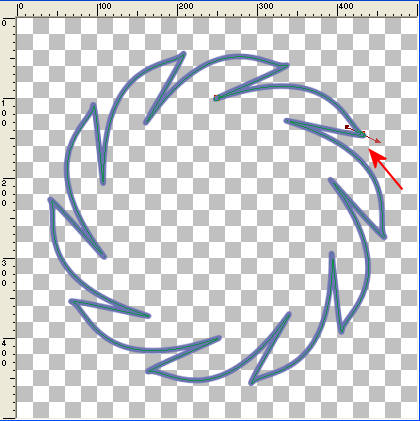
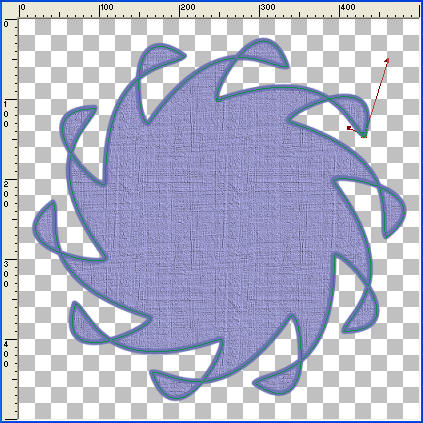
In your Materials Palette OPEN the background pattern
Drag the right handle of the arrow UP to 460 across on top ruler
and 50 down
on left ruler
In your LAYER PALETTE right click on the Vector 1 layer and select
'Convert to Raster Layer'
With your MAGIC WAND
Mode = Replace
Match Mode = RGB Value
Tolerance = 0
Feather = 1
Antialias = Checked
Sample Merged = UNCHECKED
PSP9 - X3: Check CONTIGUOUS
PSPX - X3: There is no " Sample Merged"
PSPX - X3: Use all layers = UNChecked
PSP9 - X3: ANTIALIAS = OUTside
Select the solid PURPLE outline
SELECTIONS >>> MODIFY >>> CONTRACT = 1
EFFECTS >>> 3D EFFECTS >>> INNER BEVEL
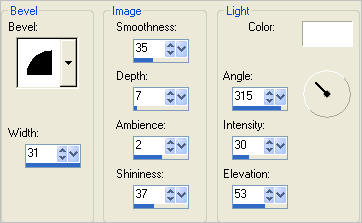
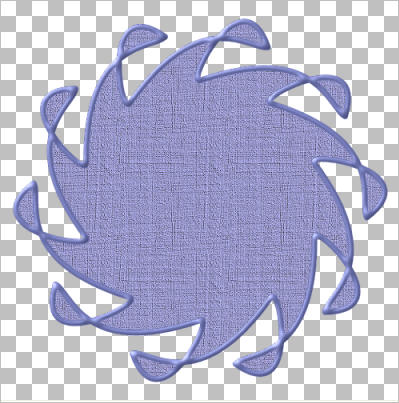
Save as .psp image
WINDOW >>> DUPLICATE
Close the original Image
OK... let's do something with our creation... click HERE
Page designed by

for
http://www.artistrypsp.com/
Copyright ©
2000-2011 Artistry In PSP / PSP Artistry
All rights reserved.
Unless specifically made available for
download,
no graphics or text may be removed from
this site for any reason
without written permission from Artistry
In PSP / PSP Artistry
|