DEVOTION
PSP8 to PSPX3
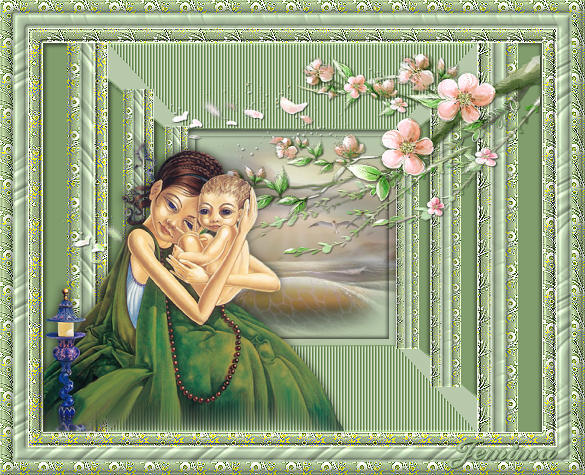
This tutorial was written by Jemima ~ APRIL 2011
Copyright © 2011 ~ Jemima ~ All rights reserved
********************************
This was created using PSP9 but can be adapted for other versions of PSP.
You will need the
following to complete this tutorial
Materials
WoodroffePatrick_UntoUsASonIsGiven_Moonstar.psp
Beach template-Laufey.pspimage
Z4268-2.pspimage
Save to a folder on your computer
abstract448.jpg
Save to your PSP Patterns folder
PSP8: C:\Program Files\Jasc Software\Paint Shop Pro 8\Patterns
PSP9: C:\Program Files\Jasc Software\Paint Shop Pro 9\Patterns
PSPX: C:\Program Files\Corel\Corel Paint Shop Pro X\Patterns
PSPXI / X2: C:\Program Files\Corel\Corel Paint Shop Pro Photo X2\Corel_08
PSPX3: C:\Program Files\Corel\X3\PSPClassic\Corel_08
L&k6.bmp (Download HERE)
Save to your PSP Textures folder
PSP8: C:\Program Files\Jasc Software\Paint Shop Pro 8\Textures
PSP9: C:\Program Files\Jasc Software\Paint Shop Pro 9\Textures
PSPX: C:\Program Files\Corel\Corel Paint Shop Pro X\Textures
PSPXI / X2: C:\Program Files\Corel\Corel Paint Shop Pro Photo X2\Corel_15
PSPX3: C:\Program Files\Corel\X3\PSPClassic\Corel_15
Plugins
** EYE CANDY3 **
HERE
********************************
In your MATERIALS PALETTE
Load the ' abstract448 ' pattern in your foreground
using the settings below.
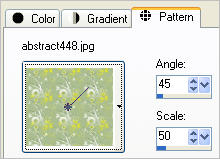
Load Light Green " #b7c9aa" in your background
Open a new image 625 x 490
Transparent background
PSPX - X2: Colour Depth = 8bits/channel
PSPX3: Colour Depth RGB = 8bits/channel
Flood fill with the pattern
EFFECTS >>> EDGE EFFECTS >>> ENHANCE
Choose your SELECTION TOOL then click on the CUSTOM SELECTION
symbol
and enter these coordinates.
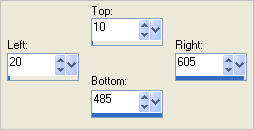
IMAGE >>> CROP TO SELECTION
SELECTIONS >>> SELECT ALL
SELECTIONS >>> MODIFY >>> CONTRACT = 15
EDIT >>> CLEAR
SELECTIONS >>> INVERT
EFFECTS >>> 3D EFFECTS >>> INNER BEVEL
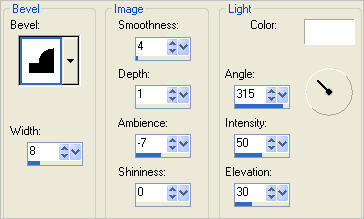
SELECTIONS >>> INVERT
LAYERS >>> NEW RASTER LAYER
SELECTIONS >>> MODIFY >>> EXPAND = 2
Flood fill with Light Green
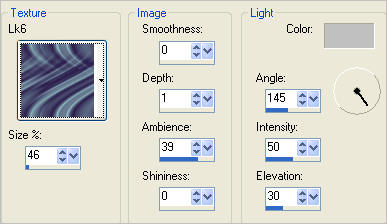
EFFECTS >>> TEXTURE EFFECTS >>> TEXTURE
COLOUR = #c0c0c0
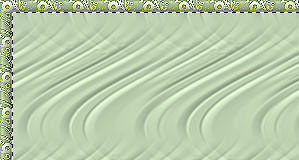
SELECTIONS >>> MODIFY >>> CONTRACT = 15
EDIT >>> CLEAR
DESELECT
EFFECTS >>> 3D EFFECTS >>> INNER BEVEL
Same settings

With your MAGIC WAND
Mode = Replace
Match Mode = RGB Value
Tolerance = 0
Feather = 0
Antialias = UNchecked
Sample Merged = UNCHECKED
PSP9 - X3: Check CONTIGUOUS
PSPX - X3: There is no " Sample Merged"
PSPX - X3: Use all layers = UNChecked
Select the CENTRE transparent area
LAYERS >>> NEW RASTER LAYER
Flood fill with pattern
SELECTIONS >>> MODIFY >>> CONTRACT = 15
EDIT >>> CLEAR
DESELECT
EFFECTS >>> 3D EFFECTS >>> INNER BEVEL
Same settings
EFFECTS >>> EDGE EFFECTS >>> ENHANCE

LAYERS >>> MERGE >>> MERGE VISIBLE
LAYERS >>> DUPLICATE
PSP8 - PSP9:IMAGE >>> ROTATE >>> FREE ROTATE = RIGHT 90
Ensure "All layers" is UNCHECKED
PSPX - PSPX3: IMAGE >>> FREE ROTATE = RIGHT 90
Ensure "All layers" is UNCHECKED
IMAGE >>> RESIZE = 95%
Ensure "Resize all layers" is UNCHECKED
Resample using WEIGHTED AVERAGE
ADJUST >>> SHARPNESS >>> SHARPEN
ACTIVATE THE MERGED LAYER
With your MAGIC WAND....
Same settings.
Select the CENTRE transparent area
SELECTIONS >>> MODIFY >>> EXPAND = 4
ACTIVATE Copy of Merged layer
SELECTIONS >>> INVERT
EDIT >>> CLEAR
DESELECT
LAYERS >>> ARRANGE >>> MOVE DOWN

LAYERS >>> DUPLICATE
IMAGE >>> RESIZE = 75%
Ensure "Resize all layers" is UNCHECKED
Resample using WEIGHTED AVERAGE
ADJUST >>> SHARPNESS >>> SHARPEN
LAYERS >>> DUPLICATE
IMAGE >>> RESIZE = 75%
Ensure "Resize all layers" is UNCHECKED
Resample using WEIGHTED AVERAGE
ADJUST >>> SHARPNESS >>> SHARPEN
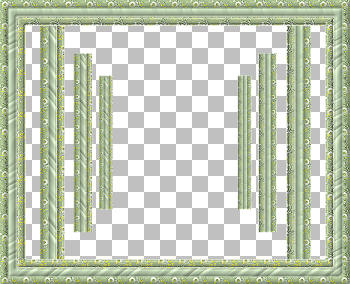
CLOSE THE MERGED LAYER
LAYERS >>> MERGE >>> MERGE VISIBLE
Rename this layer MERGED 2
OPEN THE MERGED LAYER
In your MATERIALS PALETTE
Load solid Dark Green #819d6d in the foreground
Still on the MERGED 2 layer..
LAYERS >>> NEW RASTER LAYER
Select your PEN tool, using these settings

Starting at #1 (left side of left front "column" ) left click at each point shown below,
with the final click #5 back where you started.
(Make sure your horizontal lines are perfectly straight.)

Click the APPLY button
LAYERS >>> ARRANGE >>> MOVE DOWN
Choose your FREEHAND SELECTION TOOL
Selection Type = Point to Point
Mode = Replace
Feather = 0
Antialias = UNChecked
Starting at the same point (#1) as above BUT this time on the RIGHT side of the left column
section off the area shown below.

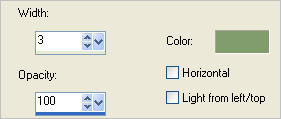
EFFECTS >>> TEXTURE EFFECTS >>> BLINDS
COLOUR =
Dark Green #819d6d
ADJUST >>> SHARPNESS >>> SHARPEN MORE
SELECTIONS >>> SELECT NONE

LAYERS >>> DUPLICATE
IMAGE >>> FLIP
LAYERS >>> MERGE >>> MERGE VISIBLE
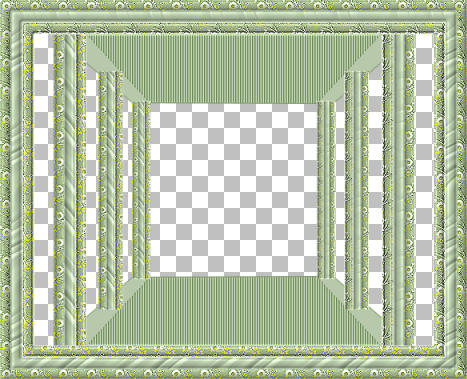
With your MAGIC WAND....
Same settings.
Select the CENTRE transparent area
SELECTIONS >>> MODIFY >>> EXPAND = 4
LAYERS >>> NEW RASTER LAYER
LAYERS >>> ARRANGE >>> MOVE DOWN
Flood fill with LIGHT GREEN
LAYERS >>> NEW RASTER LAYER
SELECTIONS >>> INVERT
EFFECTS >>> PLUGINS >>> EYE CANDY 3 >>> DROP SHADOW
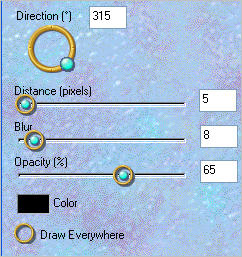
EDIT >>> Repeat Drop Shadow.. change DIRECTION to 235
SELECTIONS >>> INVERT
SELECTIONS >>> MODIFY >>> CONTRACT = 10
SELECTIONS >>> INVERT
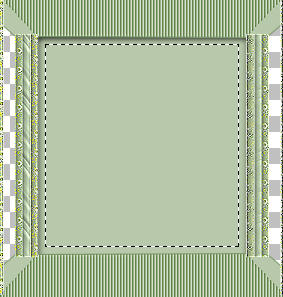
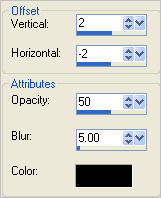
EFFECTS >>> 3D EFFECTS >>> DROP SHADOW
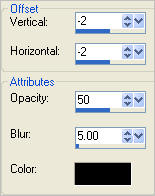
EFFECTS >>> 3D EFFECTS >>> DROP SHADOW
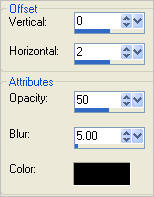
DESELECT
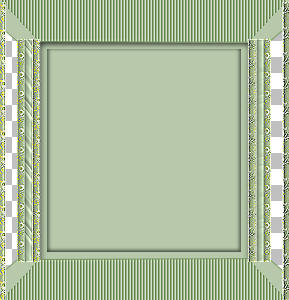
ACTIVATE THE MERGED LAYER
With your MAGIC WAND....
Same settings.
and while depressing your SHIFT KEY...
Select the remaining transparent areas
SELECTIONS >>> MODIFY >>> EXPAND = 4
ACTIVATE RASTER 1
LAYERS >>> NEW RASTER LAYER
Flood fill selected areas with Dark Green
DESELECT
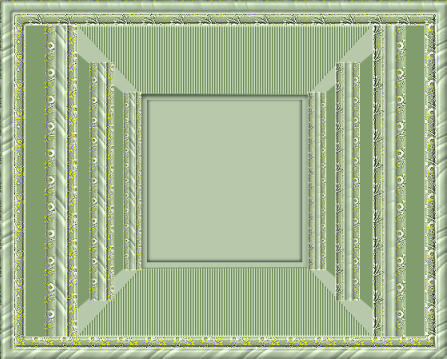
ACTIVATE THE MERGED LAYER
With your MAGIC WAND....
Same settings.
and while depressing your SHIFT KEY...
Select the 3 LEFT Dark Green areas
ACTIVATE RASTER 2
SELECTIONS >>> INVERT
EFFECTS >>> 3D EFFECTS >>> DROP SHADOW
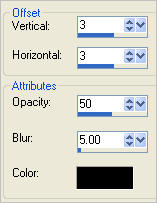
DESELECT
ACTIVATE THE MERGED LAYER
With your MAGIC WAND.... Same settings.
and while depressing your SHIFT KEY...
Select the 3 RIGHT Dark Green areas
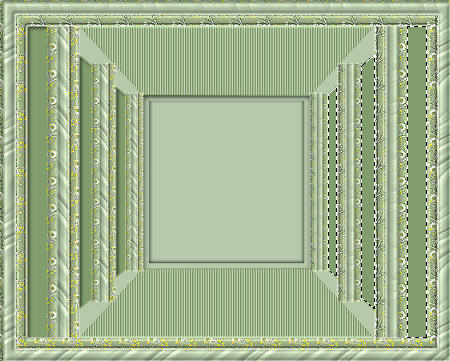
ACTIVATE RASTER 2
SELECTIONS >>> INVERT
EFFECTS >>> 3D EFFECTS >>> DROP SHADOW
DESELECT
ACTIVATE RASTER 1
Open up the Beach template-Laufey image in your PSP workspace
Right click on the Title Bar and select COPY from the options
Right click on the Title Bar of your tag image
and select PASTE AS NEW LAYER from the options.
IMAGE >>> RESIZE = 55%
Ensure "Resize all layers" is UNCHECKED
Resample using WEIGHTED AVERAGE
IMAGE >>> MIRROR
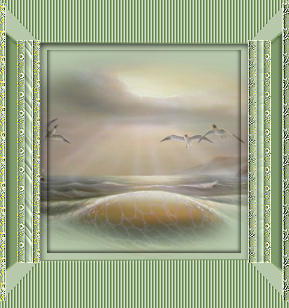
ACTIVATE THE MERGED LAYER
Open up the Z4268-2 image in your PSP workspace
Right click on the Title Bar and select COPY from the options
Right click on the Title Bar of your tag image
and select PASTE AS NEW LAYER from the options.
IMAGE >>> RESIZE = 80%
Ensure "Resize all layers" is UNCHECKED
Resample using WEIGHTED AVERAGE
ADJUST >>> SHARPNESS >>> SHARPEN
Reposition with your MOVER tool
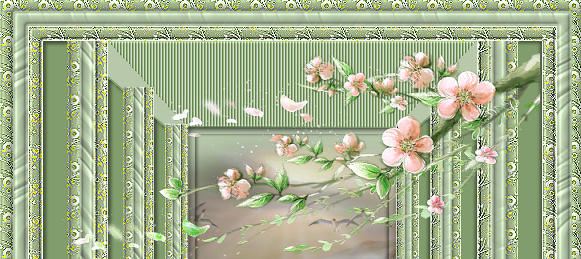
EFFECTS >>> 3D EFFECTS >>> DROP SHADOW
Vertical & Horizontal offsets = 1
Colour = Black
Opacity = 50
Blur = 0
Open up the WoodroffePatrick_UntoUsASonIsGiven_Moonstar image in your PSP workspace
Right click on the Title Bar and select COPY from the options
Right click on the Title Bar of your tag image
and select PASTE AS NEW LAYER from the options.
IMAGE >>> RESIZE = 75%
Ensure "Resize all layers" is UNCHECKED
Resample using WEIGHTED AVERAGE
Reposition with your MOVER tool
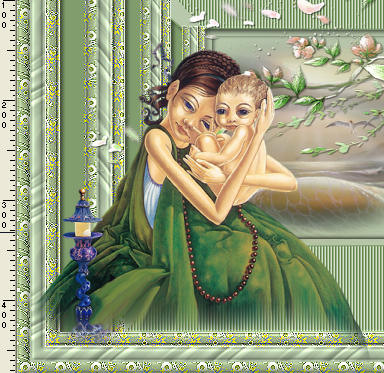
Choose your SELECTION TOOL
Selection Type = Rectangle
Mode = Replace
Feather = 0
Antialias = UNChecked
Select the area shown below
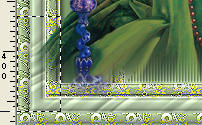
EDIT >>> CLEAR
DESELECT
Choose your SELECTION TOOL ... same settings
Select the area shown below

EDIT >>> CLEAR
DESELECT
EFFECTS >>> PLUGINS >>> EYE CANDY 3 >>> DROP SHADOW
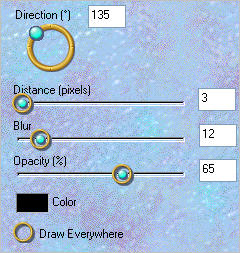
LAYERS >>> MERGE >>> MERGE ALL (Flatten)
Save as .jpg image
TESTERS RESULTS
Page designed by

for
http://www.artistrypsp.com/
Copyright ©
2000-2011 Artistry In PSP / PSP Artistry
All rights reserved.
Unless specifically made available for
download,
no graphics or text may be removed from
this site for any reason
without written permission from Artistry
In PSP / PSP Artistry
|