ST. PATRICK'S DAY 2009
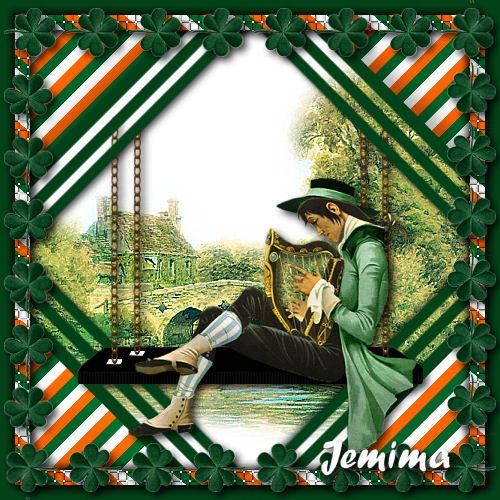
This tutorial was
created by Jemima using PSP9 ~ January 2009
BUT should be creatable using all versions of PSP
Copyright © 2009 ~ Jemima
~ All rights reserved
I have a permanent mental block when it comes to creating St. Patrick Day frames..
This is more like a Tag tut than a Frame tut... but I hope you enjoy it anyway.
********************************
You will need the
following to complete this tutorial
Materials
STP09_Materials ZIP
irishcolours.jpg
JF_SP29.psp
JF_Shelf2.psp
hhgsham1.pspimage
vsc_RuralEngladn_csg021_TheTroutInn_Godstow_Oxfordshire.psp
Save to a folder on your computer
Plugins
** EYE CANDY3 **
http://www.pircnet.com/downloads.html
** MURA'S MEISTER COPIES **
http://heavendream.de/tuts/filter.php#M
********************************
Open up the downloaded images in your PSP workspace
and minimize.
In your MATERIALS PALETTE
Load the ' irishcolours ' pattern in your foreground
using the settings below.
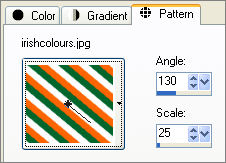
Load SOLID GREEN ' #034218 ' in your background
Open a new image 500 x 500
Transparent background
PSPX: Colour Depth = 8bits/channel
Flood fill with SOLID GREEN
SELECTIONS >>> SELECT ALL
SELECTIONS >>> MODIFY >>> CONTRACT = 15
EDIT >>> CLEAR
DESELECT
LAYERS >>> DUPLICATE
IMAGE >>> RESIZE = 85%
Ensure "Resize all layers" is UNCHECKED
Resample using WEIGHTED AVERAGE
IMAGE >>> ROTATE >>> FREE ROTATE = RIGHT 45
Ensure "All layers" is UNCHECKED
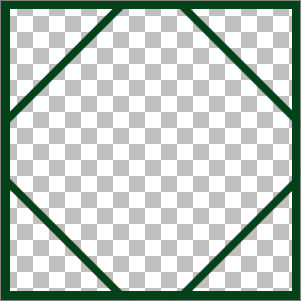
LAYERS >>> DUPLICATE
IMAGE >>> RESIZE = 90%
Ensure "Resize all layers" is UNCHECKED
Resample using WEIGHTED AVERAGE
LAYERS >>> DUPLICATE
IMAGE >>> RESIZE = 90%
Ensure "Resize all layers" is UNCHECKED
Resample using WEIGHTED AVERAGE
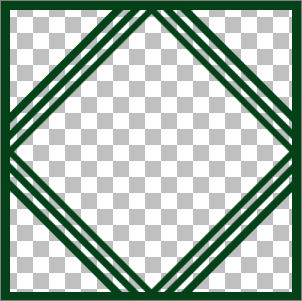
CLOSE RASTER 1
LAYERS >>> MERGE >>> MERGE VISIBLE
OPEN AND ACTIVATE RASTER 1
With your MAGIC WAND
Mode = Replace
Match Mode = RGB Value
Tolerance = 0
Feather = 0
Antialias = UNchecked
Sample Merged = UNCHECKED
PSP9/X: Check CONTIGUOUS
PSPX: There is no " Sample Merged"
PSPX: Use all layers = UNChecked
Select the CENTRE transparent area
LAYERS >>> NEW RASTER LAYER
Flood fill with Pattern
SELECTIONS >>> MODIFY >>> CONTRACT = 15
EDIT >>> CLEAR
DESELECT
EFFECTS >>> 3D EFFECTS >>> DROP SHADOW
Vertical & Horizontal offsets = 1
Colour = Black
Opacity = 60
Blur = 0
Repeat Drop Shadow effect changing
Vertical & Horizontal Offsets to - ( minus ) 1
Click OK
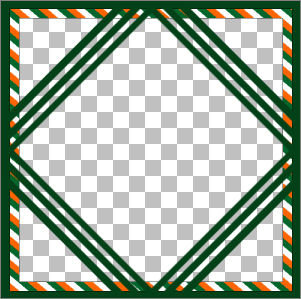
ACTIVATE THE MERGED LAYER
LAYERS >>> ARRANGE >>> MOVE DOWN
ACTIVATE RASTER 2
Maximize the hhgsham1.pspimage image in your PSP workspace
Right click on the Title Bar and select COPY from the options
Go to your frame image
Right click on the Title Bar of your frame image
and select PASTE AS NEW LAYER from the options.
IMAGE >>> RESIZE = 50%
Ensure "Resize all layers" is UNCHECKED
Resample using WEIGHTED AVERAGE
Reposition with your MOVER tool to the top left of your frame.
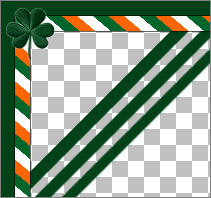
Select your DEFORMATION tool
Mode = SCALE
use default settings
PSPX/XI/XII:Select your PICK tool
and rotate the clover so that the stem is horizontal and to the left
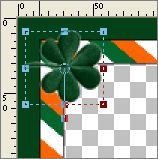
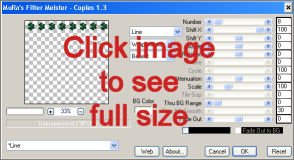
EFFECTS >>> PLUGINS >>> MURAS MEISTER >>> COPIES
Use these settings
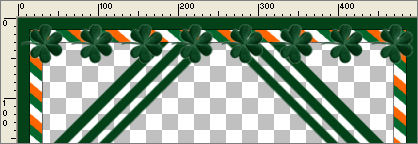
LAYERS >>> DUPLICATE
IMAGE >>> FLIP
IMAGE >>> MIRROR
LAYERS >>> DUPLICATE
IMAGE >>> ROTATE >>> FREE ROTATE = RIGHT 90
Ensure "All layers" is UNCHECKED
Reposition with your MOVER tool to the left of your frame
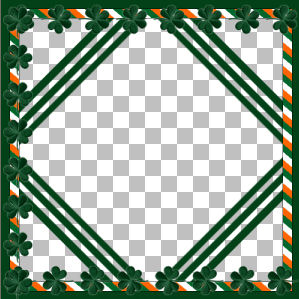
Choose your SELECTION TOOL
Selection Type = Rectangle
Mode = Replace
Feather = 0
Antialias = Checked
Section off the top 'clover'
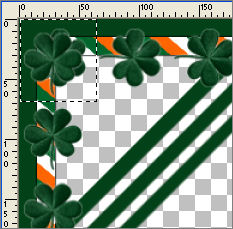
EDIT >>> CLEAR
DESELECT
Repeat these with the bottom left 'clover'
LAYERS >>> DUPLICATE
IMAGE >>> FLIP
IMAGE >>> MIRROR
CLOSE the bottom 3 layers
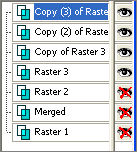
LAYERS >>> MERGE >>> MERGE VISIBLE
Rename this layer "Merged 2"
EFFECTS >>> PLUGINS >>> EYE CANDY 3 >>> DROP SHADOW
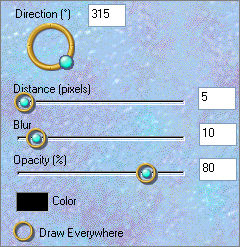
CLOSE the top 2 layers... Activate the Merged layer

LAYERS >>> MERGE >>> MERGE VISIBLE
With your MAGIC WAND.... same settings ... select the 4 transparent corners
SELECTIONS >>> MODIFY >>> EXPAND = 3
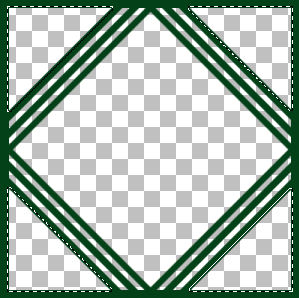
LAYERS >>> NEW RASTER LAYER
LAYERS >>> ARRANGE >>> MOVE DOWN
In your MATERIALS PALETTE Change the ANGLE of the foreground pattern to 45
Flood fill the 4 corners with the pattern.
EFFECTS >>> 3D EFFECTS >>> INNER BEVEL
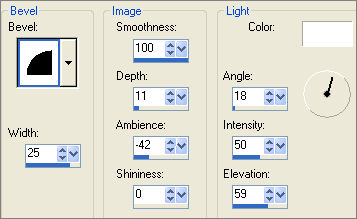
DESELECT
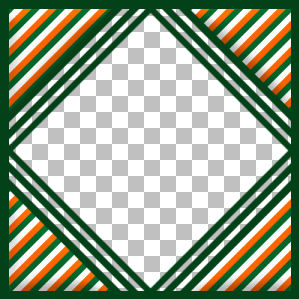
OPEN & ACTIVATE RASTER 2
EFFECTS >>> TEXTURE EFFECTS >>> WEAVE
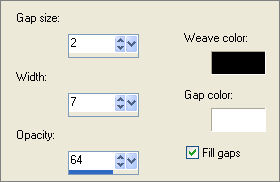
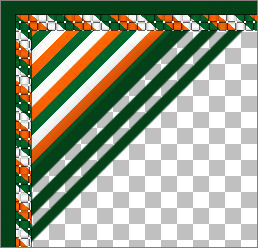
EFFECTS >>> PLUGINS >>> EYE CANDY 3 >>> DROP SHADOW
Same settings
EDIT >>> Repeat Drop Shadow.. change DIRECTION to 135
ACTIVATE THE MERGED LAYER
With your MAGIC WAND.... same settings ...Select the CENTRE transparent area
SELECTIONS >>> MODIFY >>> EXPAND = 3
SELECTIONS >>> INVERT
LAYERS >>> NEW RASTER LAYER
LAYERS >>> ARRANGE >>> MOVE DOWN
EFFECTS >>> PLUGINS >>> EYE CANDY 3 >>> DROP SHADOW
Same settings
EDIT >>> Repeat Drop Shadow.. change DIRECTION to 315
DESELECT
Maximize the JF_Shelf2.psp image in your PSP workspace
Right click on the Title Bar and select COPY from the options
Go to your frame image
Right click on the Title Bar of your frame image
and select PASTE AS NEW LAYER from the options.
IMAGE >>> RESIZE = 75%
Ensure "Resize all layers" is UNCHECKED
Resample using WEIGHTED AVERAGE
Choose your SELECTION TOOL
Selection Type = Rectangle
Mode = Replace
Feather = 0
Antialias = Checked
Draw a rectangle as shown below

Then click inside the rectangle to select the lower part of the shelf

ACTIVATE THE MERGED LAYER
EDIT >>> CLEAR
DESELECT
ACTIVATE RASTER 1
LAYERS >>> NEW RASTER LAYER
Flood fill with WHITE
LAYERS >>> ARRANGE >>> MOVE DOWN
Save as .psp image
Maximize the vsc_RuralEngladn_csg021_TheTroutInn_Godstow_Oxfordshire image
Right click on the Title Bar and select COPY from the options
Go to your frame image
Right click on the Title Bar of your frame image
and select PASTE AS NEW LAYER from the options.
ADJUST >>> COLOUR BALANCE >>> MANUAL COLOUR CORRECTION
Draw a rectangle in the left window to select the 'Source' and "Target" colours
Then use the settings below
The FOLIAGE colour is "EvergrnSun"
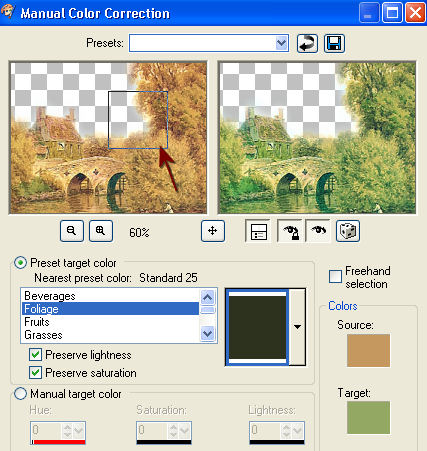
Click OK
ADJUST >>> SHARPNESS >>> SHARPEN MORE
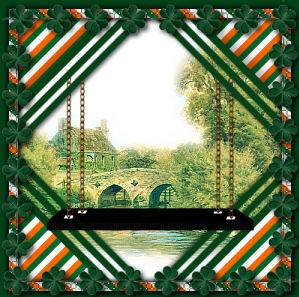
ACTIVATE the TOP Layer
Maximize the JF_SP29 image in your PSP workspace
Right click on the Title Bar and select COPY from the options
Go to your frame image
Right click on the Title Bar of your frame image
and select PASTE AS NEW LAYER from the options.
IMAGE >>> RESIZE =75%
Ensure "Resize all layers" is UNCHECKED
Resample using WEIGHTED AVERAGE
EFFECTS >>> 3D EFFECTS >>> INNER BEVEL
Same settings
Reposition with your MOVER tool
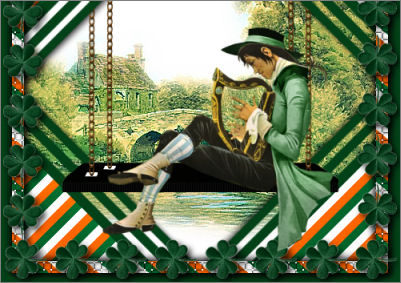
EFFECTS >>> PLUGINS >>> EYE CANDY 3 >>> DROP SHADOW
Same settings
ACTIVATE RASTER 4 (THE SWING/SHELF)
EFFECTS >>> PLUGINS >>> EYE CANDY 3 >>> DROP SHADOW
Same settings
LAYERS >>> MERGE >>> MERGE ALL (Flatten)
Save as .jpg image
Testers Results
Page designed by

for

http://www.artistrypsp.com/
Copyright ©
2000-2009 Artistry In PSP / PSP Artistry
All rights reserved.
Unless specifically made available for
download,
no graphics or text may be removed from
this site for any reason
without written permission from Artistry
In PSP / PSP Artistry
TUTORIAL
INDEX
|