REFLECTION
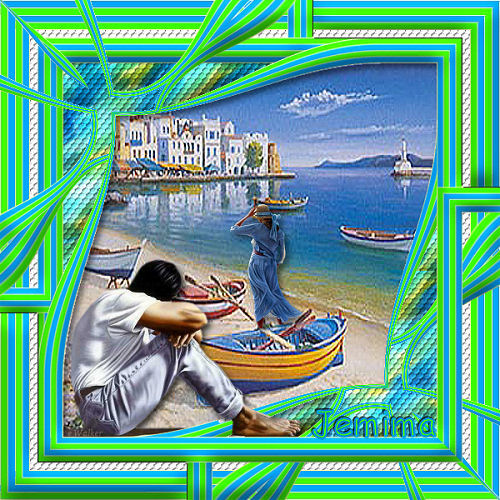
This tutorial was
created by Jemima using PSP9 ~ January 2009
BUT should be creatable using all versions of PSP
Copyright © 2009 ~ Jemima
~ All rights reserved
********************************
You will need the
following to complete this tutorial
Materials
Reflection Materials ZIP
PatternG~06_GxChic!.jpg
11HP-9001a.jpg
Save to your PSP Patterns folder
lace6.bmp
Save to your PSP Textures folder
Mediterranean.jpg
FBR_Reflections~Mark Shasha 4-25-06 280 KB.psp
Saphiere_GraphicDream_Tubes_Artist_Steve__.psp
Save to a folder on your computer
Plugins
** EYE CANDY3 **
http://www.pircnet.com/downloads.html
********************************
Open up the downloaded images in your PSP workspace
and minimize.
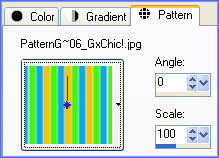
In your MATERIALS PALETTE load
PatternG~06_GxChic! in the foreground
using these settings
Open a new image 600 x 600
Transparent background
PSPX: Colour Depth = 8bits/channel
Flood fill with the pattern
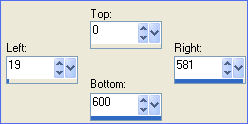
Choose your SELECTION TOOL then click on the CUSTOM SELECTION
symbol
and enter these coordinates.
EDIT >>> CLEAR
DESELECT
LAYERS >>> DUPLICATE
IMAGE >>> ROTATE >>> FREE ROTATE = LEFT 90
Ensure "All layers" is UNCHECKED
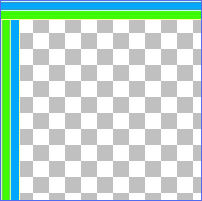
Choose your FREEHAND SELECTION TOOL
Selection Type = Point to Point
Mode = Replace
Feather = 0
Antialias = UNChecked
Click your cursor at 30 pixels across and 30 pixels down..
next click right in the corner..
next click below the top border.
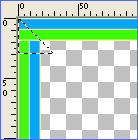
EDIT >>> CLEAR
DESELECT
Click your cursor at 570 pixels across and 30 pixels down..
next click right in the corner..
next click below the top border.

EDIT >>> CLEAR
DESELECT
Click your cursor at 30 pixels across and 570 pixels down..
next click right in the corner..
next click above the top border.
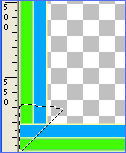
EDIT >>> CLEAR
DESELECT
Click your cursor at 570 pixels across and 570 pixels down..
next click right in the corner..
next click above the top border.
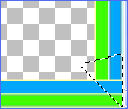
EDIT >>> CLEAR
DESELECT
LAYERS >>> MERGE >>> MERGE VISIBLE

LAYERS >>> DUPLICATE
IMAGE >>> RESIZE = 94%
Ensure "Resize all layers" is UNCHECKED
Resample using WEIGHTED AVERAGE
LAYERS >>> MERGE >>> MERGE VISIBLE
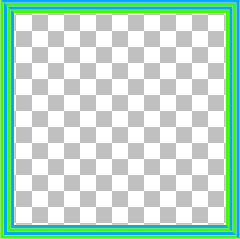
LAYERS >>> DUPLICATE
IMAGE >>> RESIZE = 85%
Ensure "Resize all layers" is UNCHECKED
Resample using WEIGHTED AVERAGE
ADJUST >>> SHARPNESS >>> SHARPEN
LAYERS >>> DUPLICATE
EFFECTS >>> REFLECTION EFFECTS >>> ROTATING MIRROR
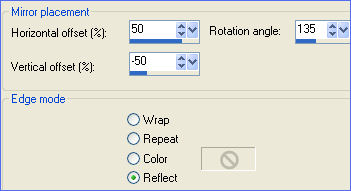
LAYERS >>> DUPLICATE
IMAGE >>> FLIP
IMAGE >>> MIRROR
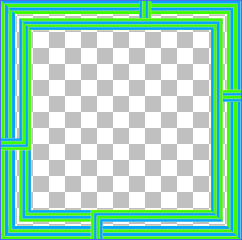
Close the Merged layer
LAYERS >>> MERGE >>> MERGE VISIBLE
EFFECTS >>> DISTORTION EFFECTS >>> WARP

LAYERS >>> DUPLICATE
IMAGE >>> FLIP
IMAGE >>> MIRROR
EFFECTS >>> 3D EFFECTS >>> INNER BEVEL
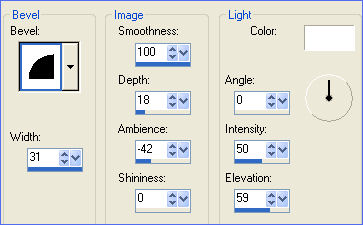
ACTIVATE the Merged layer indicated below

Repeat Inner Bevel
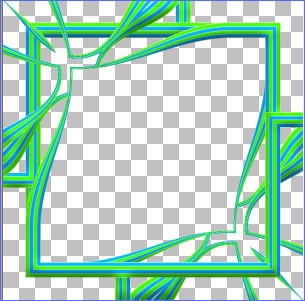
LAYERS >>> MERGE >>> MERGE VISIBLE
LAYERS >>> NEW RASTER LAYER
LAYERS >>> ARRANGE >>> MOVE DOWN
Flood Fill with WHITE
ACTIVATE the TOP Merged layer
With your MAGIC WAND
Mode = Replace
Match Mode = RGB Value
Tolerance = 0
Feather = 0
Antialias = UNchecked
Sample Merged = UNCHECKED
PSP9/X: Check CONTIGUOUS
PSPX: There is no " Sample Merged"
PSPX: Use all layers = UNChecked
Select the centre of the image
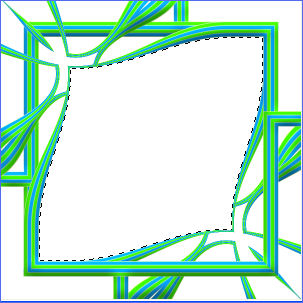
SELECTIONS >>> MODIFY >>> EXPAND = 1
ACTIVATE RASTER 1
EDIT >>> CLEAR
DESELECT
LAYERS >>> ARRANGE >>> MOVE DOWN
OPEN ALL LAYERS
ACTIVATE the TOP Merged layer
With your MAGIC WAND .... same settings ..and using your SHIFT key
Select the areas shown below
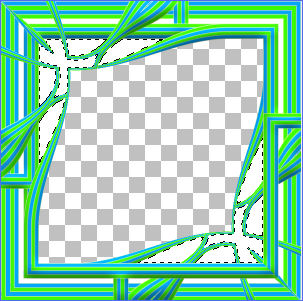
SELECTIONS >>> MODIFY >>> EXPAND = 1
ACTIVATE RASTER 1
EFFECTS >>> TEXTURE EFFECTS >>> SCULPTURE
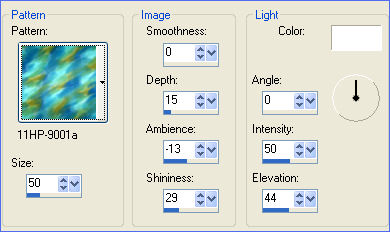
EFFECTS >>> 3D EFFECTS >>> INNER BEVEL
Same settings
DESELECT
ACTIVATE the TOP Merged layer
With your MAGIC WAND .... same settings .. and using your SHIFT key
Select the areas shown below
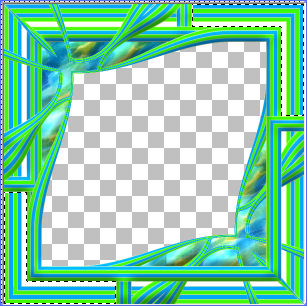
ACTIVATE the lower Merged layer

EFFECTS >>> 3D EFFECTS >>> INNER BEVEL
Same settings
LAYERS >>> NEW RASTER LAYER
EFFECTS >>> 3D EFFECTS >>> DROP SHADOW
Vertical & Horizontal offsets = 1
Colour = Black
Opacity = 85
Blur = 0
Repeat Drop Shadow effect changing
Vertical & Horizontal Offsets to - ( minus ) 1
Click OK
LAYERS >>> ARRANGE >>> BRING TO TOP
****
EFFECTS >>> 3D EFFECTS >>> DROP SHADOW
Vertical & Horizontal offsets = 1
Colour = Black
Opacity = 85
Blur = 0
Repeat Drop Shadow effect changing
Vertical & Horizontal Offsets to - ( minus ) 1
Click OK
DESELECT
*****
ACTIVATE RASTER 1
EFFECTS >>> TEXTURE EFFECTS >>> TEXTURE
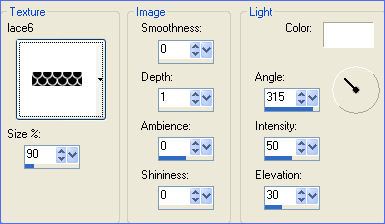
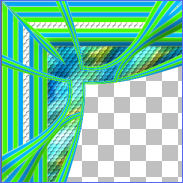
Open up the mediterranean.jpg image in your PSP workspace
Right click on the Title Bar and select COPY from the options
Right click on the Title Bar of your frame image
and select PASTE AS NEW LAYER from the options.
LAYERS >>> ARRANGE >>> SEND TO BOTTOM
Select your DEFORMATION tool
Mode = SCALE
use default settings
Drag the centre top and bottom nodes to meet the frame edge
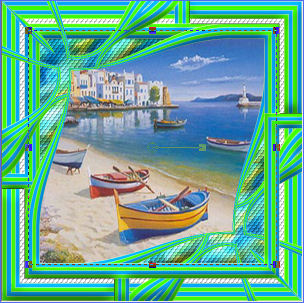
Click the RESET RECTANGLE arrow
EFFECTS >>> EDGE EFFECTS >>> ENHANCE
ACTIVATE RASTER 3
Open up the Saphiere_GraphicDream_Tubes_Artist_Steve__.psp
image in your PSP workspace
Right click on the Title Bar and select COPY from the options
Right click on the Title Bar of your frame image
and select PASTE AS NEW LAYER from the options.
IMAGE >>> RESIZE = 75%
Ensure "Resize all layers" is UNCHECKED
Resample using WEIGHTED AVERAGE
LAYERS >>> ARRANGE >>> MOVE DOWN
Repeat...LAYERS >>> ARRANGE >>> MOVE DOWN
Repeat...LAYERS >>> ARRANGE >>> MOVE DOWN
Reposition with your MOVER tool
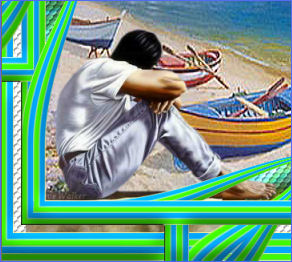
Choose your SELECTION TOOL
Selection Type = Rectangle
Mode = Replace
Feather = 0
Antialias = UNChecked
Draw a rectangle as shown below
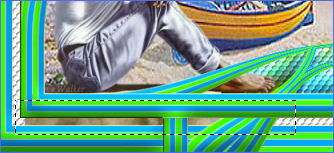
EDIT >>> CLEAR
DESELECT
EFFECTS >>> PLUGINS >>> EYE CANDY 3 >>> DROP SHADOW
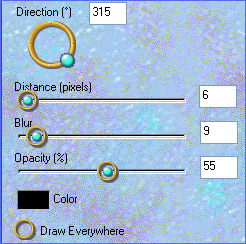
ACTIVATE the TOP Merged layer
Lower the OPACITY to 30
Choose your FREEHAND SELECTION TOOL
Selection Type = Point to Point
Mode = Replace
Feather = 0
Antialias = Checked
ZOOM in and draw around the man's foot
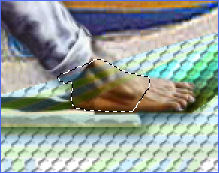
EDIT >>> CLEAR
DESELECT
Change the OPACITY back to 100
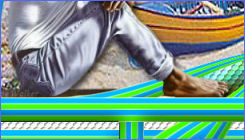
ACTIVATE RASTER 4
Open up the FBR_Reflections~Mark Shasha 4-25-06 280 KB.psp
image in your PSP workspace
Right click on the Title Bar and select COPY from the options
Right click on the Title Bar of your frame image
and select PASTE AS NEW LAYER from the options.
IMAGE >>> RESIZE = 40%
Ensure "Resize all layers" is UNCHECKED
Resample using WEIGHTED AVERAGE
ADJUST >>> SHARPNESS >>> SHARPEN
Reposition with your MOVER tool so her feet are inside the boat.
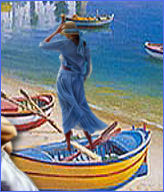
Choose your FREEHAND SELECTION TOOL
Selection Type = Point to Point
Mode = Replace
Feather = 0
Antialias = Checked
Section off the area shown below
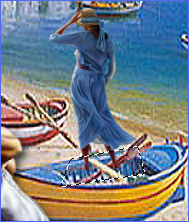
EDIT >>> CLEAR
DESELECT
EFFECTS >>> PLUGINS >>> EYE CANDY 3 >>> DROP SHADOW
Same settings
ADJUST >>> SHARPNESS >>> SHARPEN
ACTIVATE the TOP Merged layer
With your MAGIC WAND
Same settings..
Select the CENTRE of the image
SELECTIONS >>> INVERT
EFFECTS >>> PLUGINS >>> EYE CANDY 3 >>> DROP SHADOW
Same settings
DESELECT
LAYERS >>> MERGE >>> MERGE ALL (Flatten)
Save as .jpg image
Testers Results
Page designed by

for

http://www.artistrypsp.com/
Copyright ©
2000-2009 Artistry In PSP / PSP Artistry
All rights reserved.
Unless specifically made available for
download,
no graphics or text may be removed from
this site for any reason
without written permission from Artistry
In PSP / PSP Artistry
TUTORIAL
INDEX
|