COUNTRY
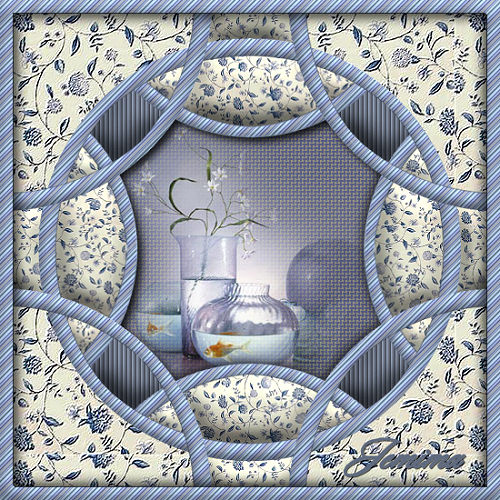
This tutorial was
created by Jemima using PSP9 ~ June 2009
BUT should be creatable using all versions of PSP
Copyright © 2009 ~ Jemima
~ All rights reserved
********************************
You will need the
following to complete this tutorial
Materials
Country_Materials ZIP
Kat_0015.pspimage
Save to a folder on your computer
JF_BlueStripe.jpg
Medium_WV-151.jpg
Save to your PSP Patterns folder
Plugins
** EYE CANDY3 **
http://www.pircnet.com/downloads.html
** Muras Seamless **
DOWNLOAD
There are lots of sets.... we'll be using the one with "Shift at Wave"
My advice.... DOWNLOAD THE LOT *S*
They're all great!!!!!
http://www.photoshop-filters.com/html/mura.htm
********************************
In your MATERIALS PALETTE
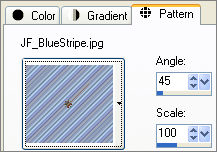
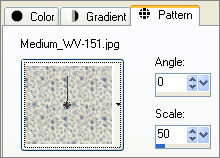
Load the ' JF_BlueStripe ' pattern in your foreground
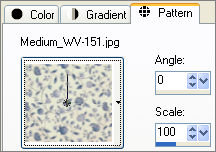
Load the ' Medium_WV-151 ' pattern in your background
using the settings below.
 . . 
Open a new image 550 x 550
Transparent background
PSPX: Colour Depth = 8bits/channel
Flood fill with the ' JF_BlueStripe ' pattern
SELECTIONS >>> SELECT ALL
SELECTIONS >>> MODIFY >>> CONTRACT = 15
EDIT >>> CLEAR
EFFECTS >>> 3D EFFECTS >>> DROP SHADOW
Vertical & Horizontal offsets = 1
Colour = Black
Opacity = 70
Blur = 0
Repeat Drop Shadow effect changing
Vertical & Horizontal Offsets to - ( minus ) 1
Click OK
DESELECT
LAYERS >>> DUPLICATE
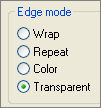
EFFECTS>>> GEOMETRIC EFFECTS >>> CIRCLE
LAYERS >>> DUPLICATE
IMAGE >>> RESIZE = 97%
Ensure "Resize all layers" is UNCHECKED
Resample using WEIGHTED AVERAGE
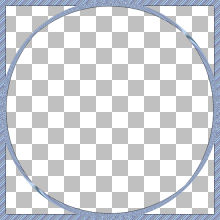
CLOSE RASTER 1
LAYERS >>> MERGE >>> MERGE VISIBLE
IMAGE >>> RESIZE = 85%
Ensure "Resize all layers" is UNCHECKED
Resample using WEIGHTED AVERAGE
OPEN RASTER 1
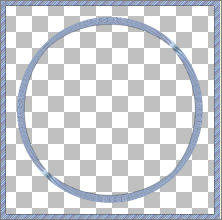
With the MERGED layer still active
LAYERS >>> DUPLICATE
EFFECTS >>> IMAGE EFFECTS >>> OFFSET
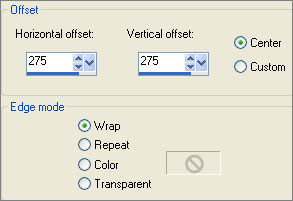
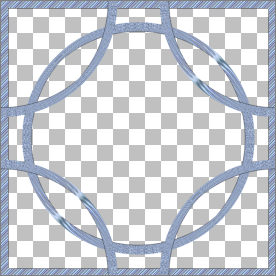
LAYERS >>> DUPLICATE
IMAGE >>> RESIZE = 80%
Ensure "Resize all layers" is UNCHECKED
Resample using WEIGHTED AVERAGE
IMAGE >>> ROTATE >>> FREE ROTATE = RIGHT 45
Ensure "All layers" is UNCHECKED
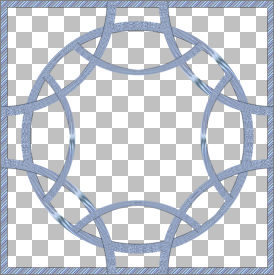
ACTIVATE RASTER 1
LAYERS >>> ARRANGE >>> BRING TO TOP
ACTIVATE Copy (2) of Merged Layer
LAYERS >>> ARRANGE >>> SEND TO BOTTOM
SELECTIONS >>> SELECT ALL
SELECTIONS >>> FLOAT
Flood fill with the ' JF_BlueStripe ' pattern
DESELECT
ACTIVATE the Merged Layer
LAYERS >>> ARRANGE >>> SEND TO BOTTOM
SELECTIONS >>> SELECT ALL
SELECTIONS >>> FLOAT
Flood fill with the ' JF_BlueStripe ' pattern
DESELECT
ACTIVATE Copy of Merged Layer
LAYERS >>> ARRANGE >>> SEND TO BOTTOM
SELECTIONS >>> SELECT ALL
SELECTIONS >>> FLOAT
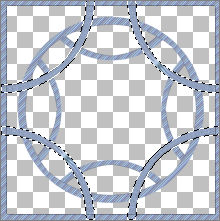
Flood fill with the ' JF_BlueStripe ' pattern
DESELECT
EFFECTS >>> 3D EFFECTS >>> INNER BEVEL
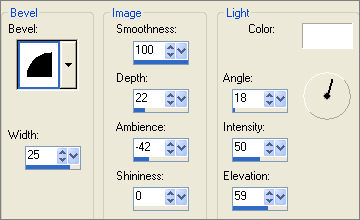
ACTIVATE the Merged Layer
EDIT >>> Repeat Inner Bevel
ACTIVATE Copy (2) of Merged Layer
EDIT >>> Repeat Inner Bevel
ACTIVATE RASTER 1
EDIT >>> Repeat Inner Bevel
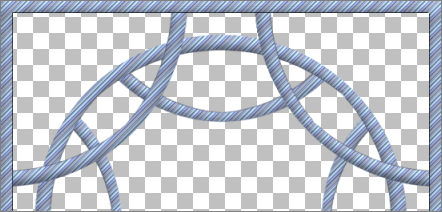
CLOSE RASTER 1
ACTIVATE the MERGED layer
LAYERS >>> MERGE >>> MERGE VISIBLE
OPEN RASTER 1
With your MAGIC WAND
Mode = Replace
Match Mode = RGB Value
Tolerance = 0
Feather = 0
Antialias = UNchecked
Sample Merged = UNCHECKED
PSP9/X: Check CONTIGUOUS
PSPX: There is no " Sample Merged"
PSPX: Use all layers = UNChecked
and while depressing your SHIFT KEY...
Select the transparent areas shown.
SELECTIONS >>> MODIFY >>> EXPAND = 3
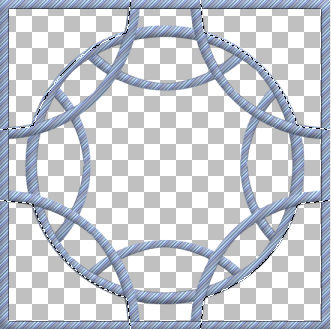
LAYERS >>> NEW RASTER LAYER
LAYERS >>> ARRANGE >>> SEND TO BOTTOM
Flood fill with the ' Medium_WV-151 ' pattern
DESELECT
EFFECTS >>> PLUGINS >>> MURA'S SEAMLESS >>> EMBOSS
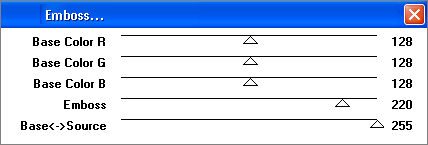
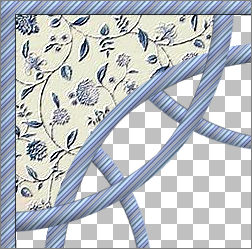
In your MATERIALS PALETTE
CHANGE the SCALE in your background pattern to 50
ACTIVATE the MERGED layer
With your MAGIC WAND....
Same settings.
and while depressing your SHIFT KEY...
Select the transparent areas shown.
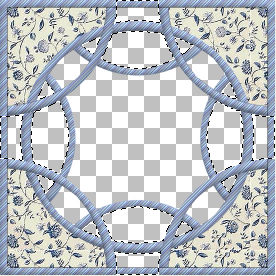
SELECTIONS >>> MODIFY >>> EXPAND = 3
LAYERS >>> NEW RASTER LAYER
LAYERS >>> ARRANGE >>> MOVE DOWN
Flood fill with the 'Medium_WV_151' pattern
ADJUST >>> SHARPNESS >>> SHARPEN
EFFECTS >>> 3D EFFECTS >>> INNER BEVEL
Same settings
DESELECT
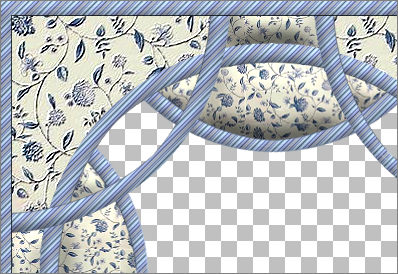
In your MATERIALS PALETTE
Load SOLID BLUE " #838da0" in your background
ACTIVATE the MERGED layer
With your MAGIC WAND.... Same settings.
and while depressing your SHIFT KEY...
Select the transparent areas shown.
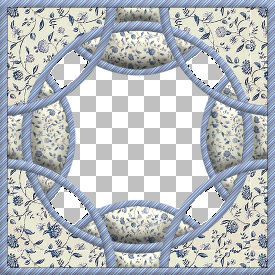
SELECTIONS >>> MODIFY >>> EXPAND = 3
LAYERS >>> NEW RASTER LAYER
LAYERS >>> ARRANGE >>> MOVE DOWN
Flood fill with SOLID BLUE
EFFECTS >>> TEXTURE EFFECTS >>> BLINDS
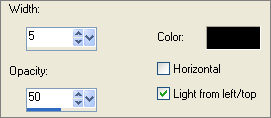
EFFECTS >>> 3D EFFECTS >>> INNER BEVEL
Same settings
DESELECT
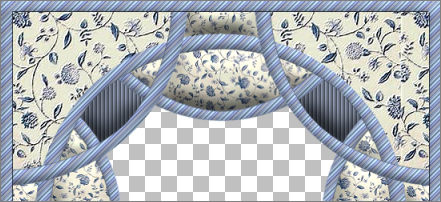
CLOSE RASTER 1
LAYERS >>> MERGE >>> MERGE VISIBLE
With your MAGIC WAND.... Same settings.
Select the CENTRE transparent area
SELECTIONS >>> MODIFY >>> EXPAND = 3
SELECTIONS >>> INVERT
LAYERS >>> NEW RASTER LAYER
LAYERS >>> ARRANGE >>> MOVE DOWN
EFFECTS >>> PLUGINS >>> EYE CANDY 3 >>> DROP SHADOW
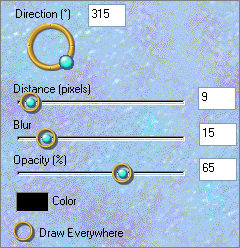
EDIT >>> Repeat Drop Shadow.. change DIRECTION to 135
DESELECT
OPEN and ACTIVATE RASTER 1
With your MAGIC WAND.... Same settings.
Select the CENTRE of the image
SELECTIONS >>> INVERT
EFFECTS >>> PLUGINS >>> EYE CANDY 3 >>> DROP SHADOW
Same settings
EDIT >>> Repeat Drop Shadow.. change DIRECTION to 315
DESELECT
LAYERS >>> MERGE >>> MERGE VISIBLE
Save as .psp image
Open up the Kat_0015.pspimage image in your PSP workspace
ACTIVATE RASTER 2
Right click on the Title Bar and select COPY from the options
Right click on the Title Bar of your frame image
and select PASTE AS NEW LAYER from the options
LAYERS >>> ARRANGE >>> MOVE DOWN
EFFECTS >>> TEXTURE EFFECTS >>> WEAVE
Both colours =
#808080
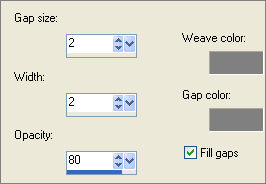
ADJUST >>> SHARPNESS >>> SHARPEN MORE
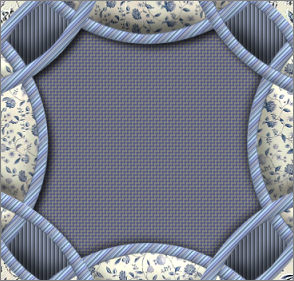
Go back to the Kat_0015.pspimage image in your PSP workspace
ACTIVATE RASTER 1
Right click on the Title Bar and select COPY from the options
Right click on the Title Bar of your frame image
and select PASTE AS NEW LAYER from the options
LAYERS >>> MERGE >>> MERGE ALL (Flatten)
Save as .jpg image
.
Testers Results
and other examples
Page designed by

for

http://www.artistrypsp.com/
Copyright ©
2000-2009 Artistry In PSP / PSP Artistry
All rights reserved.
Unless specifically made available for
download,
no graphics or text may be removed from
this site for any reason
without written permission from Artistry
In PSP / PSP Artistry
TUTORIAL
INDEX
|