PHOTO ALBUM
Page 2
This tutorial was
created by Jemima using PSP9 ~ May 2009
BUT should be creatable using all versions of PSP
Copyright © 2009 ~ Jemima
~ All rights reserved
********************************
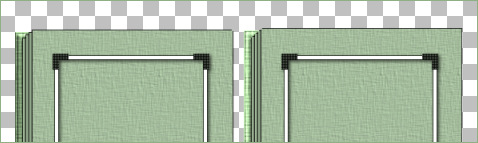
EFFECTS >>> TEXTURE EFFECTS >>> BLINDS

EFFECTS >>> TEXTURE EFFECTS >>> BLINDS
This time check "Horizontal"
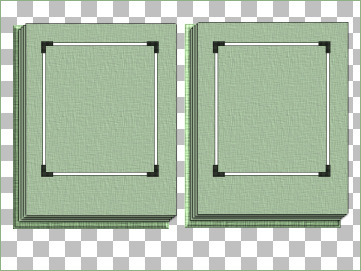
ACTIVATE RASTER 1
LAYERS >>> DUPLICATE
IMAGE >>> MIRROR
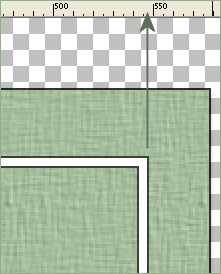
Reposition with your MOVER tool so the right edge is level with the
547 pixel mark on the top ruler.
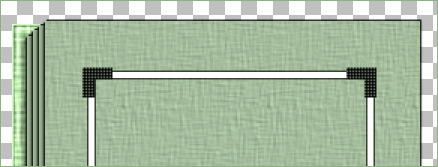
ACTIVATE RASTER 2
LAYERS >>> DUPLICATE
IMAGE >>> MIRROR
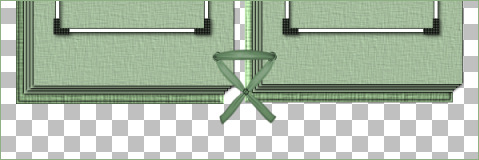
Reposition with your MOVER tool so the corners are sitting on top of the frame.
***************************************************
Close the Merged layer
LAYERS >>> MERGE >>> MERGE VISIBLE
Rename this layer Merged 2
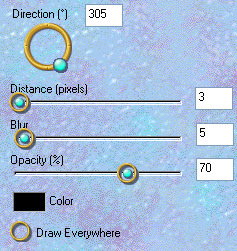
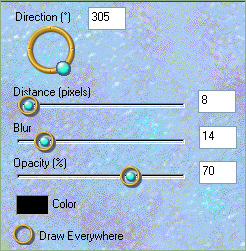
EFFECTS >>> PLUGINS >>> EYE CANDY 3 >>> DROP SHADOW
OPEN the MERGED layer
Open up the lace.pspimage image in your PSP workspace
WINDOW >>> DUPLICATE
Close the original image
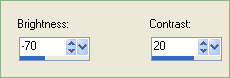
ADJUST >>> BRIGHTNESS and CONTRAST >>> BRIGHTNESS/CONTRAST
ADJUST >>> HUE & SATURATION >>> COLORIZE

Right click on the Title Bar and select COPY from the options
Right click on the Title Bar of your frame image
and select PASTE AS NEW LAYER from the options.
IMAGE >>> RESIZE = 55%
Ensure "Resize all layers" is UNCHECKED
Resample using WEIGHTED AVERAGE
ADJUST >>> SHARPNESS >>> SHARPEN
Reposition with your MOVER tool
Open up the silver tie.pspimage image in your PSP workspace
WINDOW >>> DUPLICATE
Close the original image
ADJUST >>> BRIGHTNESS and CONTRAST >>> BRIGHTNESS/CONTRAST
Same settings
ADJUST >>> HUE & SATURATION >>> COLORIZE
Same settings
Right click on the Title Bar and select COPY from the options
Right click on the Title Bar of your frame image
and select PASTE AS NEW LAYER from the options.
IMAGE >>> RESIZE = 57%
Ensure "Resize all layers" is UNCHECKED
Resample using WEIGHTED AVERAGE
ADJUST >>> SHARPNESS >>> SHARPEN
Reposition with your MOVER tool
Save as .psp image
By saving at this point it gives you the option to change the colour at any time
using
ADJUST >>> HUE & SATURATION >>> COLORIZE and you can also change the
ribbon / tie
that binds the album.
WINDOW >>> DUPLICATE
Close your saved image
I premade my photos squareish *S* so they will fit under the frame
with little distortion.... by ...
choosing your SELECTION TOOL
Selection Type = SQUARE
Mode = Replace
Feather = 0
Antialias = UNChecked
OK... let's insert the photos...
ACTIVATE the Merged 2 layer
With your MAGIC WAND
Mode = Replace
Match Mode = RGB Value
Tolerance = 0
Feather = 0
Antialias = UNchecked
Sample Merged = UNCHECKED
PSP9/X: Check CONTIGUOUS
PSPX: There is no " Sample Merged"
PSPX: Use all layers = UNChecked
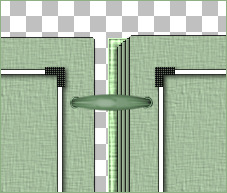
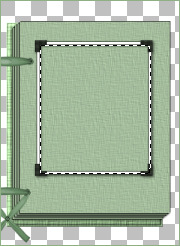
Select the CENTRE transparent area of the left frame.
SELECTIONS >>> MODIFY >>> EXPAND = 6
LAYERS >>> NEW RASTER LAYER
LAYERS >>> ARRANGE >>> MOVE DOWN
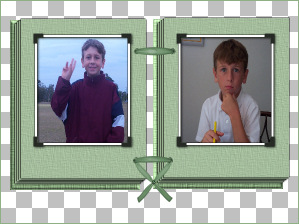
Right click on the Title Bar of your first photo and select COPY from the options
Right click on the Title Bar of your frame image
and select PASTE INTO SELECTION from the options.
DESELECT
ACTIVATE the Merged 2 layer
With your MAGIC WAND ... same settings...
Select the CENTRE transparent area of the right frame.
SELECTIONS >>> MODIFY >>> EXPAND = 6
ACTIVATE RASTER 3
Right click on the Title Bar of your second photo and select COPY from the options
Right click on the Title Bar of your frame image
and select PASTE INTO SELECTION from the options.
DESELECT
Now, if you would like to use the wordart...
ACTIVATE the top layer
Open up your selected wordart...
Right click on the Title Bar and select COPY from the options
Right click on the Title Bar of your frame image
and select PASTE AS NEW LAYER from the options.
IMAGE >>> RESIZE = 15%
(Your resize might be different depending on the original size of your wordart)
Ensure "Resize all layers" is UNCHECKED
Resample using WEIGHTED AVERAGE
Reposition with your MOVER tool
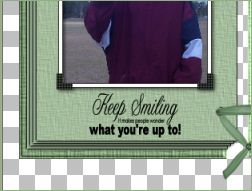
Open up your second selected wordart...
Right click on the Title Bar and select COPY from the options
Right click on the Title Bar of your frame image
and select PASTE AS NEW LAYER from the options.
IMAGE >>> RESIZE = 18%
(Your resize might be different depending on the original size of your wordart)
Ensure "Resize all layers" is UNCHECKED
Resample using WEIGHTED AVERAGE
Reposition with your MOVER tool

LAYERS >>> MERGE >>> MERGE VISIBLE
EFFECTS >>> PLUGINS >>> EYE CANDY 3 >>> DROP SHADOW
Save as .gif image
If you get a message like this...

Click YES.
OR you can save as a .PNG image
But it will be considerably larger in kbs than a .gif
That's all folks!!
Testers Results
Page designed by

for

http://www.artistrypsp.com/
Copyright ©
2000-2009 Artistry In PSP / PSP Artistry
All rights reserved.
Unless specifically made available for
download,
no graphics or text may be removed from
this site for any reason
without written permission from Artistry
In PSP / PSP Artistry
TUTORIAL
INDEX
|