SCREWS & EYELETS
PSP8/9/X
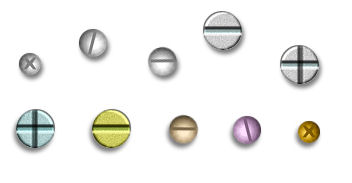
We'll create the screws first
This tutorial was
written by Jemima ~ 2008
Copyright © 2008 ~ Jemima
~ All rights reserved
********************************
This was created using PSP9 but can be adapted for other versions of PSP.
********************************
Open a new image 400 x 400
Transparent background
PSPX: Colour Depth = 8bits/channel
Flood fill with WHITE
In your MATERIALS PALETTE
Load SOLID LIGHT GREY ' #c0c0c0 ' in your foreground
Load SOLID DARK GREY ' #808080 ' in your background
LAYERS >>> NEW RASTER LAYER
Choose your SELECTION TOOL
Selection Type = CIRCLE
Mode = Replace
Feather = 1
Antialias = Checked
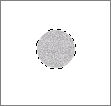
Create a small circle
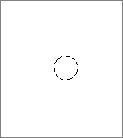
Flood fill with LIGHT GREY
To centre the image....
Right click on the Title Bar and select COPY from the options
Right click on the Title Bar and select PASTE AS NEW LAYER from the options.
DELETE RASTER 2
ACTIVATE RASTER 3
LAYERS >>> NEW RASTER LAYER
Select your TEXT tool
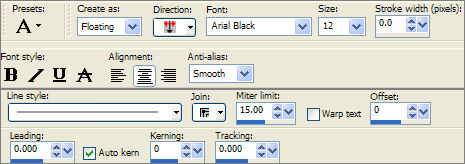
Enter the letter ' X ' (Upper case)
To centre the image....
Right click on the Title Bar and select CUT from the options
Right click on the Title Bar and select PASTE AS NEW LAYER from the options.
DELETE RASTER 2

With Raster 3 active
EFFECTS >>> 3D EFFECTS >>> INNER BEVEL
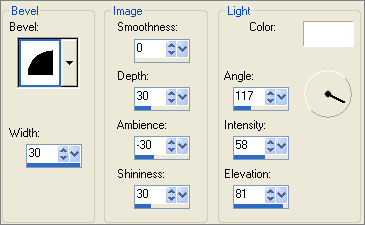
CLOSE RASTER 1
LAYERS >>> MERGE >>> MERGE VISIBLE
Rename this layer "screw 1"
ADJUST >>> SHARPNESS >>> SHARPEN
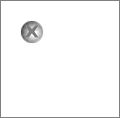
Reposition with your MOVER tool to the top left of your image
 . . 
OPEN RASTER 1
Save as screws_eyelets.psp image
************************************************************
To save your PSP from 'freezing' empty your clipboard regularly
Right click in your PSP workspace and select "Empty Clipboard" from the options
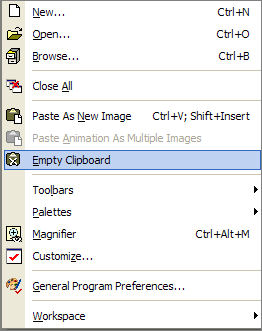
************************************************************
LAYERS >>> NEW RASTER LAYER
With your SELECTION TOOL
Same settings
Create a slightly larger circle than the last one
Flood fill with LIGHT GREY
To centre the image....
Right click on the Title Bar and select CUT from the options
Right click on the Title Bar and select PASTE AS NEW LAYER from the options.
DELETE RASTER 2
ACTIVATE RASTER 3
LAYERS >>> NEW RASTER LAYER
Select your TEXT tool
Change the SIZE to 24 or larger/smaller depending on the size of the grey dot
Enter a forward slash " / "
To centre the image....
Right click on the Title Bar and select CUT from the options
Right click on the Title Bar and select PASTE AS NEW LAYER from the options.
DELETE RASTER 2

With Raster 3 active
EFFECTS >>> 3D EFFECTS >>> INNER BEVEL
Same settings

CLOSE RASTER 1 and 'screw 1' layers
LAYERS >>> MERGE >>> MERGE VISIBLE
Rename this layer "screw 2 "
ADJUST >>> SHARPNESS >>> SHARPEN
Reposition with your MOVER tool to the top left of your image
OPEN THE 2 BOTTOM LAYERS
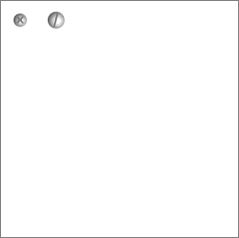
SAVE YOUR IMAGE
EMPTY YOUR CLIPBOARD
************************************************************
LAYERS >>> DUPLICATE
Reposition with your MOVER tool to the right of of 'screw 2'
IMAGE >>> ROTATE >>> FREE ROTATE = Right 75
Ensure "All layers" is UNCHECKED
ADJUST >>> BRIGHTNESS and CONTRAST >>> CLARIFY
Strength of effect = 5

Rename this layer "screw 3 "
SAVE YOUR IMAGE
************************************************************
LAYERS >>> NEW RASTER LAYER
With your SELECTION TOOL
Same settings
Starting at 200 pixels across and 200 pixels down
drag your cursor to 216 pixels across and 218 pixels down and release
Flood fill with LIGHT GREY
ADJUST >>> ADD/REMOVE NOISE >>> ADD NOISE
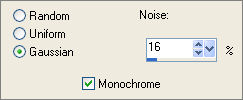 . . 
EFFECTS >>> 3D EFFECTS >>> INNER BEVEL
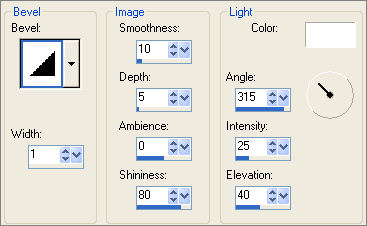
EFFECTS >>> 3D EFFECTS >>> DROP SHADOW
Vertical & Horizontal offsets = - ( minus ) 1
Colour = Black
Opacity = 60
Blur = 0
DESELECT
Choose your SELECTION TOOL then click on the CUSTOM SELECTION
symbol
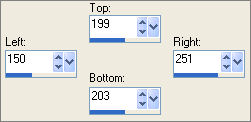

EFFECTS >>> 3D EFFECTS >>> OUTER BEVEL
COLOUR = #e3f1f1
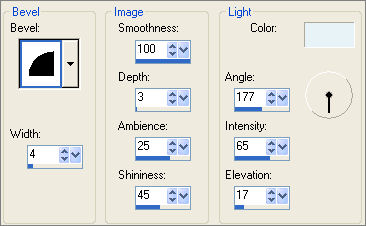
EDIT >>> Repeat Outer Bevel
DESELECT
Reposition with your MOVER tool to the right of of 'screw 3'
Rename this layer "screw 4 "
SAVE YOUR IMAGE
************************************************************
Right click on the Title Bar and select COPY from the options
Right click on the Title Bar of your
and select PASTE AS NEW LAYER from the options.
Choose your SELECTION TOOL then click on the CUSTOM SELECTION
symbol
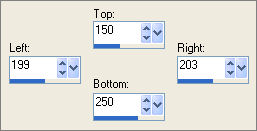
EFFECTS >>> 3D EFFECTS >>> OUTER BEVEL
COLOUR =LIGHT GREY
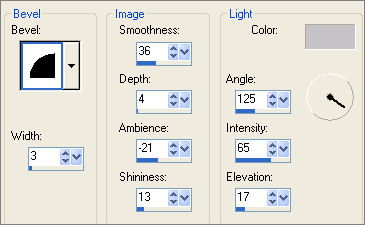
DESELECT
Reposition with your MOVER tool to the right of of 'screw 4'
Rename this layer "screw 5 "
SAVE YOUR IMAGE
************************************************************
Wheb using these scews you can play around with the colours
using
ADJUST >>> COLOUR BALANCE >>> MANUAL COLOUR CORRECTION
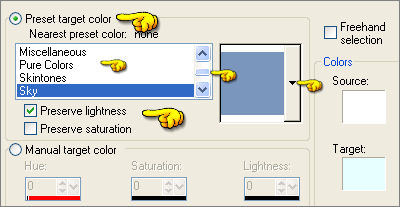
Scroll through the colour types until you find something suitable.
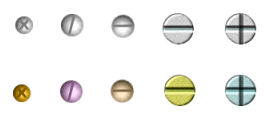
You get richer colours and more options using this rather than using the
COLOURIZE options which are limited.
************************************************************
EYELETS
Page designed by

for
http://www.artistrypsp.com/
Copyright ©
2000-2008 Artistry In PSP / PSP Artistry
All rights reserved.
Unless specifically made available for
download,
no graphics or text may be removed from
this site for any reason
without written permission from Artistry
In PSP / PSP Artistry
|