BUGS - 2
PSP8/9/X

This tutorial was
written by Jemima ~ 2008
Copyright © 2008 ~ Jemima
~ All rights reserved
********************************
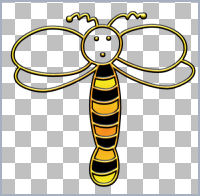
WASP ? (*S*)
This was created using PSP9 but can be adapted for other versions of PSP.
You will need the
following to complete this tutorial
Materials
RIGHT CLICK >>> SAVE TARGET AS
KF Bugs.ttf
Save to your WINDOWS >>> FONTS folder
or
to a folder where you store your extra fonts.
bhw7.PspGradient
Save to your PSP Gradients folder
** EYE CANDY3 **
http://www.pircnet.com/downloads.html
OR
http://www.fleursauvage.be/utilitaire/filtres/filtres.htm
********************************
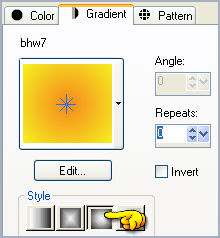
In your MATERIALS PALETTE
Load SOLID BLACK in your foreground
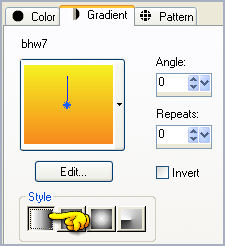
Load the ' bhw7 ' gradient in your background
using the settings below.
Open a new image 600 x 600
Transparent background
PSPX: Colour Depth = 8bits/channel
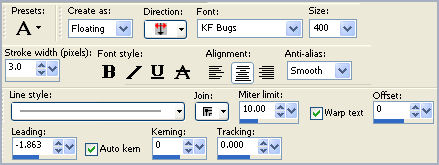
Select your TEXT tool
Locate the KF Bugs font
Use these settings
Line style = SOLID
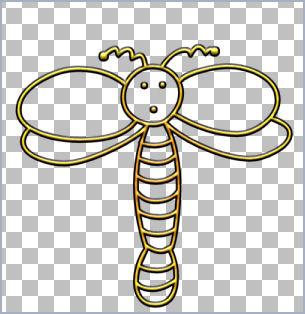
Position your cursor near the centre bottom of the blank image
and enter the letter " T "
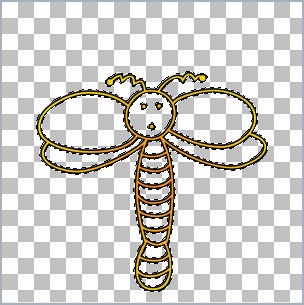
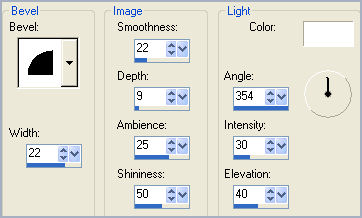
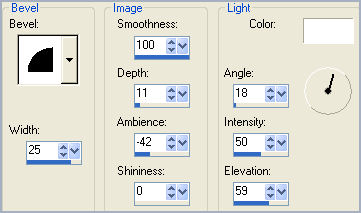
EFFECTS >>> 3D EFFECTS >>> INNER BEVEL
DESELECT
With your MAGIC WAND
Mode = Replace
Match Mode = RGB Value
Tolerance = 0
Feather = 0
Antialias = UNchecked
Sample Merged = UNCHECKED
PSP9/X: Check CONTIGUOUS
PSPX: There is no " Sample Merged"
PSPX: Use all layers = UNChecked
and while holding down your SHIFT key select the sections shown below
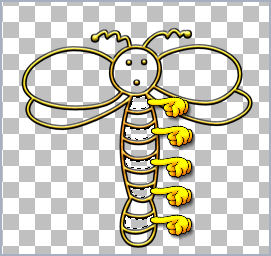
SELECTIONS >>> MODIFY >>> EXPAND = 2
LAYERS >>> NEW RASTER LAYER
LAYERS >>> ARRANGE >>> MOVE DOWN
Flood fill selected areas with BLACK
DESELECT
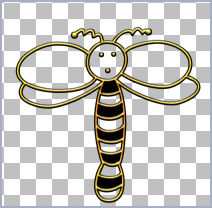
Activate Raster 1
With your MAGIC WAND
Same settings
and while holding down your SHIFT key ...
Select the other transparent areas on the body
SELECTIONS >>> MODIFY >>> EXPAND = 2
Activate Raster 2
Flood fill with the gradient
DESELECT
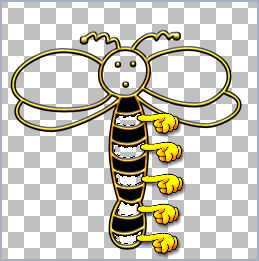
Activate Raster 1
With your MAGIC WAND
Same settings
and while holding down your SHIFT key
Select the lower 2 wings
SELECTIONS >>> MODIFY >>> EXPAND = 2
Activate Raster 2
Flood fill with the gradient
EFFECTS >>> 3D EFFECTS >>> INNER BEVEL
DESELECT

Activate Raster 1
With your MAGIC WAND
Same settings
and while holding down your SHIFT key
Select the UPPER 2 wings
SELECTIONS >>> MODIFY >>> EXPAND = 2
Activate Raster 2
In your MATERIALS PALETTE
Change the settings for the gradient
Flood fill with the gradient
EFFECTS >>> 3D EFFECTS >>> INNER BEVEL
Same settings

Activate Raster 1
With your MAGIC WAND
Same settings
Select the transparent face area..
SELECTIONS >>> INVERT
SELECTIONS >>> MODIFY >>> CONTRACT = 2
Activate Raster 2
EFFECTS >>> PLUGINS >>> EYE CANDY 3 >>> DROP SHADOW

DESELECT

LAYERS >>> MERGE >>> MERGE VISIBLE
Choose your SELECTION TOOL
Selection Type = Rectangle
Mode = Replace
Feather = 0
Antialias = UNChecked
Section off the excess transparent area
IMAGE >>> CROP TO SELECTION
Save as .psp image
BUGS 3
Page designed by

for
http://www.artistrypsp.com/
Copyright ©
2000-2008 Artistry In PSP / PSP Artistry
All rights reserved.
Unless specifically made available for
download,
no graphics or text may be removed from
this site for any reason
without written permission from Artistry
In PSP / PSP Artistry
|