BUGS~1
PSP8/9/X

This tutorial was
written by Jemima ~ 2008
Copyright © 2008 ~ Jemima
~ All rights reserved
********************************
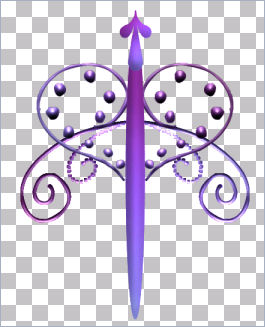
DRAGONFLY
This was created using PSP9 but can be adapted for other versions of PSP.
You will need the
following to complete this tutorial
Materials
RIGHT CLICK >>> SAVE TARGET AS
JSC_Iris.PspGradient
Save to your PSP Gradients folder
yezdoodles51.psp
Save to a folder on your computer
SK Random 91.PspShape
Save to your PSP Shapes folder
********************************
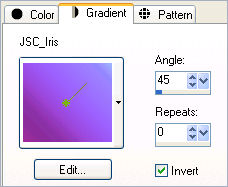
In your MATERIALS PALETTE
Load the ' JSCIris ' Gradient in your foreground
AND background

Open a new image 450 x 550
Transparent background
PSPX: Colour Depth = 8bits/channel
Open up the yezdoodles51.psp image in your PSP workspace
and activate raster 8
Right click on the Title Bar and select COPY from the options
Activate your new blank image
VIEW >>> Change Grid, Guide & Snap Properties
Use these GRID settings

VIEW >>> GRID
Right click on the Title Bar of your blank image
and select PASTE AS NEW LAYER from the options.
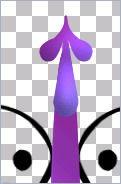
IMAGE >>> FLIP
Reposition with your MOVER tool
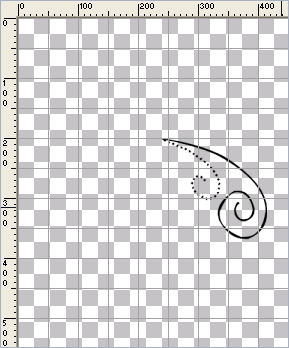
LAYERS >>> DUPLICATE (Twice)
Close Raster 1
LAYERS >>> MERGE >>> MERGE VISIBLE
LAYERS >>> DUPLICATE
IMAGE >>> MIRROR
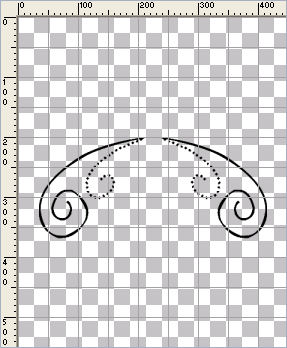
LAYERS >>> MERGE >>> MERGE VISIBLE
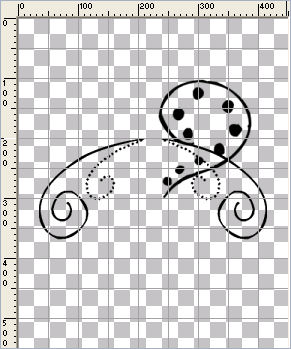
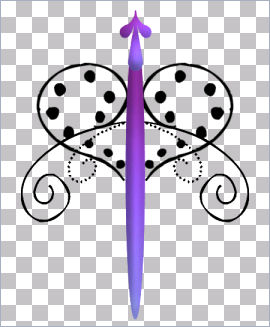
Go back to the yezdoodles51.psp image in your PSP workspace
and activate raster 9
Right click on the Title Bar and select COPY from the options
Right click on the Title Bar of your dragonfly image
and select PASTE AS NEW LAYER from the options.
Reposition with your MOVER tool
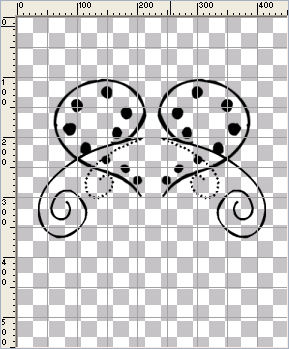
LAYERS >>> DUPLICATE
IMAGE >>> MIRROR
Close the Merged layer
LAYERS >>> MERGE >>> MERGE VISIBLE
Rename this Merged 2
Open the Merged layer
With the Merged 2 layer active
LAYERS >>> NEW RASTER LAYER
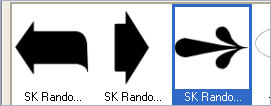
Select your PRESET SHAPE TOOL
BUTTON 012
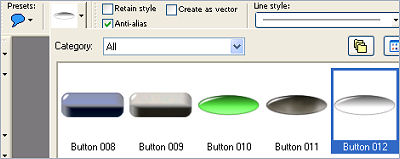
Use these settings
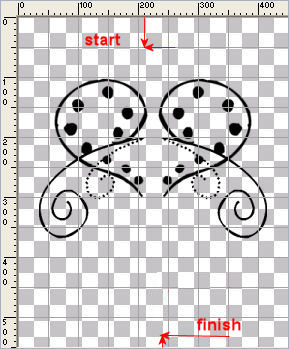
Place your cursor on the top line of the grid - 210 pixels from the left
and drag down and to the right to the 2nd bottom grid line
240 pixels from the left.
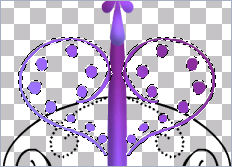
LAYERS >>> NEW RASTER LAYER
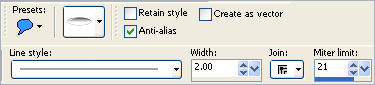
Select your PRESET SHAPE TOOL
Same settings
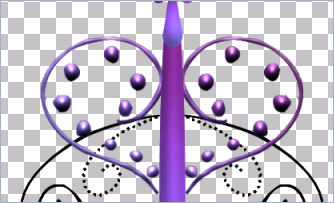
SK Random 91
Draw the shape as shown below
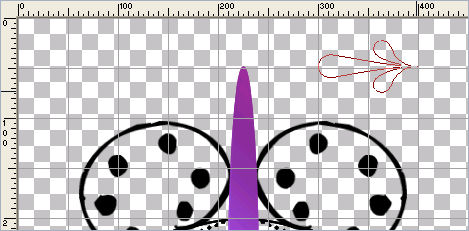

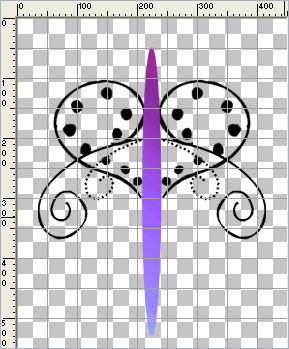
IMAGE >>> ROTATE >>> FREE ROTATE = left 90
Ensure "All layers" is UNCHECKED
VIEW >>> GRID (to turn off grid)
Reposition with your MOVER tool
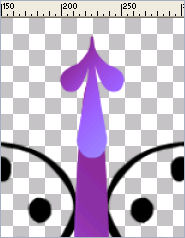
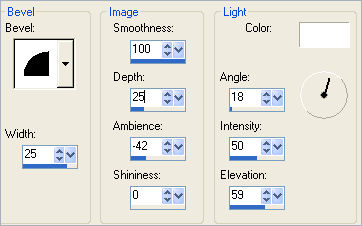
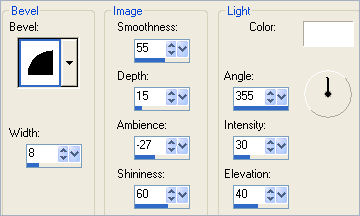
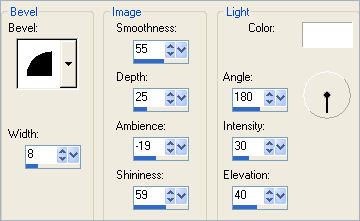
EFFECTS >>> 3D EFFECTS >>> INNER BEVEL
 . . 
Activate Raster 2
EFFECTS >>> 3D EFFECTS >>> INNER BEVEL
Same settings
Activate the Merged 2 layer
SELECTIONS >>> SELECT ALL
SELECTIONS >>> FLOAT
Select your AIRBRUSH tool
PRESET = + Round 50
Airbrush the selected area
EFFECTS >>> 3D EFFECTS >>> INNER BEVEL
DESELECT
Activate the Merged layer
SELECTIONS >>> SELECT ALL
SELECTIONS >>> FLOAT
SELECTIONS >>> DEFLOAT
SELECTIONS >>> MODIFY >>> EXPAND = 1
In your MATERIALS PALETTE foreground Gradient
Check INVERT
Select your AIRBRUSH tool
Same settings
Airbrush the selected area with the foreground gradient
EFFECTS >>> 3D EFFECTS >>> INNER BEVEL
DESELECT
LAYERS >>> MERGE >>> MERGE VISIBLE
Save as .psp image
BUGS 2
Page designed by

for
http://www.artistrypsp.com/
Copyright ©
2000-2008 Artistry In PSP / PSP Artistry
All rights reserved.
Unless specifically made available for
download,
no graphics or text may be removed from
this site for any reason
without written permission from Artistry
In PSP / PSP Artistry
|