XMAS 1 ~ 2008 FRAME
PSP8/9/X

This tutorial was written by Jemima ~ July 2007
Copyright © 2007/8 ~ Jemima ~ All rights reserved
********************************
You will need the
following to complete this tutorial
Materials
Right click and SAVE TARGET AS
Tile71-original.jpg
Save to your PSP Textures folder
goldfill1
Save to your PSP Patterns folder
x9034.jpg
jcc-WhitePointsiettas-11-05.psp
rw-poinsettia01.psp
pp_frostysundaymorning_ve.psp
Save to a folder on your computer
Plugins
** EYE CANDY3 **
http://www.pircnet.com/downloads.html
********************************
REMEMBER TO SAVE YOUR WORK OFTEN
********************************
In your MATERIALS PALETTE
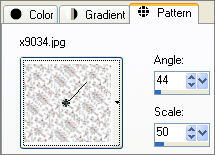
Load the ' x9034 ' pattern in your foreground,
using the settings below.
Load SOLID GREEN' #004000 ' in your background
Open a new image 550 x 400
Transparent background
PSPX: Colour Depth = 8bits/channel
Choose your SELECTION TOOL
Selection Type = Rectangle
Mode = ELLIPSE
Feather = 1
Antialias = Checked
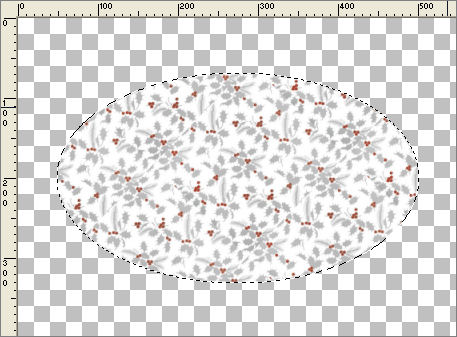
Starting at 200 pixels down and 275 pixels across, draw an ellipse.
finishing at 330 pixels down and 500 pixels across
Flood fill with the ' x9034 ' pattern
DESELECT
With your SELECTION TOOL, same settings.
Starting at 200 pixels down and 200 pixels across, draw an ellipse.
finishing at 300 pixels down and 420 pixels across
EDIT >>> CLEAR
DESELECT
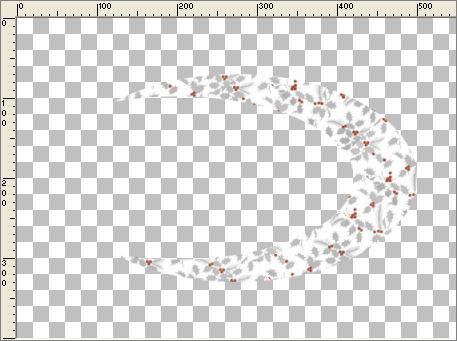
EFFECTS >>> EDGE >>> ENHANCE
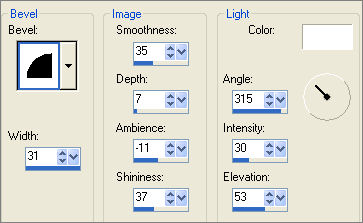
EFFECTS >>> 3D EFFECTS >>> INNER BEVEL
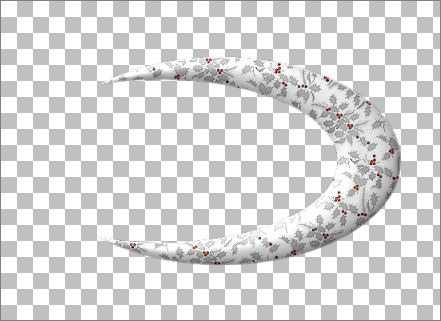
LAYERS >>> DUPLICATE
IMAGE >>> MIRROR
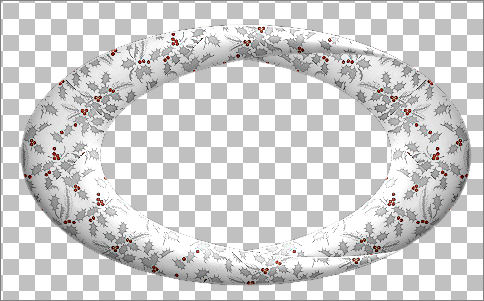
LAYERS >>> MERGE >>> MERGE VISIBLE
With your MAGIC WAND
Mode = Replace
Match Mode = RGB Value
Tolerance = 0
Feather = 0
Antialias = UNchecked
Sample Merged = UNCHECKED
PSP9/X: Check CONTIGUOUS
PSPX: There is no " Sample Merged"
PSPX: Use all layers = UNChecked
Select the OUTER transparent area
SELECTIONS >>> INVERT
SELECTIONS >>> MODIFY >>> CONTRACT = 4
SELECTIONS >>> INVERT
LAYERS >>> NEW RASTER LAYER
LAYERS >>> ARRANGE >>> MOVE DOWN
Flood fill with the SOLID GREEN' #004000 '
EFFECTS >>> TEXTURE EFFECTS >>> TEXTURE
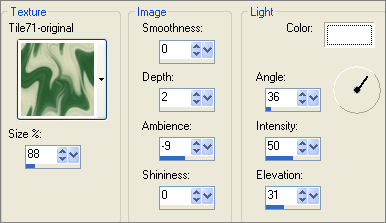
EFFECTS >>> EDGE EFFECTS >>> ENHANCE
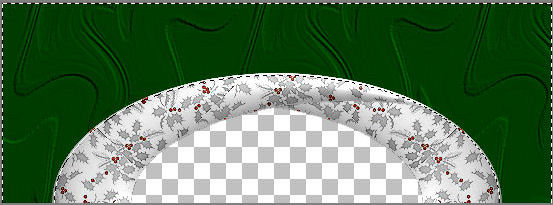
SELECTIONS >>> INVERT
LAYERS >>> NEW RASTER LAYER
EFFECTS >>> PLUGINS >>> EYE CANDY 3 >>> DROP SHADOW
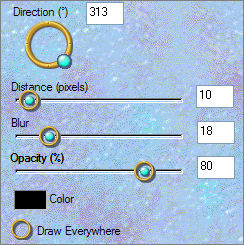 . .
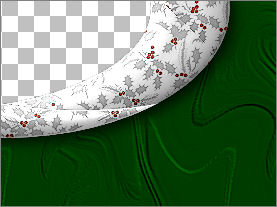
DESELECT
In your MATERIALS PALETTE load
" goldfill1 "
pattern in the background using these settings
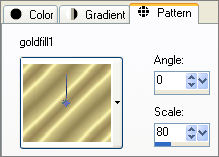
ACTIVATE THE MERGED LAYER
With your MAGIC WAND
Feather = 1
Antialias = Checked
PSP9/X: Antialias = Checked (Inside)
Select the CENTRE transparent area
SELECTIONS >>> MODIFY >>> EXPAND = 2
LAYERS >>> NEW RASTER LAYER
LAYERS >>> ARRANGE >>> MOVE DOWN
Flood fill with " goldfill1 " pattern
SELECTIONS >>> MODIFY >>> CONTRACT = 8
EDIT >>> CLEAR
DESELECT
EFFECTS >>> 3D EFFECTS >>> INNER BEVEL
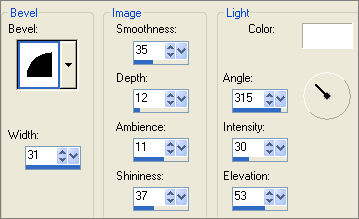
With your MAGIC WAND
Same settings
Select the CENTRE transparent area
SELECTIONS >>> MODIFY >>> EXPAND = 2
SELECTIONS >>> INVERT
LAYERS >>> NEW RASTER LAYER
LAYERS >>> ARRANGE >>> MOVE DOWN
EFFECTS >>> PLUGINS >>> EYE CANDY 3 >>> DROP SHADOW
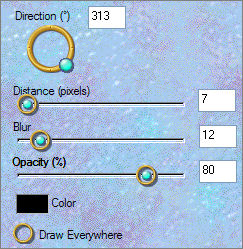
DESELECT
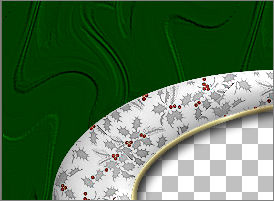
LAYERS >>> MERGE >>> MERGE VISIBLE
LAYERS >>> NEW RASTER LAYER
SELECTIONS >>> SELECT ALL
SELECTIONS >>> MODIFY >>> CONTRACT = 20
SELECTIONS >>> INVERT
Flood fill with the ' x9034 ' pattern
EFFECTS >>> EDGE EFFECTS >>> ENHANCE
SELECTIONS >>> MODIFY >>> CONTRACT = 3
EDIT >>> CLEAR
SELECTIONS >>> MODIFY >>> CONTRACT = 3
Flood fill with the ' x9034 ' pattern
EFFECTS >>> EDGE EFFECTS >>> ENHANCE
DESELECT
EFFECTS >>> 3D EFFECTS >>> DROP SHADOW
Vertical & Horizontal offsets = 1
Colour = Black
Opacity = 60
Blur = 0
Repeat Drop Shadow effect changing
Vertical & Horizontal Offsets to - ( minus ) 1
Click OK
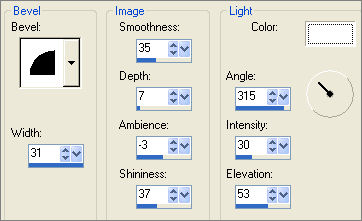
EFFECTS >>> 3D EFFECTS >>> INNER BEVEL
Same settings
EDIT >>> Repeat Inner Bevel
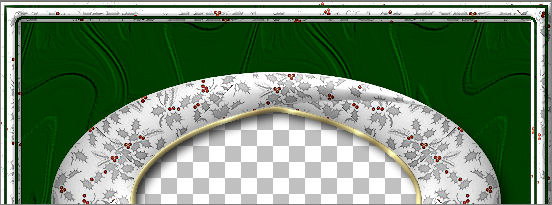
Open up the " jcc-WhitePointsiettas-11-05.psp "image in your PSP workspace
Right click on the Title Bar and select COPY from the options
Go to your frame image ...
Right click on the Title Bar
and select PASTE AS NEW LAYER from the options.
IMAGE >>> RESIZE = 50%
Ensure "Resize all layers" is UNCHECKED
EFFECTS >>> EDGE EFFECTS >>> ENHANCE
EFFECTS >>> 3D EFFECTS >>> INNER BEVEL
Reposition with your MOVER tool to the bottom left corner.
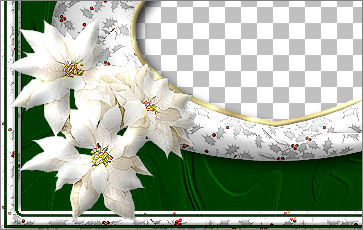
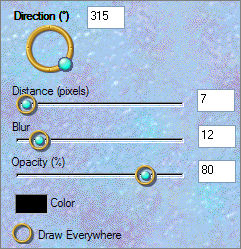
EFFECTS >>> PLUGINS >>> EYE CANDY 3 >>> DROP SHADOW
Open up the " rw-poinsettia.psp "image in your PSP workspace
Right click on the Title Bar and select COPY from the options
Go to your frame image ... Right click on the Title Bar
and select PASTE AS NEW LAYER from the options.
IMAGE >>> RESIZE = 32%
Ensure "Resize all layers" is UNCHECKED
EFFECTS >>> EDGE EFFECTS >>> ENHANCE
EFFECTS >>> 3D EFFECTS >>> INNER BEVEL
same settings
EFFECTS >>> PLUGINS >>> EYE CANDY 3 >>> DROP SHADOW
same settings
Reposition with your MOVER tool to the top right corner.
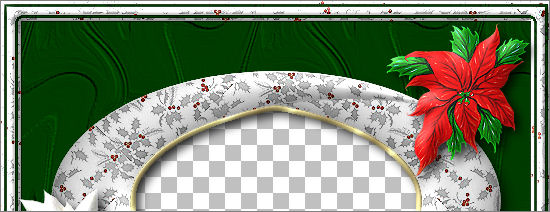
LAYERS >>> MERGE >>> MERGE VISIBLE
Save as .psp image
With your MAGIC WAND
Same settings
Select the CENTRE transparent area... hold down your SHIFT key to pick up the shadowed area
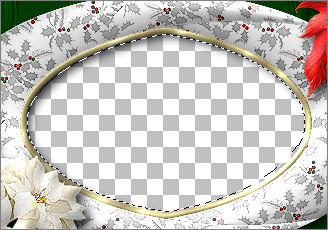
SELECTIONS >>> MODIFY >>> EXPAND = 10
LAYERS >>> NEW RASTER LAYER
LAYERS >>> ARRANGE >>> MOVE DOWN
Flood fill with WHITE
LAYERS >>> NEW RASTER LAYER
Open up the " pp_frostysundaymorning_ve.psp "image in your PSP workspace
Right click on the Title Bar and select COPY from the options
Go to your frame image ...
Right click on the Title Bar
and select PASTE INTO SELECTION from the options.
DESELECT
LAYERS >>> MERGE >>> MERGE ALL (Flatten)
IMAGE >>> ADD BORDERS = 1 SYMMETRIC
COLOUR = BLACK
Save as .jpg image
Page designed by

for

http://www.artistrypsp.com/
Copyright ©
2000-2008 Artistry In PSP / PSP Artistry
All rights reserved.
Unless specifically made available for
download,
no graphics or text may be removed from
this site for any reason
without written permission from Artistry
In PSP / PSP Artistry
TUTORIAL
INDEX
|