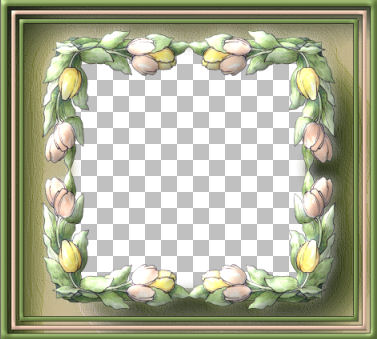
Porcelain Tulips
PSP8/9/X

This tutorial was written by Jemima ~ April 2007
Copyright © 2007/8 ~ Jemima ~ All rights reserved
Tested successfully with PSPXII
********************************
You will need the
following to complete this tutorial
Materials
Right click and SAVE TARGET AS
reading_sug.psp
Tulips j_Shelly_Reeves_Smith_ nm tinytube.psp
Save to a folder on your computer
Plugins
** EYE CANDY3 **
http://www.chezkiki.com/les_filtres.htm
OR
http://www.pircnet.com/downloads.html
** SIMPLE FILTERS **
download
XERO
( you may as well download all sets since you'll probably use them)
Xeroset 1
Xeroset 2
Xeroset 3
Xeroset 4
OR
http://www.photoshop-filters.com/html/xero.htm
OR
http://www.xero-graphics.co.uk/
Click on DOWNLOADS link
********************************
REMEMBER TO SAVE YOUR WORK OFTEN
********************************
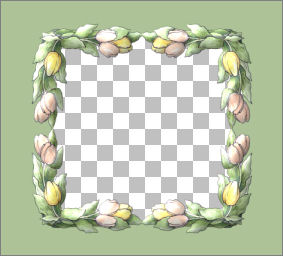
Open a new image 470 x 425
Transparent background
PSPX: Colour Depth = 8bits/channel
Open " Tulips j_Shelly_Reeves_Smith_ nm tinytub " in your PSP workspace
WINDOW >>> DUPLICATE
Close the original Image
IMAGE >>> RESIZE = 28%
Ensure "Resize all layers" is UNCHECKED
RESAMPLE using "WEIGHTED AVERAGE"
Right click on the Title Bar and select COPY from the options
Go to your frame image
Right click on the Title Bar
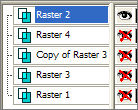
and select PASTE AS NEW LAYER from the options. Raster 2
(Minimize the tube... we will be using it again later)
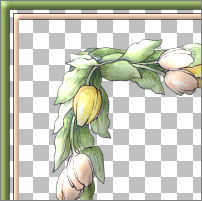
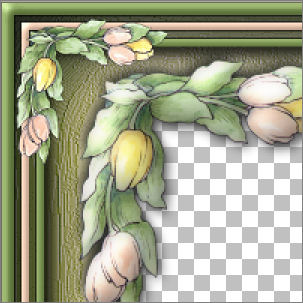
VIEW >>> Change Grid, Guide & Snap Properties
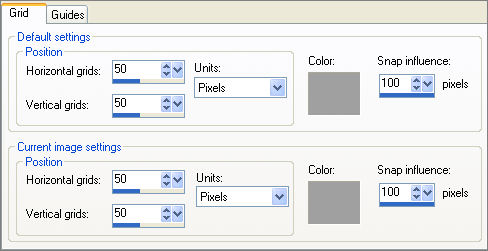
Make sure SNAP TO GRID is turned off

VIEW >>> GRID
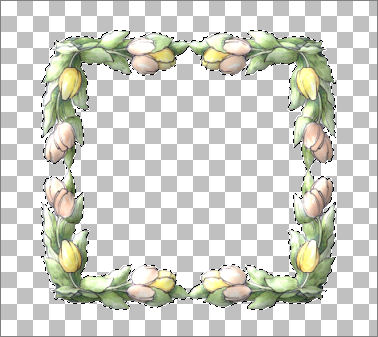
Reposition corner as shown below
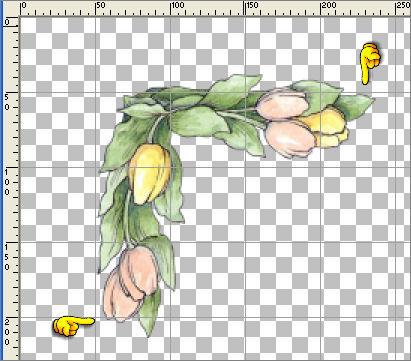
VIEW >>> GRID (To turn off Grid)
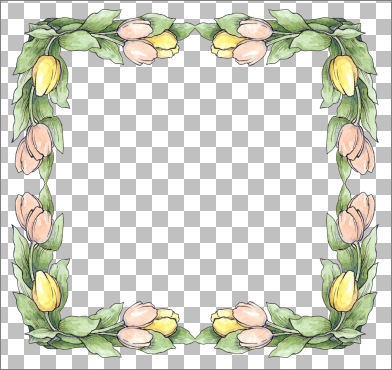
EFFECTS >>> PLUGINS >>> SIMPLE >>> TOP LEFT MIRROR
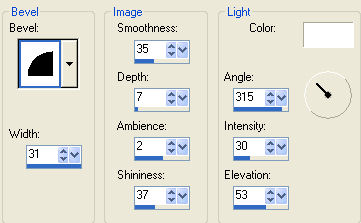
EFFECTS >>> 3D EFFECTS >>> INNER BEVEL
Load GREEN " #adc297 " in your foreground MATERIALS PALETTE
Load PINK " #dcb9a1 " in your background MATERIALS PALETTE
With your MAGIC WAND
Mode = Replace
Match Mode = RGB Value
Tolerance = 0
Feather = 0
Antialias = UNchecked
Sample Merged = UNCHECKED
PSP9/X: Check CONTIGUOUS
PSPX: There is no " Sample Merged"
PSPX: Use all layers = UNChecked
Select the transparent area outside the tulip frame.
SELECTIONS >>> MODIFY >>> EXPAND = 3
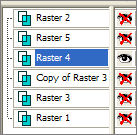
LAYERS >>> NEW RASTER LAYER Raster 3
LAYERS >>> ARRANGE >>> MOVE DOWN
Flood fill with the GREEN
DESELECT
LAYERS >>> NEW RASTER LAYER Raster 4
On your LAYER PALETTE close Raster 3
SELECTIONS >>> SELECT ALL
SELECTIONS >>> MODIFY >>> CONTRACT = 6
SELECTIONS >>> INVERT
Flood fill with the DARK GREEN " #728c49 "
EFFECTS >>> 3D EFFECTS >>> INNER BEVEL
Same settings
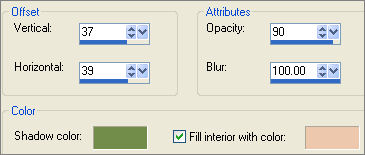
EFFECTS >>> 3D EFFECTS >>> DROP SHADOW
Vertical & Horizontal offsets = 1
Colour = Black
Opacity = 60
Blur = 0
Repeat Drop Shadow effect changing
Vertical & Horizontal Offsets to - ( minus ) 1
Click OK
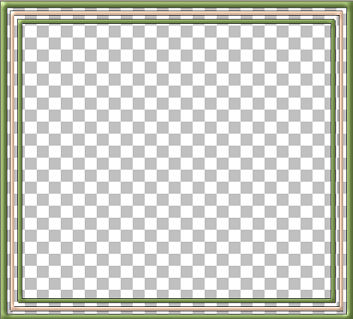
SELECTIONS >>> INVERT
SELECTIONS >>> MODIFY >>> CONTRACT = 5
Flood fill with PINK " #dcb9a1 "
SELECTIONS >>> MODIFY >>> CONTRACT = 5
EDIT >>> CLEAR
DESELECT
With your MAGIC WAND
Same settings
Select the PINK border
EFFECTS >>> 3D EFFECTS >>> INNER BEVEL
Same settings
EFFECTS >>> 3D EFFECTS >>> DROP SHADOW
Use the same settings
Click OK
Repeat Drop Shadow effect changing
Vertical & Horizontal Offsets to - ( minus ) 1
Click OK
DESELECT
With your MAGIC WAND
Same settings
Select the centre transparent area Inside the PINK border
SELECTIONS >>> MODIFY >>> CONTRACT = 5
Flood fill with DARK GREEN " #728c49 "
SELECTIONS >>> MODIFY >>> CONTRACT = 5
EDIT >>> CLEAR
DESELECT
With your MAGIC WAND
Same settings
Select the GREEN border
EFFECTS >>> 3D EFFECTS >>> INNER BEVEL
Same settings
EFFECTS >>> 3D EFFECTS >>> DROP SHADOW
Use the same settings
Click OK
Repeat Drop Shadow effect changing
Vertical & Horizontal Offsets to - ( minus ) 1
Click OK
DESELECT
On your LAYER PALETTE open and activate Raster 3
EFFECTS >>> TEXTURE EFFECTS >>> FINE LEATHER
EFFECTS >>> EDGE EFFECTS >>> ENHANCE
LAYERS >>> DUPLICATE (Copy of Raster 3)
EFFECTS >>> 3D EFFECTS >>> CUTOUT
SHADOW COLOUR = DARK GREEN " #728c49 "
INTERIOR COLOUR
= PINK " #dcb9a1 "
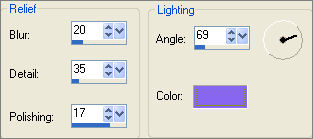
EFFECTS >>> TEXTURE EFFECTS >>> POLISHED STONE
Colour - " #8866f1 "
ADJUST >>> SHARPNESS >>> SHARPEN MORE
Activate Raster 2 and CLOSE all other layers
Choose your SELECTION TOOL
Selection Type = Rectangle
Mode = Replace
Feather = 0
Antialias = Checked
Draw a rectangle around the outside of the tulip frame then...
click inside the frame to select
SELECTION >>> DEFLOAT
SELECTIONS >>> MODIFY >>> CONTRACT = 2
LAYERS >>> NEW RASTER LAYER Raster 5
LAYERS >>> ARRANGE >>> MOVE DOWN
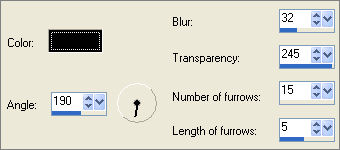
EFFECTS >>> PLUGINS >>> EYE CANDY 3 >>> DROP SHADOW
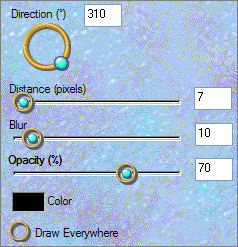
REPEAT Drop Shadow changing DIRECTION to 125
DESELECT
Activate Raster 2
EFFECTS >>> PLUGINS >>> XERO >>>PORCELAIN
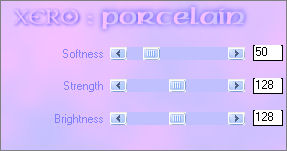
Click OK
Open and Activate
Raster 4... close all other layers
 .. .. 
With your MAGIC WAND
Same settings
Select the INNER transparent area
SELECTIONS >>> INVERT
EFFECTS >>> PLUGINS >>> EYE CANDY 3 >>> DROP SHADOW
Same settings
REPEAT Drop Shadow changing DIRECTION to 310
DESELECT
Open all layers and activate Raster 2
Maximise the duplicate copy of the
" Tulips j_Shelly_Reeves_Smith_ nm tinytub " in your PSP workspace
IMAGE >>> RESIZE = 55%
Ensure "Resize all layers" is UNCHECKED
ADJUST >>> SHARPNESS >>> SHARPEN
Right click on the Title Bar and select COPY from the options
Go to your frame image
Right click on the Title Bar
and select PASTE AS NEW LAYER from the options.
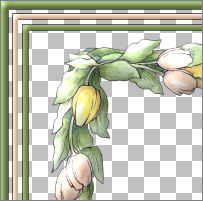
Reposition with your MOVER tool as shown below
EFFECTS >>> 3D EFFECTS >>> INNER BEVEL
same settings
EFFECTS >>> PLUGINS >>> EYE CANDY 3 >>> DROP SHADOW
Same settings .. DIRECTION = 310
EFFECTS >>> PLUGINS >>> SIMPLE >>> TOP LEFT MIRROR
Save as .psp image
Activate Raster 1
Flood fill with WHITE
Open the " reading_sug.psp " tube in your PSP workspace
Right click on the Title Bar and select COPY from the options
Go to your frame image
Right click on the Title Bar
and select PASTE AS NEW LAYER from the options.
IMAGE >>> RESIZE = 40%
Ensure "Resize all layers" is UNCHECKED
LAYERS >>> MERGE >>> MERGE ALL (Flatten)
Save as .jpg image
TESTERS RESULTS
Page designed by

for

http://www.artistrypsp.com/
Copyright ©
2000-2008 Artistry In PSP / PSP Artistry
All rights reserved.
Unless specifically made available for
download,
no graphics or text may be removed from
this site for any reason
without written permission from Artistry
In PSP / PSP Artistry
TUTORIAL
INDEX
|