OVAL PRINT FRAME
PSP8/9/X

This tutorial was written by Jemima ~ July 2007
Copyright © 2007/8 ~ Jemima ~ All rights reserved
********************************
You will need the
following to complete this tutorial
Materials
Right click and SAVE TARGET AS
Large_UB-715
Save to your PSP Patterns folder
mqc Moss.jgd
Save to your PSP Gradients folder
Seignac_Guillaume_Virginite.jpg
Save to a folder on your computer
Plugins
** EYE CANDY3 **
http://www.pircnet.com/downloads.html
********************************
REMEMBER TO SAVE YOUR WORK OFTEN
********************************
In your MATERIALS PALETTE
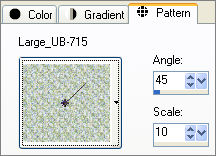
Load the ' Large_UB-715 ' Pattern in your foreground
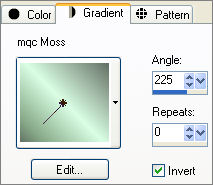
Load the ' mqc Moss ' Gradient in your background
using the settings below.
Load SOLID GREEN ' #91aa96 ' in your background
 . . 
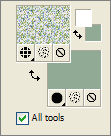
Activate the background gradient
Open a new image 450 x 600
Transparent background
PSPX: Colour Depth = 8bits/channel
Choose your SELECTION TOOL
Selection Type = Ellipse
Mode = Replace
Feather = 1
Antialias = Checked
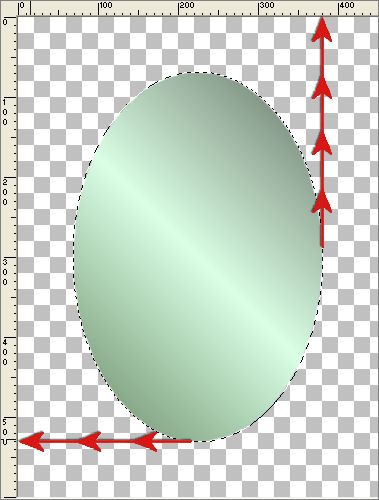
Starting at position 225 across, 300 down,
draw an ellipse finishing at 380 across, 520 down.
Flood fill with the gradient
SELECTIONS >>> MODIFY >>> CONTRACT = 25
EDIT >>> CLEAR
DESELECT
EFFECTS >>> 3D EFFECTS >>> INNER BEVEL
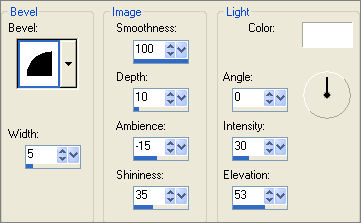
IMAGE >>> RESIZE = 90%
Ensure "Resize all layers" is UNCHECKED
Now to make sure the oval is in the exact centre....
Right click on the Title Bar and select COPY from the options
Right click on the Title Bar
and select PASTE AS NEW LAYER from the options.
ACTIVATE RASTER 1
EDIT >>> CLEAR
ACTIVATE RASTER 2
LAYERS >>> DUPLICATE
IMAGE >>> RESIZE = 90%
Ensure "Resize all layers" is UNCHECKED
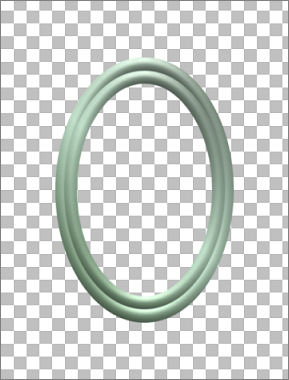
CLOSE RASTER 1
LAYERS >>> MERGE >>> MERGE VISIBLE
With your MAGIC WAND
Mode = Replace
Match Mode = RGB Value
Tolerance = 0
Feather = 0
Antialias = UNchecked
Sample Merged = UNCHECKED
PSP9/X: Check CONTIGUOUS
PSPX: There is no " Sample Merged"
PSPX: Use all layers = UNChecked
Select the OUTER transparent area
SELECTIONS >>> INVERT
SELECTIONS >>> MODIFY >>> CONTRACT = 6
SELECTIONS >>> INVERT
OPEN & ACTIVATE RASTER 1
Flood fill with SOLID GREEN
EFFECTS >>> TEXTURE EFFECTS >>> FINE LEATHER
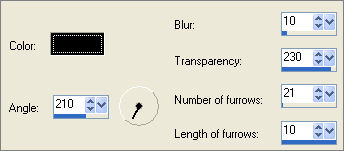
ADJUST >>> SHARPNESS >>> SHARPEN
SELECTIONS >>> INVERT
ACTIVATE THE MERGED LAYER
LAYERS >>> NEW RASTER LAYER
LAYERS >>> ARRANGE >>> MOVE DOWN
EFFECTS >>> PLUGINS >>> EYE CANDY 3 >>> DROP SHADOW
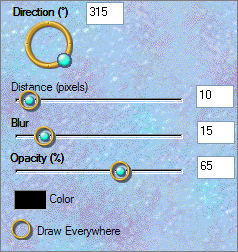
EFFECTS >>> PLUGINS >>> EYE CANDY 3 >>> DROP SHADOW
Change DIRECTION = 135
DESELECT
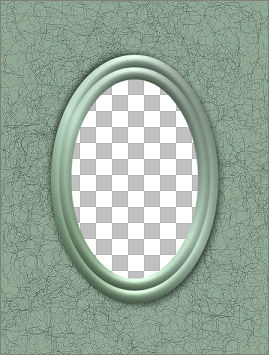
Choose your SELECTION TOOL then click on the CUSTOM SELECTION
symbol
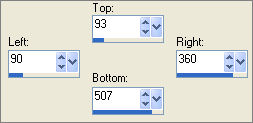
LAYERS >>> NEW RASTER LAYER
LAYERS >>> ARRANGE >>> MOVE DOWN
Flood fill with the pattern
DESELECT
ACTIVATE THE MERGED LAYER
With your MAGIC WAND
Same settings
Select the CENTRE of the image
SELECTIONS >>> MODIFY >>> EXPAND = 6
ACTIVATE RASTER 3
EDIT >>> CLEAR
DESELECT
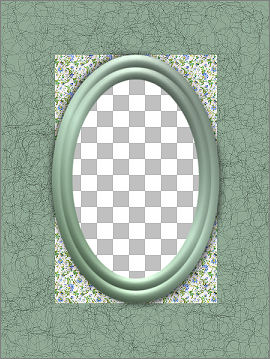
ADJUST >>> SHARPNESS >>> SHARPEN
EFFECTS >>> 3D EFFECTS >>> INNER BEVEL
Same settings
EFFECTS >>> 3D EFFECTS >>> DROP SHADOW
Vertical & Horizontal offsets = 1
Colour = Black
Opacity = 60
Blur = 0
Repeat Drop Shadow effect changing
Vertical & Horizontal Offsets to - ( minus ) 1
Click OK
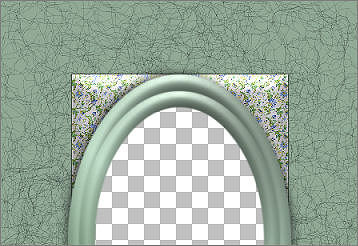
LAYERS >>> NEW RASTER LAYER
LAYERS >>> ARRANGE >>> BRING TO TOP
SELECTIONS >>> SELECT ALL
Flood fill with solid green
SELECTIONS >>> MODIFY >>> CONTRACT = 10
EDIT >>> CLEAR
SELECTIONS >>> INVERT
EFFECTS >>> 3D EFFECTS >>> INNER BEVEL
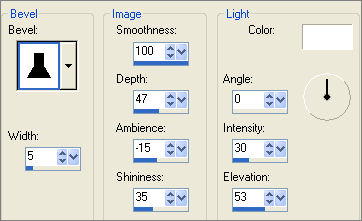
EFFECTS >>> 3D EFFECTS >>> DROP SHADOW
Use the same settings
Click OK
Repeat Drop Shadow effect changing
Vertical & Horizontal Offsets to 1
Click OK
DESELECT
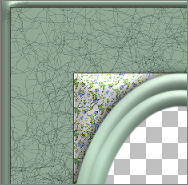
LAYERS >>> DUPLICATE
IMAGE >>> RESIZE = 97%
Ensure "Resize all layers" is UNCHECKED
LAYERS >>> ARRANGE >>> MOVE DOWN
ADJUST >>> SHARPNESS >>> SHARPEN |
|
| |
LAYERS >>> DUPLICATE
IMAGE >>> RESIZE = 97%
Ensure "Resize all layers" is UNCHECKED
LAYERS >>> ARRANGE >>> MOVE DOWN
ADJUST >>> SHARPNESS >>> SHARPEN |
|
CLOSE LAYERS shown below
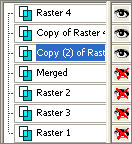 . . 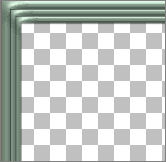
LAYERS >>> MERGE >>> MERGE VISIBLE
Then close this layer
OPEN & Activate the lower merged layer and OPEN Raster 3
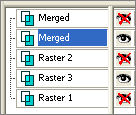
LAYERS >>> MERGE >>> MERGE VISIBLE
Rename this layer "Merged 2"
OPEN ALL layers EXCEPT Raster 1
Still on the "Merged 2" layer
LAYERS >>> NEW RASTER LAYER
Choose your SELECTION TOOL then click on the CUSTOM SELECTION
symbol

Flood fill with the pattern
ADJUST >>> SHARPNESS >>> SHARPEN MORE
SELECTIONS >>> MODIFY >>> CONTRACT = 30
EDIT >>> CLEAR
DESELECT
EFFECTS >>> 3D EFFECTS >>> INNER BEVEL
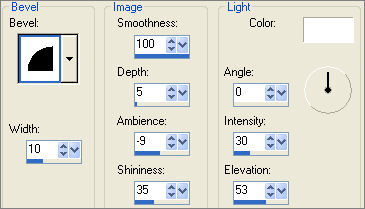
EFFECTS >>> 3D EFFECTS >>> DROP SHADOW
Use the same settings
Click OK
Repeat Drop Shadow effect changing
Vertical & Horizontal Offsets to 1
Click OK
OPEN Raster 1
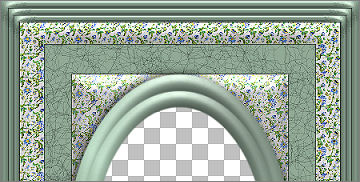
With Raster 3 active... and...
with your MAGIC WAND
Same settings
Select the CENTRE transparent area
LAYERS >>> NEW RASTER LAYER
Flood fill with SOLID GREEN
SELECTIONS >>> MODIFY >>> CONTRACT = 10
EDIT >>> CLEAR
DESELECT
EFFECTS >>> 3D EFFECTS >>> INNER BEVEL

EFFECTS >>> 3D EFFECTS >>> DROP SHADOW
Use the same settings
Click OK
Repeat Drop Shadow effect changing
Vertical & Horizontal Offsets to 1
Click OK
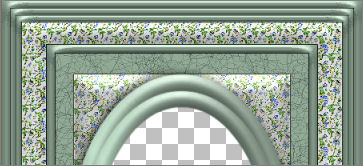
ADJUST >>> SHARPNESS >>> SHARPEN
LAYERS >>> DUPLICATE (TWICE)
ACTIVATE RASTER 4
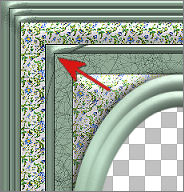
EFFECTS>>> GEOMETRIC EFFECTS >>> SPHERIZE

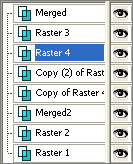
Rearrange the layers in the order shown below
 . . 
EFFECTS >>> PLUGINS >>> EYE CANDY 3 >>> DROP SHADOW
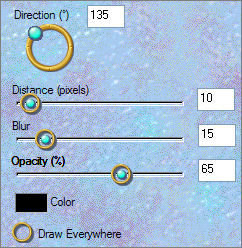
EFFECTS >>> PLUGINS >>> EYE CANDY 3 >>> DROP SHADOW
Change the DIRECTION = 315
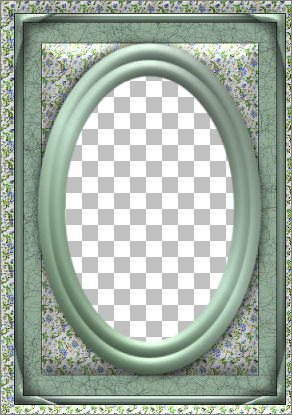
ACTIVATE the MERGED 2 layer
With your MAGIC WAND
Same settings
Select the CENTRE transparent area
SELECTIONS >>> MODIFY >>> EXPAND = 4
SELECTIONS >>> INVERT
ACTIVATE RASTER 1
EFFECTS >>> PLUGINS >>> EYE CANDY 3 >>> DROP SHADOW
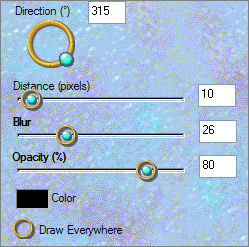
DESELECT
LAYERS >>> MERGE >>> MERGE VISIBLE
Save as .psp image
Your frame is now ready for an image of your choice
OR
you can use the one supplied.
When finished,
LAYERS >>> MERGE >>> MERGE ALL (Flatten)
Resize to suit.
Save as .jpg image
TESTERS RESULTS
Page designed by

for

http://www.artistrypsp.com/
Copyright ©
2000-2009 Artistry In PSP / PSP Artistry
All rights reserved.
Unless specifically made available for
download,
no graphics or text may be removed from
this site for any reason
without written permission from Artistry
In PSP / PSP Artistry
TUTORIAL
INDEX
|