HERRINGBONE FRAME
PSP8/9/X
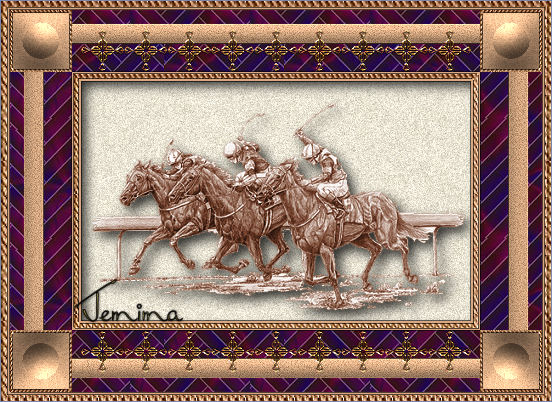
This tutorial was written by Jemima ~ April 2007
Copyright © 2007/8 ~ Jemima ~ All rights reserved
********************************
You will need the
following to complete this tutorial
Materials
Right click and SAVE TARGET AS
Herringbone.jpg
PatternQ~08_GxChic!.bmp
rope.jpg
Save to your PSP Patterns folder
LadesDividers_123.psp
Save to a folder on your computer
Plugins
** SIMPLE FILTERS **
download
Download and extract to your PSP Plugins Folder.
** EYE CANDY3 **
http://www.pircnet.com/downloads.html
********************************
REMEMBER TO SAVE YOUR WORK OFTEN
************************************************************************************************
In your MATERIALS PALETTE
Load the ' rope.jpg ' pattern in your foreground
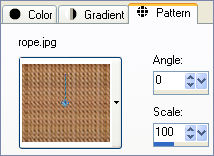
Load SOLID TAN " #d9a781 " in your background
Open a new image 500 x 400
Transparent background
PSPX: Colour Depth = 8bits/channel
Flood fill with the ' rope.jpg ' pattern
SELECTIONS >>> SELECT ALL
SELECTIONS >>> MODIFY >>> CONTRACT = 6
EDIT >>> CLEAR
SELECTIONS >>> INVERT
EFFECTS >>> 3D EFFECTS >>> DROP SHADOW
Vertical & Horizontal offsets = 1
Colour = Black
Opacity = 60
Blur = 0
Repeat Drop Shadow effect changing
Vertical & Horizontal Offsets to - ( minus ) 1
Click OK
SELECTIONS >>> INVERT
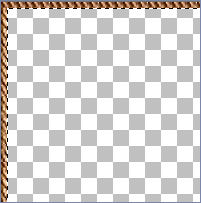
LAYERS >>> NEW RASTER LAYER (Raster 2)
LAYERS >>> ARRANGE >>> MOVE DOWN
Flood fill with the SOLID TAN " #d9a781 "
SELECTIONS >>> MODIFY >>> CONTRACT = 3
EDIT >>> CLEAR
EFFECTS >>> 3D EFFECTS >>> DROP SHADOW
Use the same settings
Click OK
Repeat Drop Shadow effect changing
Vertical & Horizontal Offsets to 1
Click OK
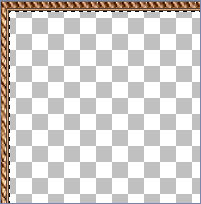
LAYERS >>> NEW RASTER LAYER (Raster 3)
LAYERS >>> ARRANGE >>> MOVE DOWN
In your MATERIALS PALETTE
Load the ' herringbone ' pattern in your background
using the settings below.
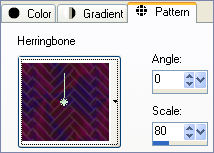
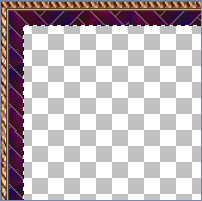
Flood fill with the ' herringbone ' pattern
SELECTIONS >>> MODIFY >>> CONTRACT = 14
EDIT >>> CLEAR
SELECTIONS >>> INVERT
ADJUST >>> SHARPNESS >>> SHARPEN
EFFECTS >>> 3D EFFECTS >>> DROP SHADOW
Use the same settings
Click OK
Repeat Drop Shadow effect changing
Vertical & Horizontal Offsets to 1
Click OK
SELECTIONS >>> INVERT
In your MATERIALS PALETTE
Load SOLID CREAM "
#f2ebd8 " in your background.
LAYERS >>> NEW RASTER LAYER (Raster 4)
LAYERS >>> ARRANGE >>> MOVE DOWN
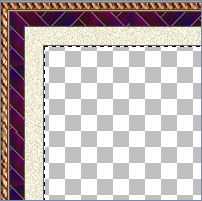
Flood fill with the SOLID CREAM " #f2ebd8 "
ADJUST >>> ADD/REMOVE NOISE >>> ADD NOISE

SELECTIONS >>> MODIFY >>> CONTRACT = 20
EDIT >>> CLEAR
EFFECTS >>> 3D EFFECTS >>> DROP SHADOW
Use the same settings
Click OK
Repeat Drop Shadow effect changing
Vertical & Horizontal Offsets to 1
Click OK
LAYERS >>> NEW RASTER LAYER (Raster 5)
LAYERS >>> ARRANGE >>> MOVE DOWN
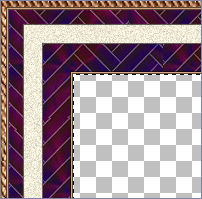
Flood fill with the ' herringbone ' pattern
IMAGE >>> FLIP
SELECTIONS >>> DEFLOAT
ADJUST >>> SHARPNESS >>> SHARPEN
SELECTIONS >>> MODIFY >>> CONTRACT = 28
EDIT >>> CLEAR
SELECTIONS >>> INVERT
EFFECTS >>> 3D EFFECTS >>> DROP SHADOW
Use the same settings
Click OK
Repeat Drop Shadow effect changing
Vertical & Horizontal Offsets to 1
Click OK

Load SOLID TAN " #d9a781 " in your background
LAYERS >>> NEW RASTER LAYER (Raster 6)
LAYERS >>> ARRANGE >>> BRING TO TOP
SELECTIONS >>> INVERT
Flood fill with the SOLID TAN " #d9a781 "
SELECTIONS >>> MODIFY >>> CONTRACT = 2
EDIT >>> CLEAR
EFFECTS >>> 3D EFFECTS >>> DROP SHADOW
Use the same settings
Click OK
Repeat Drop Shadow effect changing
Vertical & Horizontal Offsets to 1
Click OK
LAYERS >>> NEW RASTER LAYER (Raster 7)
LAYERS >>> ARRANGE >>> MOVE DOWN
In your MATERIALS PALETTE
CHANGE the SCALE for the ' rope.jpg ' pattern to 75%
Flood fill with the ' rope.jpg ' pattern
SELECTIONS >>> MODIFY >>> CONTRACT = 5
EDIT >>> CLEAR
EFFECTS >>> 3D EFFECTS >>> DROP SHADOW
Use the same settings
Click OK
Repeat Drop Shadow effect changing
Vertical & Horizontal Offsets to 1
Click OK
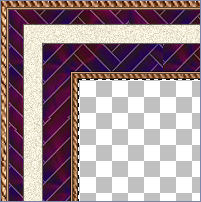
LAYERS >>> NEW RASTER LAYER (Raster 8)
LAYERS >>> ARRANGE >>> MOVE DOWN
Flood fill with the SOLID TAN " #d9a781 "
SELECTIONS >>> MODIFY >>> CONTRACT = 2
EDIT >>> CLEAR
DESELECT
EFFECTS >>> 3D EFFECTS >>> DROP SHADOW
Use the same settings
Click OK
Repeat Drop Shadow effect changing
Vertical & Horizontal Offsets to 1
Click OK
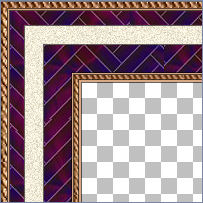
Your LAYER PALETTE should look like this
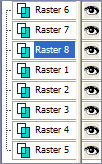
ACTIVATE RASTER 4
EFFECTS >>> 3D EFFECTS >>> INNER BEVEL
COLOUR = " #edd5c3 "
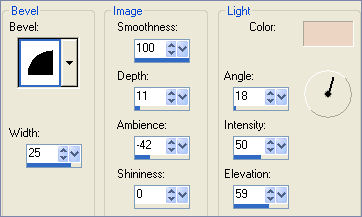
EDIT >>> Repeat Inner Bevel
ADJUST >>> SHARPNESS >>> SHARPEN
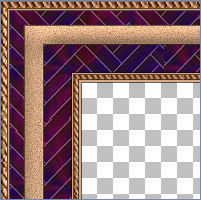
ACTIVATE RASTER 7
ADJUST >>> SHARPNESS >>> SHARPEN
ACTIVATE RASTER 6
LAYERS >>> NEW RASTER LAYER
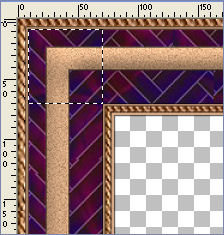
Choose your SELECTION TOOL then click on the CUSTOM SELECTION
symbol
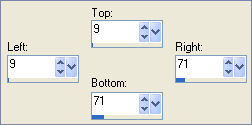 .. .. 
In your MATERIALS PALETTE
CHANGE the SCALE for the ' rope.jpg ' pattern to 50%
Flood fill with the ' rope.jpg ' pattern
ADJUST >>> SHARPNESS >>> SHARPEN
SELECTIONS >>> MODIFY >>> CONTRACT = 3
EDIT >>> CLEAR
EFFECTS >>> 3D EFFECTS >>> DROP SHADOW
Use the same settings
Click OK
Repeat Drop Shadow effect changing
Vertical & Horizontal Offsets to 1
Click OK
Flood fill with the SOLID CREAM " #f2ebd8 "
ADJUST >>> ADD/REMOVE NOISE >>> ADD NOISE
Same settings
EFFECTS >>> 3D EFFECTS >>> INNER BEVEL
Same settings
EDIT >>> Repeat Inner Bevel
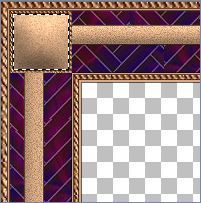
SELECTIONS >>> MODIFY >>> CONTRACT = 8
EFFECTS>>> GEOMETRIC EFFECTS >>> CIRCLE
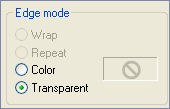
EFFECTS >>> 3D EFFECTS >>> INNER BEVEL
CHANGE the COLOUR to WHITE
EDIT >>> Repeat Inner Bevel
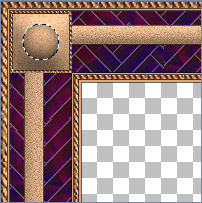
DESELECT
EFFECTS >>> PLUGINS >>> SIMPLE >>> TOP LEFT MIRROR
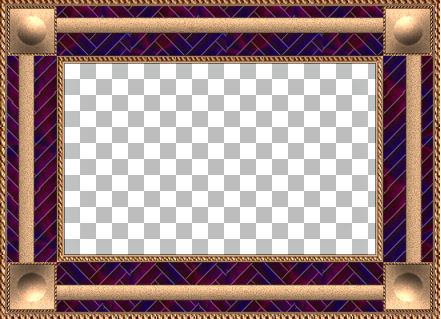
Close all layers except Raster 9 and Raster 4
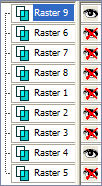
LAYERS >>> MERGE >>> MERGE VISIBLE
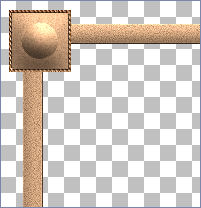
Close all layers except Raster 6. Raster 7 and Raster 8
ACTIVATE RASTER 6
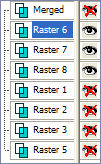
LAYERS >>> MERGE >>> MERGE VISIBLE
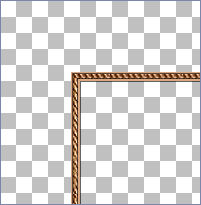
Open ALL layers
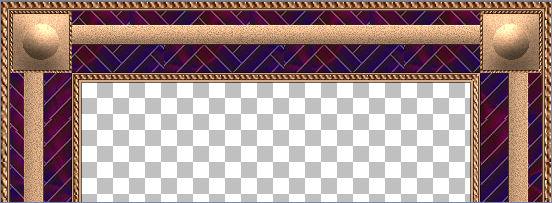
ACTIVATE the top MERGED layer
LAYERS >>> NEW RASTER LAYER
Open up the "
LadesDividers_123.psp " image in your PSP workspace,
activate the " LSDSet1div_3 " layer
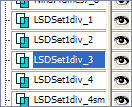
Right click on the Title Bar and select COPY from the options
Go to your frame image ..
Right click on the Title Bar
and select PASTE AS NEW SELECTION from the options.
Reposition using your MOVER tool
DESELECT
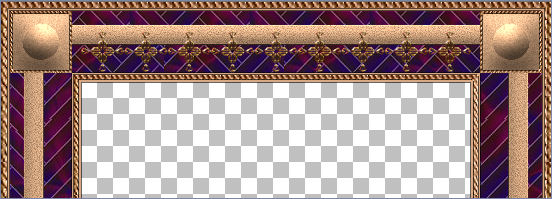
EFFECTS >>> 3D EFFECTS >>> DROP SHADOW
Vertical = 1
Horizontal = 0
Colour = Black
Opacity = 60
Blur = 0
ADJUST >>> SHARPNESS >>> SHARPEN
LAYERS >>> DUPLICATE
IMAGE >>> FLIP
LAYERS >>> MERGE >>> MERGE VISIBLE
With your MAGIC WAND
Mode = Replace
Match Mode = RGB Value
Tolerance = 0
Feather = 0
Antialias = UNchecked
Sample Merged = UNCHECKED
PSP9/X: Check CONTIGUOUS
PSPX: There is no " Sample Merged"
PSPX: Use all layers = UNChecked
Select the CENTRE transparent area
SELECTIONS >>> MODIFY >>> EXPAND = 2
SELECTIONS >>> INVERT
LAYERS >>> NEW RASTER LAYER
LAYERS >>> ARRANGE >>> MOVE DOWN
EFFECTS >>> PLUGINS >>> EYE CANDY 3 >>> DROP SHADOW
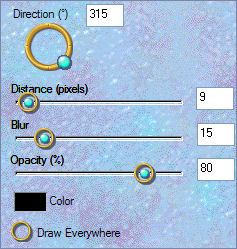
LAYERS >>> MERGE >>> MERGE VISIBLE
Save as .psp image
Your frame is now ready for an image of your choice
TESTERS RESULTS
Page designed by

for

http://www.artistrypsp.com/
Copyright ©
2000-2008 Artistry In PSP / PSP Artistry
All rights reserved.
Unless specifically made available for
download,
no graphics or text may be removed from
this site for any reason
without written permission from Artistry
In PSP / PSP Artistry
TUTORIAL
INDEX
|