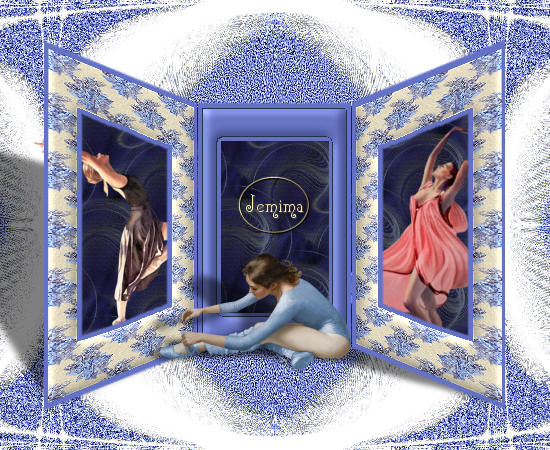
DANCE MEMORIES
PSP8/9/X
This tutorial was
written by Jemima ~ January 2007
Copyright © 2007 ~ Jemima
~ All rights reserved
********************************
This was created using PSP9 but can be adapted for other versions of PSP.
You will need the
following to complete this tutorial
Materials
LEFT CLICK >>> SAVE
JF_FrameTemplate.psp
ctdesigns_people_woman_dancer-pink.psp
Steve Hanks_vengy.psp
jcw_ballerinas_blue.psp
Save to a folder on your computer
winni[1].bg.xmas10.1.jpg
NikSeamless.jpg
Save to your PSP Patterns folder
Plugins
** EYE CANDY3 **
http://www.chezkiki.com/les_filtres.htm
OR
http://www.pircnet.com/downloads.html
********************************
(This is a long tutorial... 2 pages)
Open all your TUBE images in PSP and minimize.
Open a new image 550 x 450
Transparent background
PSPX: Colour Depth = 8bits/channel
Flood fill with WHITE
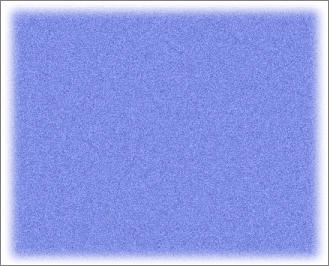
LAYERS >>> NEW RASTER LAYER
Flood fill with BLUE " #808ee2 "
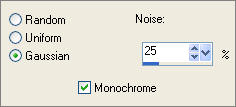
ADJUST >>> ADD/REMOVE NOISE >>> ADD NOISE
SELECTIONS >>> SELECT ALL
SELECTIONS >>> MODIFY >>> CONTRACT = 20
SELECTIONS >>> MODIFY >>> FEATHER = 20
SELECTIONS >>> INVERT
EDIT >>> CLEAR
DESELECT
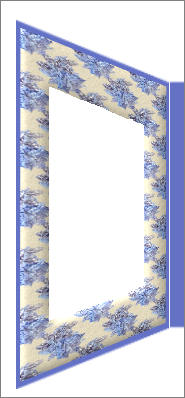
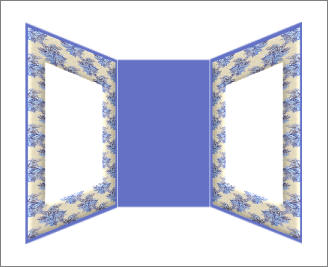
Open up the JF_FrameTemplate.psp image in your PSP workspace
ACTIVATE RASTER 1
Right click on the Title Bar and select COPY from the options
Right click on the Title Bar of your tag image
and select PASTE AS NEW LAYER from the options.
On the JF_FrameTemplate.psp image
ACTIVATE the MERGED layer
Right click on the Title Bar and select COPY from the options
Right click on the Title Bar of your tag image
and select PASTE AS NEW LAYER from the options.

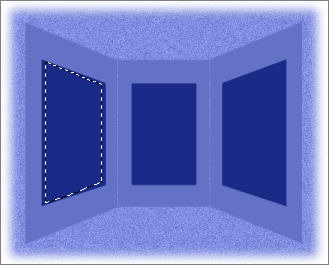
With your MAGIC WAND
Mode = Replace
Match Mode = RGB Value
Tolerance = 0
Feather = 0
Antialias = Checked
Sample Merged = UNCHECKED
PSP9/X: Check CONTIGUOUS
PSPX: There is no " Sample Merged"
PSPX: Use all layers = UNChecked
PSP9/X: ANTIALIAS = Inside
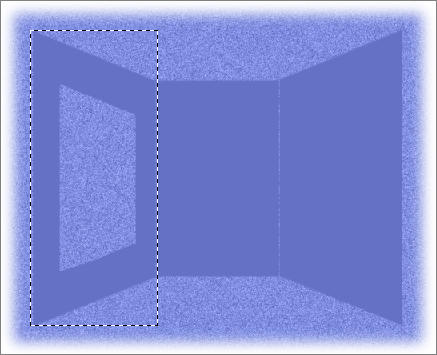
Select the left dark blue panel
SELECTIONS >>> MODIFY >>> CONTRACT = 5
CLOSE RASTER 4
ACTIVATE RASTER 3
EDIT >>> CLEAR
DESELECT
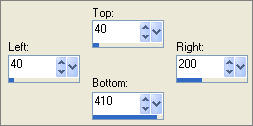
Choose your SELECTION TOOL then click on the CUSTOM SELECTION
symbol
LAYERS >>> NEW RASTER LAYER
Flood fill with WHITE
EFFECTS >>> TEXTURE EFFECTS >>> SCULPTURE
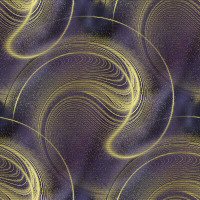
Locate the "
winni[1].bg.xmas10.1 " pattern
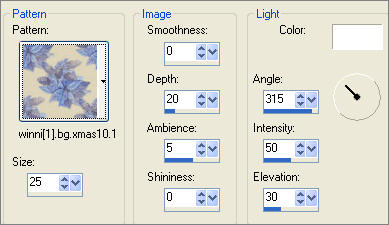
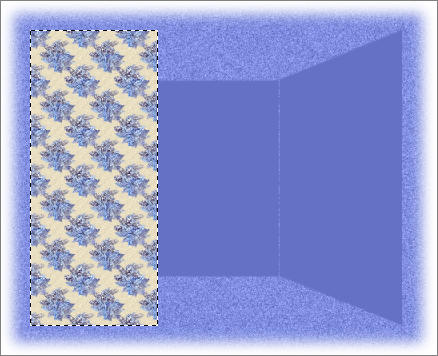
DESELECT
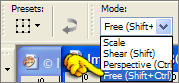
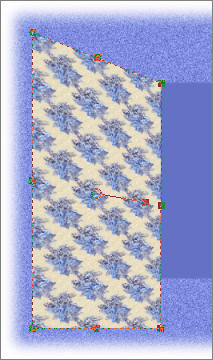
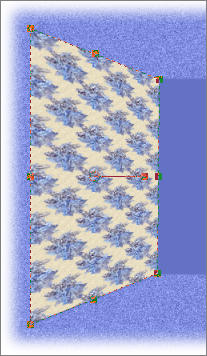
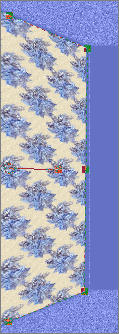
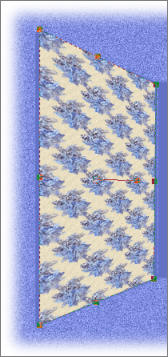
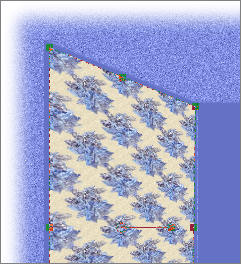
Select your DEFORMATION tool
Choose the " Free (Shift + Ctrl) option and the default settings
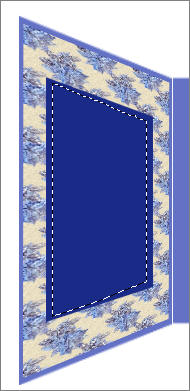
| Place your cursor over the top right node and drag down,
level with the top of the centre blue section |
|
| Place your cursor over the bottom right node
and drag up level with the top
of the
centre blue section |
|
| Place your cursor over the centre right node and drag to the left
so a portion of the dark blue is visible |
|
Place your cursor over the centre left node and drag to the right
so an equal portion of the dark blue is visible
|
|
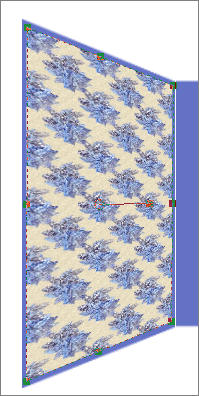
Place your cursor over the top centre node and drag down, just below the blue section.
You will have to drag down the top left node also
so that the perspective looks correct |
|
Place your cursor over the bottom centre node and drag up, just above the blue section.
You will have to drag up the top left node also
so that the perspective looks correct
CLOSE RASTER 2 so you can get a clearer picture |
|
Click the RESET RECTANGLE arrow
ACTIVATE RASTER 4
With your MAGIC WAND
Same settings..
Select the left dark blue panel
SELECTIONS >>> MODIFY >>> CONTRACT = 5
CLOSE RASTER 4
ACTIVATE RASTER 5
EDIT >>> CLEAR
DESELECT
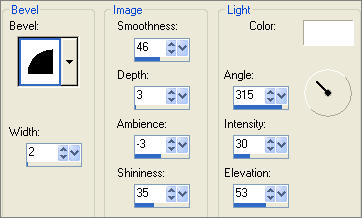
EFFECTS >>> 3D EFFECTS >>> INNER BEVEL
ADJUST >>> SHARPNESS >>> SHARPEN
LAYERS >>> DUPLICATE
IMAGE >>> MIRROR
With your MAGIC WAND
Same settings..
Select the right light blue panel

ACTIVATE RASTER 3
EDIT >>> CLEAR
DESELECT
NEXT PAGE
Page designed by

for

http://www.artistrypsp.com/
Copyright ©
2000-2007 Artistry In PSP / PSP Artistry
All rights reserved.
Unless specifically made available for
download,
no graphics or text may be removed from
this site for any reason
without written permission from Artistry
In PSP / PSP Artistry
TUTORIAL
INDEX
|
![winni[1].bg.xmas10.1.jpg](winni%5B1%5D.bg.xmas10.1.jpg)