Mother's Day - 07
PSP8/9

This tutorial was
written by Jemima ~ January 2007
Copyright © 2007 ~ Jemima
~ All rights reserved
********************************
This has also been successfully tested in PSPX and PSPXI
********************************
REMEMBER TO SAVE YOUR WORK OFTEN
********************************
You will need the
following to complete this tutorial
MATERIALS
" 02-berrybkg " pattern
"goldfill1.bmp" pattern
Save to your PSP Patterns folder
"shape98.psp " tube
"
Blue-and-Alone_TubedByGini_12-24-06.psp " (used in this result)
"CJ_Mary Mother of God_Misted.psp" tube (used in my alternative result)
Save to a folder on your computer.
Plugin
** EYE CANDY3 **
http://www.pircnet.com/downloads.html
********************************
We're going to do some work in this tutorial *S*
First we have to create a new shape for the frame.
Open up the " shape98.psp " image
WINDOW >>> DUPLICATE
Close the original Image
Choose your SELECTION TOOL then click on the CUSTOM SELECTION
symbol
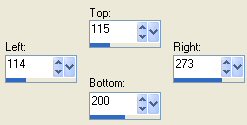
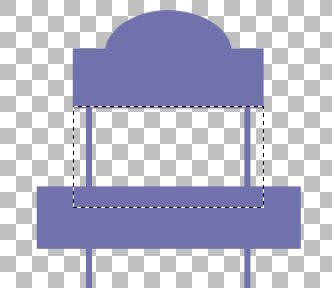
Flood fill with PURPLE ( #7271AB )
Choose your SELECTION TOOL then click on the CUSTOM SELECTION
symbol
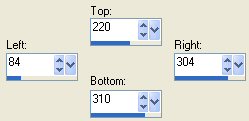
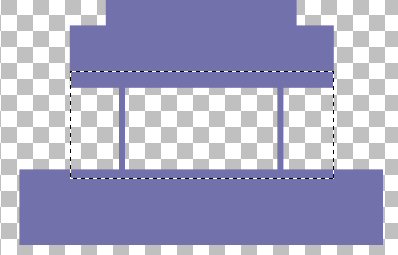
Flood fill with PURPLE ( #7271AB )
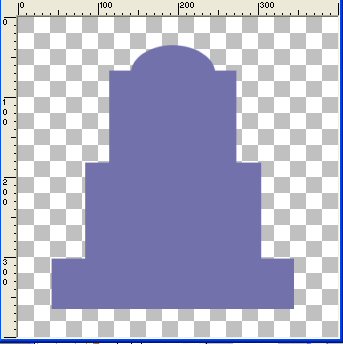
Choose your SELECTION TOOL then click on the CUSTOM SELECTION
symbol
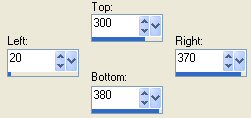
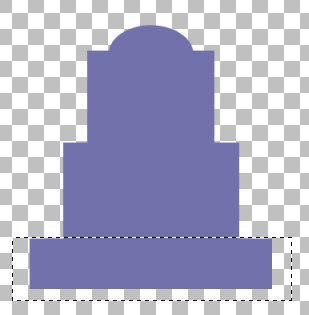
EDIT >>> CLEAR
DESELECT
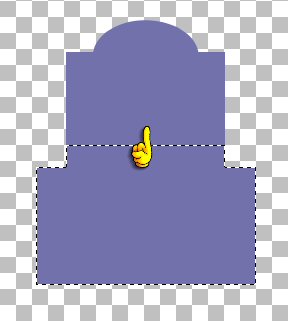
With your SELECTION TOOL

Draw a rectangle as shown below
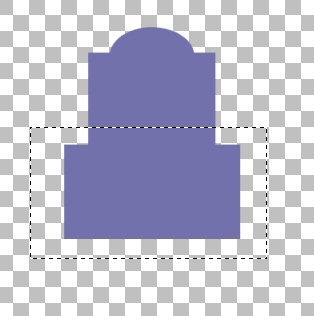
Click inside the rectangle to select the area shown below,
then with your MOVER tool move the selection towards the top of the shape
 .. .. 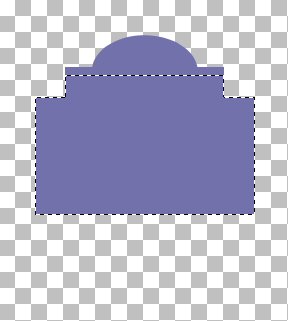
DESELECT
LAYERS >>> DUPLICATE
IMAGE >>> FLIP
LAYERS >>> MERGE >>> MERGE VISIBLE
LAYERS >>> DUPLICATE
IMAGE >>> ROTATE >>> FREE ROTATE = Right 90
Ensure "All layers" is UNCHECKED
LAYERS >>> MERGE >>> MERGE VISIBLE
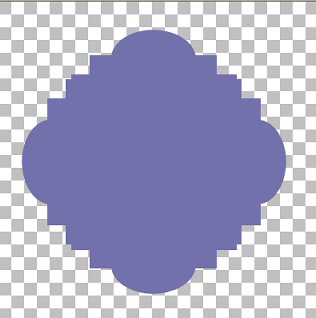
With your MAGIC WAND
Mode = Replace
Match Mode = RGB Value
Tolerance = 0
Feather = 0
Antialias = Checked (Inside)
Sample Merged = UNCHECKED
PSP9 USERS: CHECK CONTIGUOUS
Select the INNER purple area
SELECTIONS >>> MODIFY >>> CONTRACT = 6
EDIT >>> CLEAR
DESELECT
IMAGE >>> RESIZE = 110%
Ensure "Resize all layers" is UNCHECKED
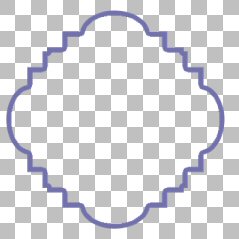
LAYERS >>> DUPLICATE
IMAGE >>> RESIZE = 87%
Ensure "Resize all layers" is UNCHECKED
LAYERS >>> MERGE >>> MERGE VISIBLE
With your MAGIC WAND
Mode = Replace
Match Mode = RGB Value
Tolerance = 50
Feather = 0
Antialias = UNchecked
Sample Merged = UNCHECKED
PSP9 USERS: CHECK CONTIGUOUS
Select the purple frames ... Depress your SHIFT key to select both.
Load the 'goldfill1" pattern in your foreground on your MATERIALS PALETTE
ANGLE = 0
SCALE = 100
Flood fill with GOLD pattern
EFFECTS >>> 3D EFFECTS >>> INNER BEVEL
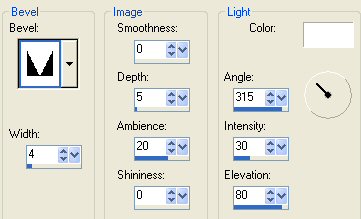
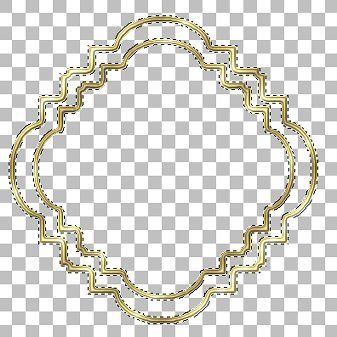
DESELECT
With your MAGIC WAND
Same settings
Select the OUTER transparent area
LAYERS >>> NEW RASTER LAYER
LAYERS >>> ARRANGE >>> MOVE DOWN
SELECTIONS >>> INVERT
Load SOLID LILAC ( #C6C6DA ) in your background on your MATERIALS PALETTE
Flood fill with LILAC
DESELECT
Activate the MERGED layer
With your MAGIC WAND
Same settings
Select the INNER LILAC area
Activate Raster 1
EDIT >>> CLEAR
DESELECT
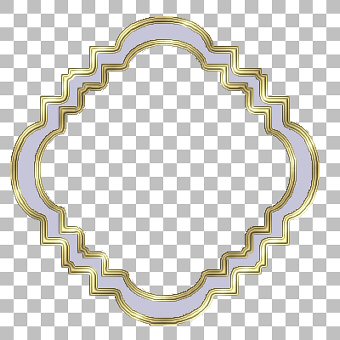
With your MAGIC WAND
Same settings
Select the LILAC area
EFFECTS >>> 3D EFFECTS >>> INNER BEVEL
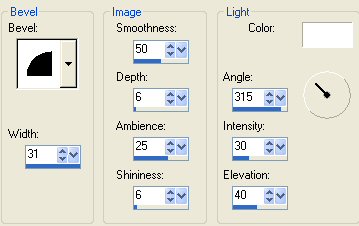
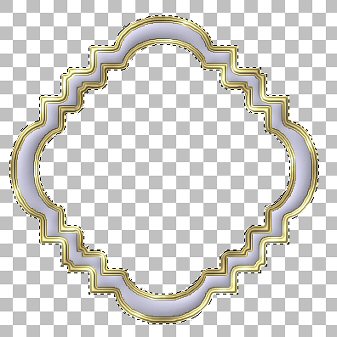
DESELECT
IMAGE >>> CANVAS SIZE
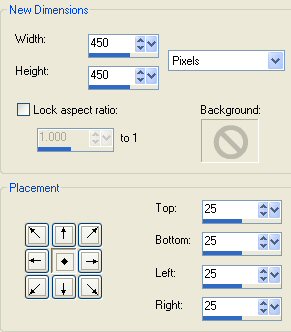
LAYERS >>> MERGE >>> MERGE VISIBLE
With your MAGIC WAND
Same settings
Select the OUTER transparent area
LAYERS >>> NEW RASTER LAYER
LAYERS >>> ARRANGE >>> MOVE DOWN
SELECTIONS >>> INVERT
SELECTIONS >>> MODIFY >>> CONTRACT = 2
SELECTIONS >>> INVERT
On your MATERIALS PALETTE load the " 02-berrybkg " pattern in the background.
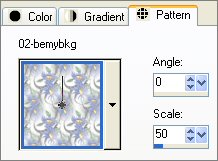
Flood fill with " 02-berrybkg " pattern
ADJUST >>> SHARPNESS >>> SHARPEN MORE
DESELECT
SELECTIONS >>> SELECT ALL
SELECTIONS >>> MODIFY >>> CONTRACT = 25
SELECTIONS >>> INVERT
EDIT >>> CLEAR
DESELECT
EFFECTS >>> 3D EFFECTS >>> INNER BEVEL
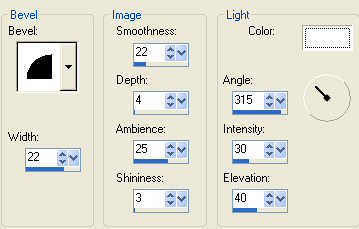
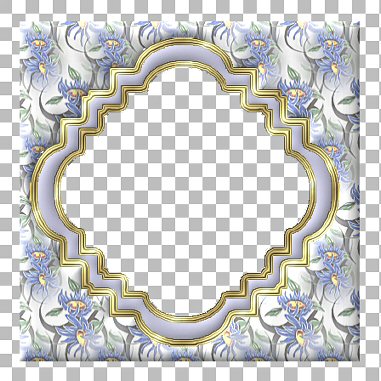
With your MAGIC WAND
Same settings
Select the OUTER transparent area
LAYERS >>> NEW RASTER LAYER
Flood fill with GOLD
EFFECTS >>> 3D Effects >>> Drop Shadow
Vertical & Horizontal offsets = 1
Colour = Black
Opacity = 55
Blur = 0
Repeat Drop Shadow effect changing
Vertical & Horizontal Offsets to - ( minus ) 1
Click OK
SELECTIONS >>> MODIFY >>> CONTRACT = 3
EDIT >>> CLEAR
EFFECTS >>> 3D Effects >>> Drop Shadow
Vertical & Horizontal offsets = 1
Colour = Black
Opacity = 55
Blur = 0
Repeat Drop Shadow effect changing
Vertical & Horizontal Offsets to - ( minus ) 1
Click OK
DESELECT
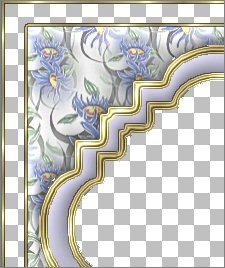
LAYERS >>> DUPLICATE
IMAGE >>> ROTATE >>> FREE ROTATE = 45.00
Ensure "All layers" is UNCHECKED
LAYERS >>> ARRANGE >>> SEND TO BOTTOM
CLOSE the MERGED layer and Raster 1

LAYERS >>> MERGE >>> MERGE VISIBLE
LAYERS >>> DUPLICATE
LAYERS >>> MERGE >>> MERGE VISIBLE
(This defines the gold a little better)
Open all layers... but still working on the bottom Merged layer
With your MAGIC WAND
Same settings
and while depressing your SHIFT key
Select the transparent areas indicated below
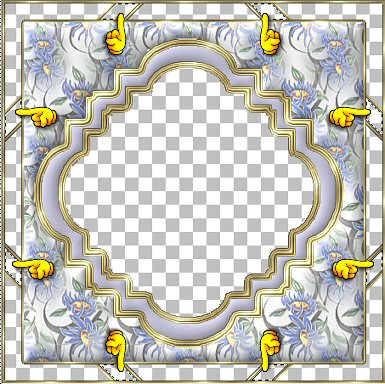
Flood fill with LILAC ( #C6C6DA )
EFFECTS >>> 3D EFFECTS >>> INNER BEVEL
Same settings
DESELECT
With your MAGIC WAND
Same settings
Select the 4 transparent corners
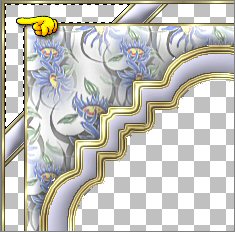
LAYERS >>> NEW RASTER LAYER
LAYERS >>> ARRANGE >>> SEND TO BOTTOM
Flood fill with GOLD
SELECTIONS >>> MODIFY >>> CONTRACT = 3
Flood fill with LILAC
EFFECTS >>> 3D Effects >>> Drop Shadow
Vertical & Horizontal offsets = 1
Colour = Black
Opacity = 55
Blur = 0
Repeat Drop Shadow effect changing
Vertical & Horizontal Offsets to - ( minus ) 1
Click OK
EFFECTS >>> 3D EFFECTS >>> INNER BEVEL
Same settings
DESELECT
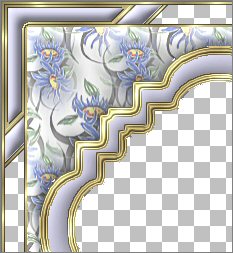
Activate the lower MERGED layer

With your MAGIC WAND
Same settings
Select the 4 remaining outer transparent areas
Flood fill with GOLD
SELECTIONS >>> MODIFY >>> CONTRACT = 3
Flood fill with " 02-berrybkg " pattern
EFFECTS >>> 3D Effects >>> Drop Shadow
Vertical & Horizontal offsets = 1
Colour = Black
Opacity = 55
Blur = 0
Repeat Drop Shadow effect changing
Vertical & Horizontal Offsets to - ( minus ) 1
Click OK
EFFECTS >>> 3D EFFECTS >>> INNER BEVEL
Same settings
DESELECT
LAYERS >>> MERGE >>> MERGE VISIBLE
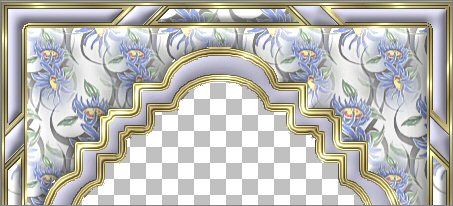
With your MAGIC WAND
Same settings BUT CHANGE... FEATHER = 1
Select the CENTRE transparent area
Hit your DELETE Key TWICE
(This will get rid of the little specks)
LAYERS >>> NEW RASTER LAYER
LAYERS >>> ARRANGE >>> SEND TO BOTTOM
SELECTIONS >>> MODIFY >>> EXPAND = 2
SELECTIONS >>> INVERT
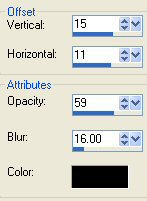
EFFECTS >>> 3D Effects >>> Drop Shadow
Save your frame as a ,psp image.
Your frame is now ready for an image of your choice
If you wish to do the flower
as in my result
go to the next page.
NEXT
Page designed by

for

http://www.artistrypsp.com/
Copyright ©
2000-2007 Artistry In PSP / PSP Artistry
All rights reserved.
Unless specifically made available for
download,
no graphics or text may be removed from
this site for any reason
without written permission from Artistry
In PSP / PSP Artistry
|