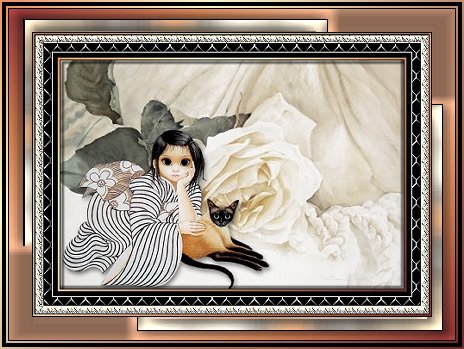
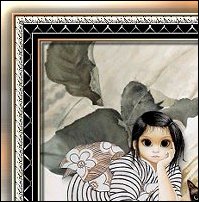
ORIENTAL ROSE
PSP8
This
tutorial was written by Jemima ~ January
2005
Copyright © 2005 ~
Jemima ~ All rights reserved
********************************
You will
need the following to complete this
tutorial
PLUGIN GALAXY
http://www.artistrypsp.com/PG/plugingalaxy.zip
Download and extract
to your PSP Plugins Folder
'mqc Calico' gradient
download
Download and extract
to your PSP Gradients folder.
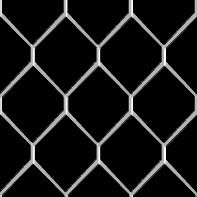
Right click and save these patterns to a
folder on your computer.
"JF_Wht_patt" on the left below
and
'safety_patt' on the right below
 .......... .......... 
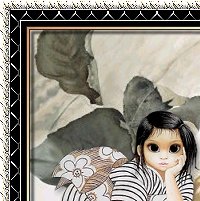
LEFT click and save the larger version of
the image below
to a folder on your computer.

********************************
Open up your ORIENTAL ROSE image in your
PSP workspace
Go to WINDOW >>> Duplicate
Close the original Image
Open up your saved patterns and minimize
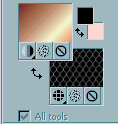
Go to your MATERIALS PALETTE
Load SOLID BLACK into your upper
(foreground) box
THEN.... Click on the 'pattern' option
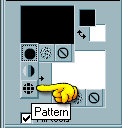
Load the "JF_Wht_patt" pattern
into your upper (foreground) box
SCALE = 30
ANGLE = 0
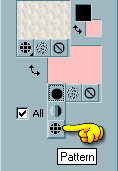
THEN.... Click on the GRADIENT ICON in
the upper (foreground) box

Load the 'mqc Calico' gradient into your
upper (foreground) box
USE THESE SETTINGS

Load SOLID PINK (any shade) into your
lower (background) box
Click on the 'pattern' option
Load the 'safety_patt' pattern into your
lower (background) box
SCALE = 25
ANGLE = 0
Click on the Oriental Rose image to
activate
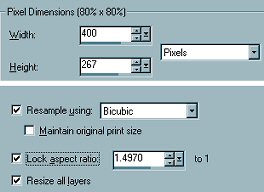
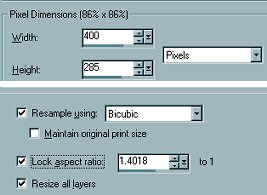
Go to IMAGE >>> RESIZE
Go to IMAGE >>> ADD BORDER = 3
COLOUR = PINK
With your MAGIC WAND
Mode = Replace
Match Mode = RGB Value
Tolerance = 0
Feather = 0
Antialias = UNchecked
Sample Merged = UNCHECKED
Select the pink border and
Flood Fill with the Gradient
Go to EFFECTS >>> 3D Effects
>>> Drop Shadow
Vertical & Horizontal offsets = 1
Colour = Black
Opacity = 100
Blur = 0
Repeat Drop
Shadow effect changing
Vertical & Horizontal Offsets to - (
minus ) 1
Click OK
Go to
EFFECTS >>> PLUGINS >>>
Eye Candy 3 >>> Drop Shadow
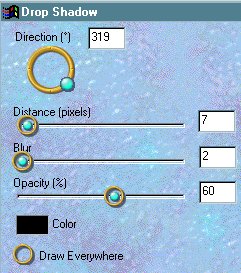
Repeat drop shadow
changing DIRECTION to 139
DESELECT

Go to IMAGE
>>> ADD BORDER = 6
COLOUR = BLACK
With your MAGIC WAND
Same settings
Select the BLACK border
Go to EFFECTS >>> 3D Effects
>>> Drop Shadow
Vertical & Horizontal offsets = 1
Colour = Black
Opacity = 100
Blur = 0
Repeat Drop
Shadow effect changing
Vertical & Horizontal Offsets to - (
minus ) 1
Click OK
DESELECT
Go to IMAGE >>> ADD BORDER = 10
COLOUR = PINK
With your MAGIC WAND
Match Mode = RGB Value
Tolerance = 0
Feather = 0
Sample Merged = UNCHECKED
Select the PINK border
Flood fill with the 'safety-patt'
Go to EFFECTS >>> EDGE EFFECTS
>>> ENHANCE
Go to EFFECTS >>> 3D Effects
>>> Drop Shadow
Vertical & Horizontal offsets = 1
Colour = WHITE
Opacity = 100
Blur = 0
Repeat Drop
Shadow effect changing
Vertical & Horizontal Offsets to - (
minus ) 1
Click OK
Go to
EFFECTS >>> 3D EFFECTS
>>> INNER BEVEL
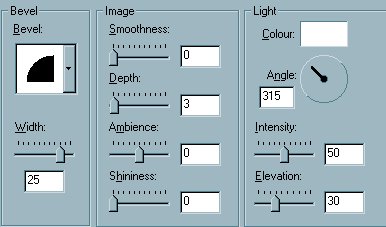
Go to EDIT >>> REPEAT INNER
BEVEL
DESELECT

Click on the PATTERN ICON in your upper
(foregound) box
Go to IMAGE >>> ADD BORDER = 10
COLOUR = PINK
With your MAGIC WAND
Same settings
Select the PINK border
Flood fill with the 'JF_Wht_patt'
Go to EFFECTS >>> EDGE EFFECTS
>>> ENHANCE
Go to EFFECTS >>> 3D Effects
>>> Drop Shadow
Vertical & Horizontal offsets = 1
Colour = BLACK
Opacity = 100
Blur = 0
Repeat Drop Shadow effect changing
Vertical & Horizontal Offsets to - (
minus ) 1
Click OK
Go to EFFECTS >>> 3D EFFECTS
>>> INNER BEVEL
Same settings
Go to EFFECTS >>> EDGE EFFECTS
>>> ENHANCE
DESELECT
Click on the GRADIENT ICON in your upper
(foregound) box
Go to IMAGE
>>> ADD BORDER = 3
COLOUR = PINK
With your MAGIC WAND
Same settings
Select the PINK border and
Flood Fill with the Gradient
Go to EFFECTS >>> 3D Effects
>>> Drop Shadow
Vertical & Horizontal offsets = 1
Colour = Black
Opacity = 100
Blur = 0
Repeat Drop
Shadow effect changing
Vertical & Horizontal Offsets to - (
minus ) 1
Click OK
Go to
EFFECTS >>> PLUGINS >>>
Eye Candy 3 >>> Drop Shadow
Same settings but change DIRECTION to 309
and OPACITY to 25%
DESELECT
Go to IMAGE >>> RESIZE
Go to IMAGE >>> ADD BORDER = 12
COLOUR = ORANGE ( #F77E2D )
With your MAGIC WAND
Same settings
Select the ORANGE border
Go to EFFECTS >>> PLUGINS
>>> SIMPLE >>> QUICK
TILE
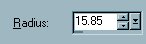
Go to ADJUST >>> BLUR
>>> GAUSSIAN BLUR
Go to EFFECTS >>> 3D Effects
>>> Drop Shadow
Vertical & Horizontal offsets = 1
Colour = Black
Opacity = 100
Blur = 0
Repeat Drop
Shadow effect changing
Vertical & Horizontal Offsets to - (
minus ) 1
Click OK
Go to EFFECTS >>> 3D EFFECTS
>>> INNER BEVEL
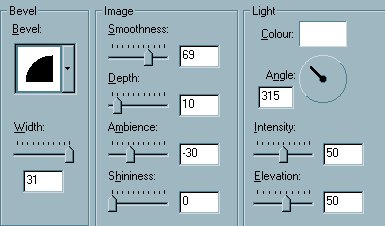
Go to EDIT >>> REPEAT INNER
BEVEL
DESELECT
Go to your MATERIALS PALETTE
Left click on the GRADIENT
Select INVERT GRADIENT from the options
box
Go to IMAGE >>> ADD BORDER = 12
With your MAGIC WAND
Same settings
Select the ORANGE border
Flood fill with the gradient
Go to EFFECTS >>> 3D Effects
>>> Drop Shadow
Vertical & Horizontal offsets = 1
Colour = Black
Opacity = 100
Blur = 0
Repeat Drop
Shadow effect changing
Vertical & Horizontal Offsets to - (
minus ) 1
Click OK
Go to EFFECTS >>> 3D EFFECTS
>>> INNER BEVEL
Same settings
Go to EDIT >>> REPEAT INNER
BEVEL
DESELECT

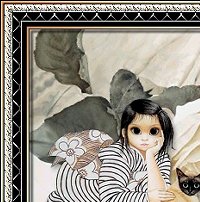
NEXT
Page designed by

for

http://www.artistrypsp.com/
Copyright
© 2000-2005 Artistry In PSP / PSP
Artistry
All rights reserved.
Unless specifically made available for
download,
no graphics or text may be removed from
this site for any reason
without written permission from Artistry
In PSP / PSP Artistry
TUTORIAL INDEX
|