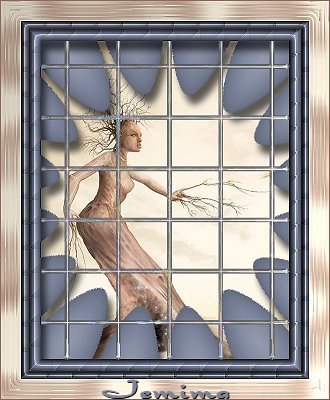
WINDOW
GLASS
PSP8 to PSPX2
This tutorial was written by Jemima ~ 20
April 2003
Revised SEPTEMBER 2005
Revised FEBRUARY 2010
Copyright © 2003 ~ Jemima ~ All rights reserved
*********************************************
You
will need the following for this tutorial:
EYE CANDY3
http://www.pircnet.com/downloads.html
~*~*~*~*~
EYE CANDY 4000
HERE
OR
Eye Candy 4
~*~*~*~*~
VM INSTANT ART
VISMAN
HERE
OR
Visman VM filtre
Download
and extract to your PSP Plugins Folder.
~*~*~*~*~
CRESCENT
MOON
download
OR
Crescent moon
Download
and extract to your PSP Plugins Folder.
~*~*~*~*~
UNPLUGGED
COLOURS
HERE
or
HERE
Download
and extract to your PSP Plugins Folder.
~*~*~*~*~
KANG
(Complete set 1 - 4)
SETS 1 & 2
SETS 3 & 4
Download
and extract to your PSP Plugins Folder
************************************
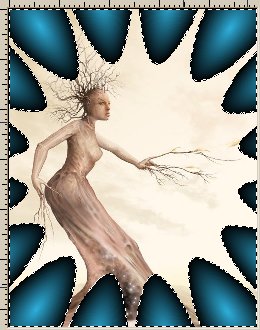
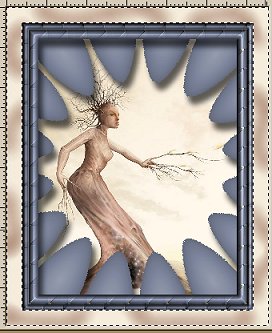
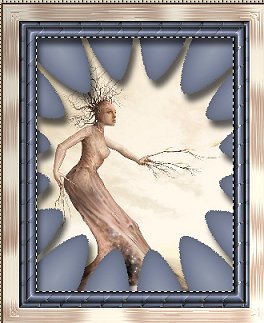
Click HERE for the larger image of that shown
below
save to a folder on your computer.
*********************************************
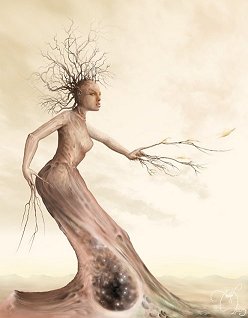
Open "DreamTree" image in PSP
Go to WINDOW >>> Duplicate
Close original image
LAYERS >>> Promote Background Layer
LAYERS >>> Duplicate
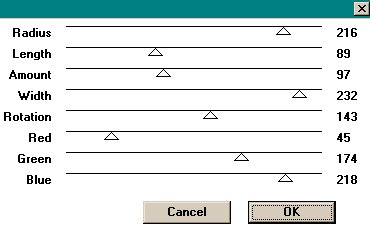
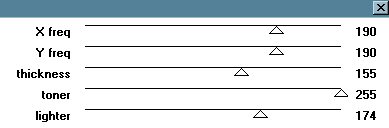
EFFECTS >>> Plugins >>> VM
Instant Art >>> Pearl's Girl
Use these SETTINGS
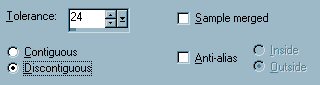
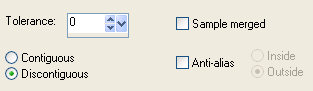
With your MAGIC WAND
Settings:
Mode = Replace
Match Mode = RGB Value
Tolerance = 130
Feather = 0
Antialias = UNchecked
Sample Merged = UNCHECKED
PSP9 - X2: Check "Contiguous"
PSPX - X2: There is no " Sample Merged"
PSPX - /X2: Use all layers = UNChecked
Select one of the 'petals'
Using your SHIFT key to select the WHOLE 'petal'.
SELECTIONS >>> Modify >>> Select
Similar
PSP8
PSP9 - X2
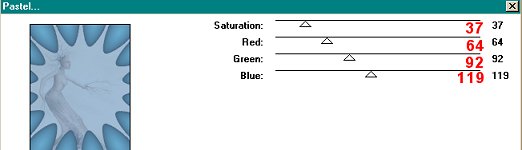
EFFECTS >>> Plugins >>> UnPlugged
Colours >>> Pastel
Use these settlings
Go to ADJUST >>> Hue and Saturation >>> Hue/Saturation/Lightness
Use these settings.
PSP8
CHECK "COLORIZE"
Hue = 225
Saturation = 13
Lightness = 6
PSP9 - X2
CHECK "COLORIZE"
Hue = 223
Saturation = 13
Lightness = 6
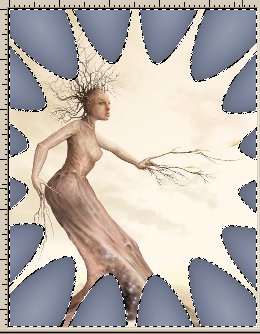
SELECTIONS >>>> Invert
Hit your DELETE key
SELECTIONS >>>> Invert
Effects >>> Plugins >>> Eye Candy
3 >>> Drop Shadow
Use these settings
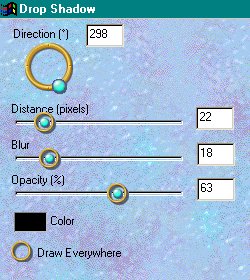
Click OK
LAYERS >>> Merge Merge All (Flatten)
IMAGE >>>Add Borders = Symmetric 20
Colour RED
Select the RED border with MAGIC WAND
Settings:
Tolerance = 0
Feather = 0
Antialias = UNchecked
Sample Merged = UNCHECKED
PSP9 - X2: Check "Contiguous"
PSPX - X2: There is no " Sample Merged"
PSPX - /X2: Use all layers = UNChecked
With your EYE DROPPER right click on a DARK GREY
part of your 'petals'
FLOOD FILL the border with the Dark Grey
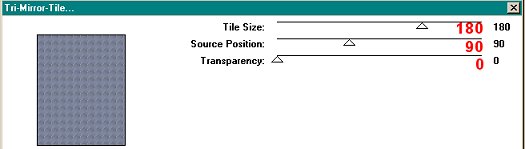
EFFECTS >>> Plugins >>> Crescent
Moon >>> Tri Mirror Tile
Use these settings
EFFECTS >>> Edge Effects >>> Enhance
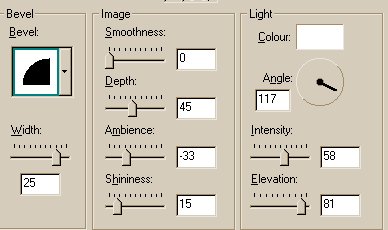
EFFECTS >>> 3D Effects >>> Inner
Bevel
Use these settings
Effects >>> Plugins >>> Eye Candy
3 >>> Drop Shadow
Use the same settings
DESELECT
IMAGE >>>Add Borders = Symmetric 15
Colour RED
Select the RED border with MAGIC WAND
Same settings
FLOOD FILL the border with the Dark Grey
EFFECTS >>> Plugins >>> Crescent
Moon >>> Tri Mirror Tile
Use the same settings
EFFECTS >>> Edge >>> Enhance
EFFECTS >>> 3D Effects >>> Inner
Bevel
Use the same settings
DESELECT

Don't worry about the rough edges around the 'petals'.
They'll disappear when we resize the image *S*
Right click with your EYEDROPPER on a 'cream' section
of your image to select a new background colour
IMAGE >>>Add Borders = 40
Colour = CREAM
Right click with your EYEDROPPER on a 'brown' section
of your image to select a new FOREground colour
Select your AIRBRUSH tool
Use these settings

Brush around portions of the border as shown below
EFFECTS >>>Plugins >>> Eye Candy
4000 >>> Glass
Click the SETTINGS TAB
Click "Clear Glass"
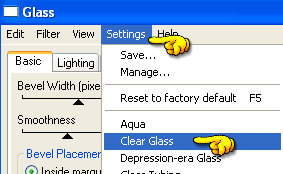
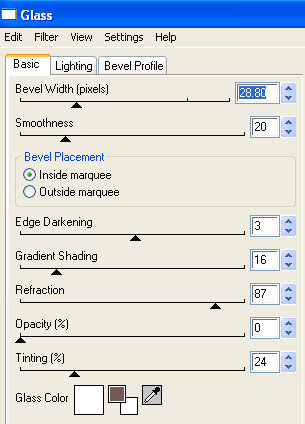
On the BASIC TAB
Use these settings
ADJUST >>> Sharpness >>> Sharpen
More
DESELECT
Go to IMAGE ... Add Borders = 2
Colour BROWN
With your SELECTION tool
Settingds as below
Click on the CUSTOM SELECTION icon
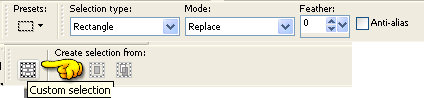
Enter these settings
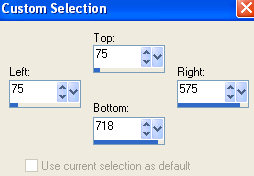
Click OK
EFFECTS >>> Plugins >>> Kang 4
>>> Gem Bars 2
Use these settings
Click OK
DESELECT
IMAGE >>> Resize
as shown below
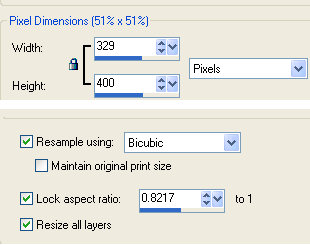
ADJUST >>> Sharpness >>> Sharpen
Save your image and you're done *S*
Page
designed by

Copyright © 2000-2010 Jemima
All rights reserved.
Unless specifically made available for download,
no graphics or text may be removed from this site for any
reason
without written permission from Jemima

|