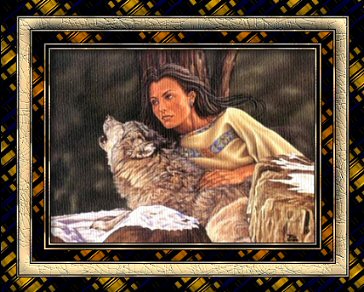
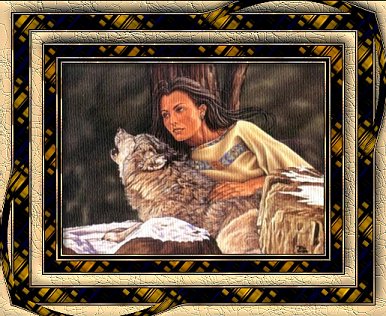
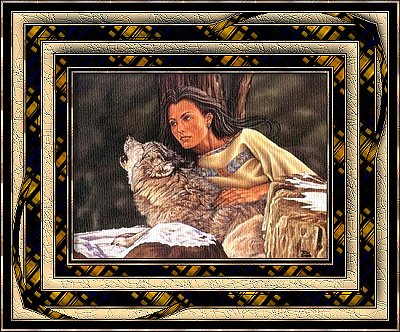
WINTER MOON
PSP7
Page 2
This
tutorial was written by Jemima ~ May 2004
Copyright © 2004 ~
Jemima ~ All rights reserved
********************************
BORDER 7
Go to IMAGE >>> Add Borders = 3
Symmetric
With your MAGIC WAND
same settings
select the border
Flood fill with the FOREGROUND Pattern
Go to EFFECTS >>> 3D Effects
>>> Drop Shadow
Vertical & Horizontal offsets = 1
Colour = Black
Opacity = 100
Blur = 0
Repeat Drop
Shadow effect changing
Vertical & Horizontal Offsets to - (
minus ) 1
Click OK
DESELECT
*********
Click on the arrows
between the upper colour boxes
so that the BLACK is now on the RIGHT
BORDER 8
Go to IMAGE >>> Add Borders =20
Symmetric
With your MAGIC WAND
same settings
select the border
Flood fill with the BACKGROUND Pattern
Go to EFFECTS >>> 3D Effects
>>> Drop Shadow
Vertical & Horizontal offsets = - (
minus ) 1
Colour = Black
Opacity = 100
Blur = 0
Repeat Drop
Shadow effect changing
Vertical & Horizontal Offsets to 1
Click OK
Go to EFFECTS
>>> 3D Effects >>>
Inner Bevel
Same settings
Click OK
REPEAT Inner bevel
Click OK
DESELECT
**********

Click on the arrows
between the upper colour boxes
so that the CREAM is now on the RIGHT
BORDER 9
Go to IMAGE >>> Add Borders = 3
Symmetric
With your MAGIC WAND
same settings
select the border
Flood fill with the FOREGROUND Pattern
Go to EFFECTS >>> 3D Effects
>>> Drop Shadow
Vertical & Horizontal offsets = 1
Colour = Black
Opacity = 100
Blur = 0
Repeat Drop
Shadow effect changing
Vertical & Horizontal Offsets to - (
minus ) 1
Click OK
DESELECT
**********
BORDER
10
Go to IMAGE >>> Add Borders = 15
Symmetric
With your MAGIC WAND
same settings
select the border
Go to EFFECTS >>> Texture
Effects >>> Fine Leather
Same settings as before
Click OK
Go to EFFECTS
>>> 3D Effects >>>
Inner Bevel
Same settings as before
Click OK
Go to EFFECTS >>> 3D Effects
>>> Drop Shadow
Vertical & Horizontal offsets = - (
minus ) 1
Colour = Black
Opacity = 100
Blur = 0
Repeat Drop
Shadow effect changing
Vertical & Horizontal Offsets to 1
Click OK
DESELECT
*****************
Go to SELECTIONS >>> Select All
Go to SELECTIONS >>> Modify
>>> Contract = 38
Go to LAYERS >>> Duplicate
Hit your DELETE key
Go to SELECTIONS >>> Invert
Go to EFFECTS >>> Geometric
effects >>> Warp

Click OK
Repeat WARP changing
Horizontal = 50
Vertical = - (minus) 50

With your MAGIC WAND
Same settings
Click in the centre of the image
Go to EFFECTS >>> 3D Effects
>>> Inner Bevel
Same settings before
EXCEPT
CHANGE THE DEPTH TO 30
Go to
EFFECTS >>> 3D Effects
>>> Drop Shadow
Vertical & Horizontal offsets = 1
Colour = Black
Opacity = 100
Blur = 0
Repeat Drop
Shadow effect changing
Vertical & Horizontal Offsets to - (
minus ) 1
Click OK
DESELECT
********
BORDER 11
Go to IMAGE >>> Add Borders = 3
Symmetric
With your MAGIC WAND
same settings
select the border
Flood fill with the FOREGROUND Pattern
Go to EFFECTS >>> 3D Effects
>>> Drop Shadow
Vertical & Horizontal offsets = - (
minus ) 1
Colour = Black
Opacity = 100
Blur = 0
Repeat Drop
Shadow effect changing
Vertical & Horizontal Offsets to 1
Click OK
DESELECT
***********
Click on the arrows between the upper
colour boxes
so that the BLACK is now on the RIGHT
BORDER 12
Go to IMAGE >>> Add Borders = 10
Symmetric
With your MAGIC WAND
same settings
select the border
Go to EFFECTS >>> 3D Effects
>>> Drop Shadow
Vertical & Horizontal offsets = 1
Colour = Black
Opacity = 100
Blur = 0
Repeat Drop
Shadow effect changing
Vertical & Horizontal Offsets to - (
minus ) 1
Click OK
DESELECT
**********
Click on the arrows between the upper
colour boxes
so that the CREAM is now on the RIGHT
BORDER 13
Go to IMAGE >>> Add Borders = 3
Symmetric
With your MAGIC WAND
same settings
select the border
Flood fill with the FOREGROUND Pattern
Go to EFFECTS >>> 3D Effects
>>> Drop Shadow
Vertical & Horizontal offsets = - (
minus ) 1
Colour = Black
Opacity = 100
Blur = 0
Repeat Drop
Shadow effect changing
Vertical & Horizontal Offsets to 1
Click OK
DESELECT
************
Click on the arrows between the upper
colour boxes
so that the BLACK is now on the RIGHT
BORDER 14
Go to IMAGE >>> Add Borders = 1
Symmetric
************
Resize to suit
Go to EFFECTS >>> Sharpen
>>> Sharpen
and you're done
************
I would like to thank ANNIE
from GRAFIXADDIX
for her assistance in testing this
tutorial *S*
These are Annie's results

.jpg)
Page designed by

for

http://www.coldfusion-vpm.com/~jemima/Artistry_Pages/index.html
Copyright
© 2000-2004 Artistry In PSP / PSP
Artistry
All rights reserved.
Unless specifically made available for
download,
no graphics or text may be removed from
this site for any reason
without written permission from Artistry
In PSP / PSP Artistry
TUTORIAL INDEX
|