
PADDED LACE
PSP7
This tutorial was
written by Jemima ~ 2 May 2003..
Copyright © 2003/4 ~ Jemima
~ All rights reserved
*************************
You
will need the following for this
tutorial:
The EYE CANDY 3 plugin
Download and extract
to your PSP Plugins Folder.
You'll need to download
VISMAN
With this zip you will get the following
fantastic filters:
VM Distortion - 26 filters
VM Experimentel - 15 filters
VM Extravaganza - 21 filters
VM Instant Art - 32 filters
VM Natural - 21 filters
VM Toolbox - 39 filters,
Softborder,
Seamless Tile, Instant Tile,
Motion Trail
Download and extract
to your PSP Plugins Folder.
You'll be using VM Distortion and VM
Natural with this tutorial
BUT
I'm sure you'll have loads of fun
experimenting with the other filters
in your spare time *S*
************************************
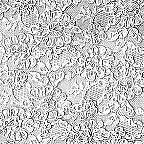
Click on the
"Lace" image below and save to
your computer
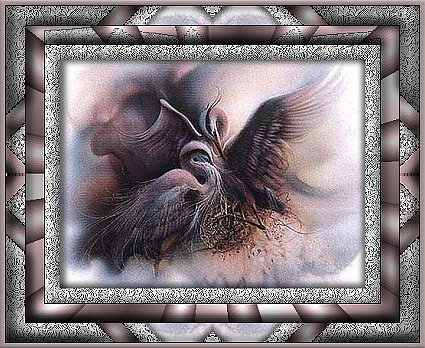
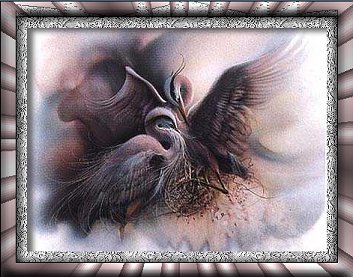
Right click the "Proposal"
image below
and save to a folder on your computer.

*********************************************
Open up The Proposal
image in PSP.
and your Lace image
Go to WINDOW
>>> Duplicate
for both images then close the originals
Set your Background colour to #A0ABBD
In your Foreground select the "lace
pattern"
Scale = 100
Angle - 0
Go to IMAGE >>> Add Borders = 20
Select the border
with your MAGIC WAND
Flood Fill with the 'lace pattern"
Go to EFFECTS >>> Sharpen
>>> Sharpen
Go to EFFECTS >>> Plugins
>>> Eye Candy 3 >>>
Drop Shadow
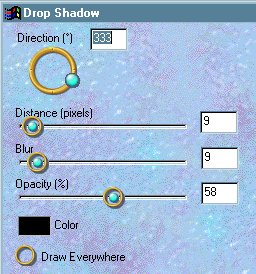
Repeat Drop Shadow
altering direction
to 133
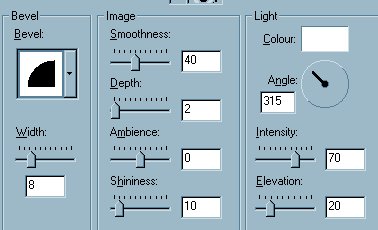
Go to EFFECTS >>> 3D Effects
>>> Inner bevel
DESELECT
Change background colour to #BA9195
Go to IMAGE >>> Add Borders = 25
Select the border with your MAGIC WAND
Go to EFFECTS >>> 3D Effects
>>> Drop Shadow
Settings:
Horizontal and Vertical = 1
Opacity = 100
Blur = 0
Click OK
Repeat Drop shadow changing
Horizontal and
Vertical to - (minus) 1
Go to EFFECTS >>> Plugins
>>> VM Natural >>>
Welder
Use the default settings
But change the
Scale = 149
and
Mode = 49
Go to EFFECTS >>> 3D Effects
>>> Inner bevel
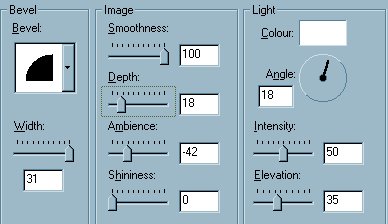
Click OK
DESELECT
Go to IMAGE >>> Resize
Resize the width
to 375
Go to EFFECTS >>> Sharpen
>>>Sharpen
Change background colour to RED
Go to IMAGE >>> Add Borders = 20
Select the border with your MAGIC WAND
Change background colour to WHITE
Flood fill the border with WHITE
Go to EFFECTS >>> 3D Effects
>>> Drop Shadow
Settings:
Horizontal and Vertical = 1
Opacity = 100
Blur = 0
Click OK
Repeat Drop shadow changing
Horizontal and
Vertical to - (minus) 1
Go to EFFECTS >>> Plugins
>>> VM Distortion >>>
Kaleidoscope
Use these settings
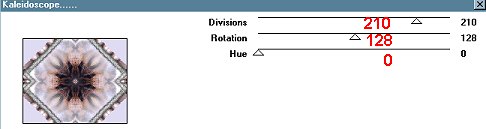
DESELECT
With your MAGIC WAND and
holding down your SHIFT key
select the 4 white corner sections.
Flood Fill with the "Lace
Pattern".
Go to EFFECTS >>> 3D Effects
>>> Inner bevel
Use same settings as
before
Go to EFFECTS >>> Plugins
>>> Eye Candy 3 >>>
Drop Shadow
Use same settings as
before
Repeat Drop Shadow
altering direction
to 133
DESELECT
Change background colour to pink =
#F4DEE0
Go to IMAGE >>> Add Borders = 5
Select the border with your MAGIC WAND
Go to EFFECTS >>> 3D Effects
>>> Inner bevel
Use same settings as
before
Go to EFFECTS >>> 3D Effects
>>> Drop Shadow
Settings:
Horizontal and Vertical = 1
Opacity = 100
Blur = 0
Click OK
Repeat Drop shadow changing
Horizontal and
Vertical to - (minus) 1
Go to EFFECTS >>> Plugins
>>> Eye Candy 3 >>>
Drop Shadow
Use same settings as
before
Repeat Drop Shadow
altering direction to 133
DESELECT
Go to EFFECTS >>> Sharpen
>>>Sharpen
Hope you enjoyed doing this tutorial.
Now you can go and play with all the VM
Plugins *S*
Page designed by

Copyright ©
2000-2003 Jemima
All rights reserved.
Unless specifically made available for
download,
no graphics or text may be removed from
this site for any reason
without written permission from Jemima

NEW TUTORIAL INDEX
|