MASK FRAME
PSP7
Page 2
This tutorial was
written by Jemima ~ April 2004
Copyright © 2004 ~
Jemima ~ All rights reserved
********************************
Go to LAYERS >>> New Raster
Layer
Go to your LAYER PALETTE and
click on Layer 2 to activate
With your MAGIC WAND
Select the CENTRE area of the Mask/Frame
Go to SELECTIONS >>> Modify
>>> Expand = 3
Go to your LAYER PALETTE and
click on Layer 3 to activate
Maximize the 'Together' image
Select your SELECTION tool
Use these settings
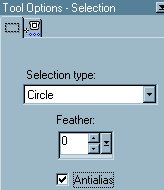
Draw a circle on the 'Together' image
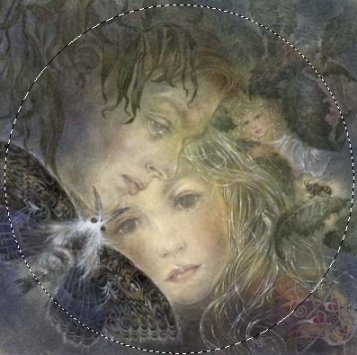
Right click on the title bar of the image
and
select COPY from the options
Right click on the title bar of the
Mask/Frame image and
select PASTE INTO SELECTION from the
options.
Go to your LAYER PALETTE and
click on Layer 2 to activate
Go to SELECTIONS >>> Invert
Go to EFFECTS >>> Plugins
>>> Eye Candy 3 >>>
Drop Shadow
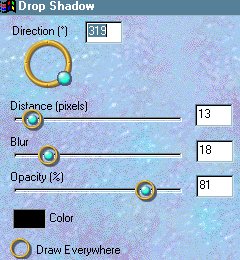
Click OK
DESELECT
Go to LAYERS >>> Merge
>>> Merge Visible
Save as a .psp image
To save as a transparent .GIF image...
Go to LAYERS >>> New raster
Layer
Go to LAYERS >>> Arrange
>>> Send to Bottom
Flood fill with pale blue
Go to LAYERS >>> Merge
>>> Merge All (Flatten)
Go to COLOURS >>> Set Palette
Transparency
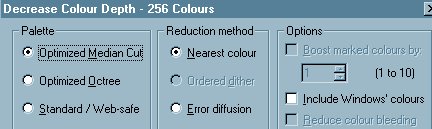
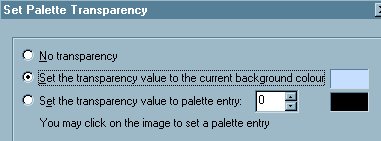
Click OK
Go to COLOURS >>> Viewt Palette
Transparency
Save as a .GIF image
For other examples check out the next
page.
NEXT
Page designed by

for

http://www.coldfusion-vpm.com/~jemima/Artistry_Pages/index.html
Copyright
© 2000-2004 Artistry In PSP / PSP
Artistry
All rights reserved.
Unless specifically made available for
download,
no graphics or text may be removed from
this site for any reason
without written permission from Artistry
In PSP / PSP Artistry
TUTORIAL INDEX
|