GOLD EDGED DECKLE
PSP8
Page 2
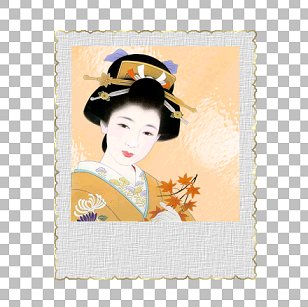
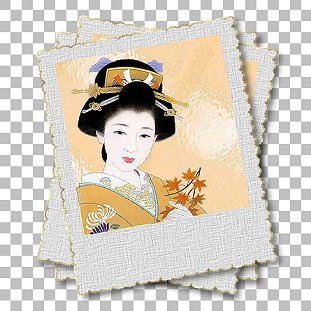
OK now we're going to create the image
shown at the top of the first page.
With your duplicated image active
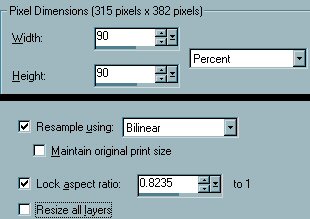
Go to IMAGE >>> RESIZE
Use these settings
Right click on the Title Bar and
select COPY from the options
Open a new image 450 x 450
Right click on the Title Bar and
select PASTE >>> PASTE AS NEW
LAYER from the options
Select your SELECTION tool
Click on CUSTOM SELECTION

and enter the following settings
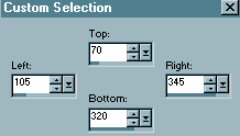
Click OK
Load the "Glass1" pattern into
your foreground box on your
COLOUR PALETTE
Angle = 310
Scale = 100
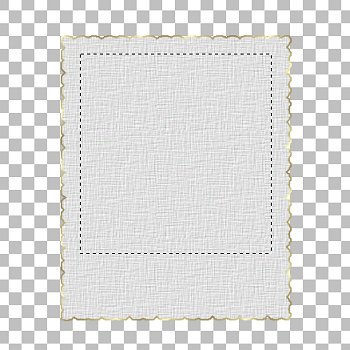
Flood fill the selected area with the
"Glass1" pattern
DESELECT
Right click on the Title Bar of the
'Oriental 4" image and
select COPY from the options
Right click on the Title Bar of your
Deckle Paper image and
select PASTE >>> PASTE AS NEW
LAYER from the options
Go to IMAGE >>>> RESIZE

With your MOVER tool position the
Oriental image
as shown below
Go to ADJUST >>> SHARPNESS
>>> SHARPEN
Go to your LAYER PALETTE
Close Raster 1
Go to LAYERS >>> MERGE
>>> MERGE VISIBLE
Go to EFFECTS >>> 3D Effects
>>> Drop Shadow
Vertical & Horizontal offsets = 6
Colour = Black
Opacity = 50
Blur = 12.9
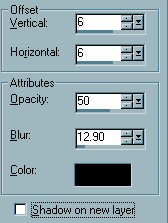
Click OK
Go to LAYERS >>> DUPLICATE
Go to IMAGE >>> ROTATE
>>> FREE ROTATE = RIGHT 10

Go to ADJUST >>> SHARPNESS
>>> SHARPEN
Go to LAYERS >>> DUPLICATE
Go to IMAGE >>> ROTATE
>>> FREE ROTATE = LEFT 20
Go to ADJUST >>> SHARPNESS
>>> SHARPEN
Go to LAYERS >>> MERGE
>>> MERGE VISIBLE
Go to LAYERS >>> NEW RASTER
LAYER
Right click on the Title Bar of the
'Corner" image and
select COPY from the options
Right click on the Title Bar of your
Deckle Paper image and
select PASTE >>> PASTE AS NEW
SELECTION from the options
Go to IMAGE >>>> FREE ROTATE
>>> ROTATE = LEFT 10
Position the 'corner' on the left hand
side of the image.
Go to ADJUST >>> SHARPNESS
>>> SHARPEN
DESELECT
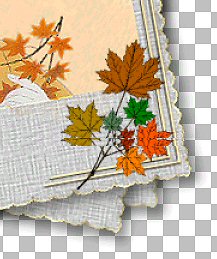
Go to LAYERS >>> NEW RASTER
LAYER
Right click on the Title Bar of the
'leaves" image and
select COPY from the options
Right click on the Title Bar of your
Deckle Paper image and
select PASTE >>> PASTE AS NEW
SELECTION from the options
Go to IMAGE >>> RESIZE = 65%
Use same settings as before.
Click OK
Go to ADJUST >>> SHARPNESS
>>> SHARPEN
Position the 'leaves' on the left hand
side of the image,
slightly overlapping the 'corner'.
DESELECT
Go to your LAYER PALETTE
OPEN Raster 1
Go to LAYERS >>> MERGE
>>> MERGE VISIBLE
With your SELECTION TOOL
set to RECTANGLE, FEATHER = 0, ANTIALIAS
= UNCHECKED
Draw a rectangle around your image to
reduce the
surrounding transparent area.
Go to IMAGE >>> CROP TO
SELECTION
Save your image as a .psp file.
From here you can add a layer
>>> send it to the bottom
and flood fill with the colour of your
choice
to match your web page or email
stationery
depending on how you use your result
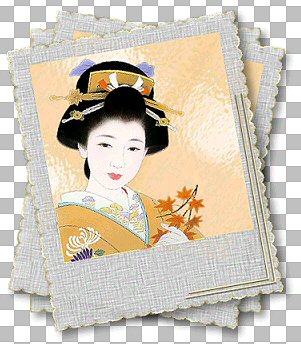
EXAMPLES
I would like to thank EVA
from GRAFIXADDIX
for her assistance in testing this
tutorial *S*
You can also view
her result on the EXAMPLES Page.
MAIN TUTORIAL INDEX
Page designed by

for

http://www.artistrypsp.com/
Copyright © 2000-2004 Artistry In PSP / PSP Artistry
All rights reserved.
Unless specifically made available for download,
no graphics or text may be removed from this site for any reason
without written permission from Artistry In PSP / PSP Artistry
|