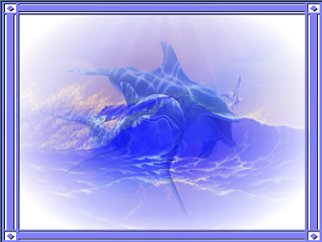
DOUBLE FRAMED
DOLPHINS
Page 2
This tutorial was created by Jemima 10
June 2003
Copyright © 2003/4 ~ Jemima ~ All rights
reserved
***************
Go to LAYERS >>>> New Raster
Layer
Go to MASK >>> Load from disc
(Circle Gradient)
Flood fill with white

Go to MASK >>> Delete.
Click YES on the dialogue box that
appears
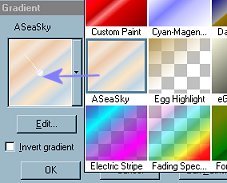
Go to your Foreground Styles Box
Click on the arrow and select the
GRADIENT icon
from the drop down options
Select "ASeaSky" from the
options box
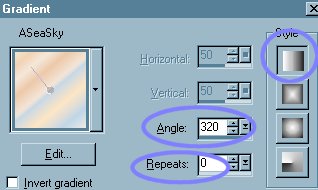
Go to LAYER 1
Flood fill with "ASeaSky"
Gradient
Go to your LAYER PALETTE
Click on Layer4 to activate
Go to LAYERS >>>> New Raster
Layer
Go to MASK >>> Load from disc
(Diamond corner)

Flood fill white area with pale purple
#8080FF

MASKS >>> Delete Mask
Click YES on the dialogue box that
appears.
Go to EFFECTS >>> 3D Effects
>>> Drop Shadow
Use these settings:
Vertical and Horizontal = 1
Opacity = 100
Blur = 0
Colour = BLACK
Go to IMAGE >>> Canvas Size =
450 x 350

With your MAGIC WAND
Settings:
Match Mode = RGB Value
Tolerance = 0
Feather = 0
Sample Merged = UN checked.
Select blank Border area
Flood fill with white
DESELECT
Still on Layer 5
Go to LAYERS >>>> New Raster
Layer (Layer 6)
Go to MASK >>> Load from disc
(Diamond corner)
Flood fill with pale purple #8080FF
Go to MASKS >>> Delete Mask
Click YES on the dialogue box that
appears.
Go to EFFECTS >>> 3D Effects
>>> Drop Shadow
Use the same settings as before.
Go to your LAYER PALETTE
Click on Layer5 to activate
Go to IMAGE Resize = 90%


Go to your LAYER PALETTE
Click on Layer 1 to activate
Flood fill with "ASeaSky"
Gradient
Go to LAYERS >>> Merge
>>> Merge All (Flatten)
With your MAGIC WAND
Same settings as before,
select WHITE area
Go to EFFECTS >>>Plugins
>>> Simple >>> Diamonds
DESELECT
You may get a small are of purple on the
left side of the image..
don't know why BUT...

Select your ERASER tool
Use these settings
Make sure your Background (Styles box)
colour is set to white *S*

ZOOM in and carefully remove the stray
pixels
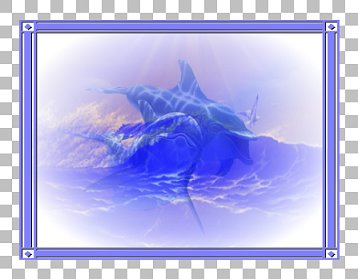
Resize your image to suit
Go to EFFECTS >>> Sharpen
>>> Sharpen
and you're finished.
Hopefully you enjoyed doing this tutorial
as much as I enjoyed creating it *S*
******************
Page designed by

for

Copyright
© 2000-2004 Artistry In PSP / PSP
Artistry
All rights reserved.
Unless specifically made available for
download,
no graphics or text may be removed from
this site for any reason
without written permission from Artistry
In PSP / PSP Artistry
 TUTORIAL INDEX TUTORIAL INDEX
|