STEP 1
Open a new image 700 x 600
Transparent background
PSPX - X2: Colour Depth = 8bits/channel
PSPX3-PSP2018: Colour Depth RGB = 8bits/channel
SELECTIONS >>> SELECT ALL
Open up the patriotic-wallpaper4 image in your PSP workspace
Right click on the Title Bar and select COPY from the options
Right click on the Title Bar of your tag image
and select PASTE INTO SELECTION from the options.
DESELECT
Rename this layer BGD
|
|
STEP 2
Open up the JA-Eagle olive branch flag image in your PSP workspace
Right click on the Title Bar and select COPY from the options
Right click on the Title Bar of your tag image
and select PASTE AS NEW LAYER from the options.
IMAGE >>> RESIZE = 80%
Ensure "Resize all layers" is UNCHECKED
Resample using WEIGHTED AVERAGE
Check "Lock aspect ratio"
ADJUST >>> SHARPNESS >>> SHARPEN
.
|
STEP 3
EFFECTS >>> IMAGE EFFECTS >>> OFFSET
Horizontal Offset = - ( minus ) 130
Vertical Offset = 150
Edge Mode = Transparent
EFFECTS >>> 3D EFFECTS >>> DROP SHADOW
Vertical & Horizontal offsets = 4
Colour = Black
Opacity = 70
Blur = 10.00
LAYERS >>> MERGE >>> MERGE DOWN
|
|
STEP 4
Open up the americana3 image in your PSP workspace
Right click on the Title Bar and select COPY from the options
Right click on the Title Bar of your tag image
and select PASTE AS NEW LAYER from the options.
EFFECTS >>> IMAGE EFFECTS >>> OFFSET
Horizontal Offset = 190
Vertical Offset = 200
Edge Mode = Transparent
Repeat Drop Shadow
LAYERS >>> MERGE >>> MERGE DOWN
SAVE YOUR WORK |
|
STEP 5
LAYERS >>> NEW RASTER LAYER
SELECTIONS >>> SELECT ALL
Flood fill with DARK RED #6f0c0a
SELECTIONS >>> MODIFY >>> CONTRACT = 4
EDIT >>> CLEAR
Flood fill with WHITE #ffffff
SELECTIONS >>> MODIFY >>> CONTRACT = 4
EDIT >>> CLEAR
Flood fill with DARK BLUE #0c299f
SELECTIONS >>> MODIFY >>> CONTRACT = 4
EDIT >>> CLEAR
DESELECT
EFFECTS >>> 3D EFFECTS >>> DROP SHADOW
Vertical & Horizontal offsets = 4
Colour = Black
Opacity = 70
Blur = 10.00
Repeat Drop Shadow effect changing
Vertical & Horizontal Offsets to - ( minus ) 1
Click OK
LAYERS >>> MERGE >>> MERGE DOWN
SAVE YOUR WORK |
|
STEP 6
Open up the patriotic_55 image in your PSP workspace
Choose your SELECTION TOOL
Selection Type = Rectangle
Mode = Replace
Feather = 0
Antialias = UNChecked
Select the lower image
Right click on the Title Bar and select COPY from the options
Right click on the Title Bar of your tag image
and select PASTE AS NEW LAYER from the options.
EFFECTS >>> IMAGE EFFECTS >>> OFFSET
Horizontal Offset = - ( minus ) 120
Vertical Offset = - ( minus ) 100
Edge Mode = Transparent
Rename this layer WMILL 1 |
|
STEP 7
LAYERS >>> DUPLICATE
PSP9: IMAGE >>> ROTATE >>> FREE ROTATE = RIGHT 90
Ensure "All layers" is UNCHECKED
PSPX - PSP2018: IMAGE >>> FREE ROTATE = RIGHT 90
Ensure "All layers" is UNCHECKED
EFFECTS >>> IMAGE EFFECTS >>> OFFSET
Horizontal Offset = - ( minus ) 2
Vertical Offset = - ( minus ) 2
Edge Mode = Transparent
Rename this layer WMILL 2 |
|
STEP 8
LAYERS >>> DUPLICATE
PSP9: IMAGE >>> ROTATE >>> FREE ROTATE = RIGHT 90
Ensure "All layers" is UNCHECKED
PSPX - PSP2018: IMAGE >>> FREE ROTATE = RIGHT 90
Ensure "All layers" is UNCHECKED
EFFECTS >>> IMAGE EFFECTS >>> OFFSET
Horizontal Offset = - ( minus ) 3
Vertical Offset = 2
Edge Mode = Transparent
Rename this layer WMILL 3 |
|
STEP 9
LAYERS >>> DUPLICATE
PSP9: IMAGE >>> ROTATE >>> FREE ROTATE = RIGHT 90
Ensure "All layers" is UNCHECKED
PSPX - PSP2018: IMAGE >>> FREE ROTATE = RIGHT 90
Ensure "All layers" is UNCHECKED
EFFECTS >>> IMAGE EFFECTS >>> OFFSET
Horizontal Offset = 2
Vertical Offset = 2
Edge Mode = Transparent
Rename this layer WMILL 4
SAVE YOUR WORK
|
|
STEP 10
Open up the USA-Crimson image in your PSP workspace
Right click on the Title Bar and select COPY from the options
Right click on the Title Bar of your tag image
and select PASTE AS NEW LAYER from the options.
IMAGE >>> RESIZE = 30%
Ensure "Resize all layers" is UNCHECKED
Resample using WEIGHTED AVERAGE
Check "Lock aspect ratio"
ADJUST >>> SHARPNESS >>> SHARPEN
EFFECTS >>> IMAGE EFFECTS >>> OFFSET
Horizontal Offset = - (minus) 210
Vertical Offset = - (minus) 240
Edge Mode = Transparent
Rename this layer USA 1 |
|
STEP 11
Open up the USA-Red-White-And-Blue image in your PSP workspace
Right click on the Title Bar and select COPY from the options
Right click on the Title Bar of your tag image
and select PASTE AS NEW LAYER from the options.
IMAGE >>> RESIZE = 30%
Ensure "Resize all layers" is UNCHECKED
Resample using WEIGHTED AVERAGE
Check "Lock aspect ratio"
ADJUST >>> SHARPNESS >>> SHARPEN
EFFECTS >>> IMAGE EFFECTS >>> OFFSET
Same settings
Rename this layer USA 2 |
|
STEP 12
Open up the USA-Gold image in your PSP workspace
Right click on the Title Bar and select COPY from the options
Right click on the Title Bar of your tag image
and select PASTE AS NEW LAYER from the options.
IMAGE >>> RESIZE = 30%
Ensure "Resize all layers" is UNCHECKED
Resample using WEIGHTED AVERAGE
Check "Lock aspect ratio"
ADJUST >>> SHARPNESS >>> SHARPEN
EFFECTS >>> IMAGE EFFECTS >>> OFFSET
Same settings
Rename this layer USA 3
SAVE YOUR WORK |
|
STEP 13
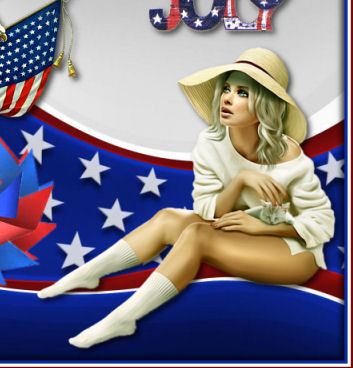
Open up the Beauty18 image in your PSP workspace
Activate Original layer
Right click on the Title Bar and select COPY from the options
Right click on the Title Bar of your tag image
and select PASTE AS NEW LAYER from the options.
EFFECTS >>> IMAGE EFFECTS >>> OFFSET
Horizontal Offset = 140
Vertical Offset = - ( minus ) 85
Edge Mode = Transparent
EFFECTS >>> 3D EFFECTS >>> DROP SHADOW
Vertical & Horizontal offsets = 4
Colour = Black
Opacity = 70
Blur = 10.00
Rename this layer GIRL 1 |
|
STEP 14
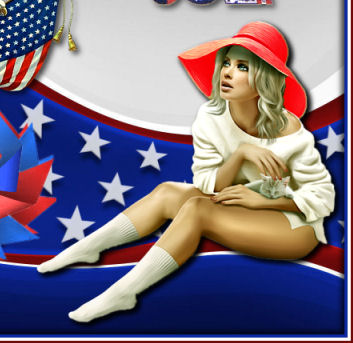
Back to the Beauty18 image in your PSP workspace
Activate RedHat layer
Right click on the Title Bar and select COPY from the options
Right click on the Title Bar of your tag image
and select PASTE AS NEW LAYER from the options.
EFFECTS >>> IMAGE EFFECTS >>> OFFSET
Same settings
EFFECTS >>> 3D EFFECTS >>> DROP SHADOW
Same settings
Rename this layer GIRL 2 |
|
STEP 15
Back to the Beauty18 image in your PSP workspace
Activate BrightTop layer
Right click on the Title Bar and select COPY from the options
Right click on the Title Bar of your tag image
and select PASTE AS NEW LAYER from the options.
EFFECTS >>> IMAGE EFFECTS >>> OFFSET
Same settings
EFFECTS >>> 3D EFFECTS >>> DROP SHADOW
Same settings
Rename this layer GIRL 3 |
|
STEP 16
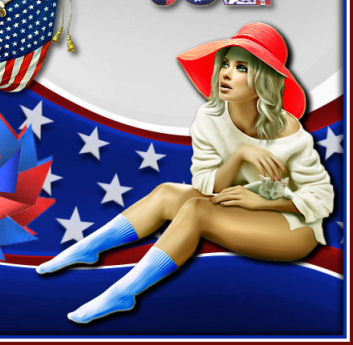
Back to the Beauty18 image in your PSP workspace
Activate BlueSocks layer
Right click on the Title Bar and select COPY from the options
Right click on the Title Bar of your tag image
and select PASTE AS NEW LAYER from the options.
EFFECTS >>> IMAGE EFFECTS >>> OFFSET
Same settings
EFFECTS >>> 3D EFFECTS >>> DROP SHADOW
Same settings
Rename this layer GIRL 4
SAVE YOUR WORK
|
|
STEP 17
ACTIVATE the BGD layer
LAYERS >> NEW RASTER LAYER
Select your TEXT TOOL
with font and settings of your choice
add your name
LAYERS >>> MERGE >>> MERGE DOWN
SAVE YOUR WORK |
|
STEP 18
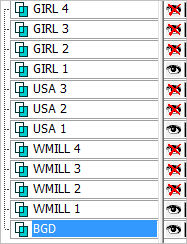
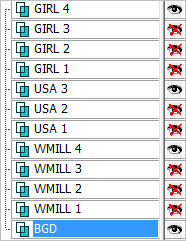
Set up LAYER PALETTE as shown
Right click on Title Bar and select
Copy merged from the options |
|
STEP 19
In ANIMATION SHOP
Right click the workspace and select
'Paste As New Animation' from the options.
Back to PSP.
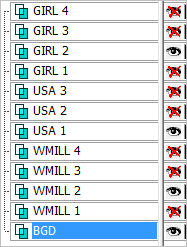
Set up LAYER PALETTE as shown
Right click on Title Bar and select
Copy merged from the options |
|
STEP 20
In ANIMATION SHOP
Select >>>
'Paste After Current' icon on top menu
Back to PSP.
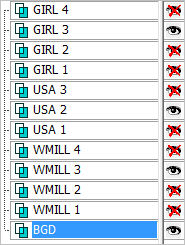
Set up LAYER PALETTE as shown
Right click on Title Bar and select
Copy merged from the options
|
|
STEP 21
In ANIMATION SHOP
Select >>> 'Paste After Current' icon on top menu
Back to PSP.
Set up LAYER PALETTE as shown
Right click on Title Bar and select
Copy merged from the options |
|
STEP 22
In ANIMATION SHOP
Select >>> 'Paste After Current' icon on top menu
Edit >> Select All
Right click on Title Bar of frames
Select 'Frame Properties' from the options
Display time = 50
, |
STEP 23
View >> Animation
and while it is still running,
File >> Save As
Locate the folder in which you wish to save it.
Name your animation.
With the Gif Optimiser keep pressing NEXT
until you get to the last one... click FINISH
Close the Animation
Close the frames.
Close Animation Shop
, |
|
|