STEP 1
Open a new image 700 x 600
Transparent background
PSP9: Colour Depth = 16 Million Colors (24bit)
PSPX-PSP2018: Colour Depth RGB = 8bits/channel
SELECTIONS >>> SELECT ALL
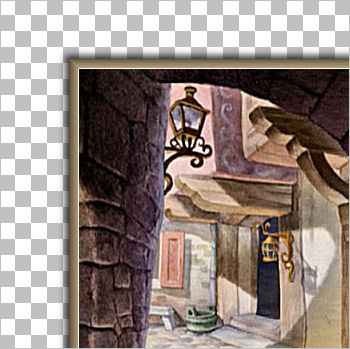
Open up the old street scene image in your PSP workspace
Right click on the Title Bar and select COPY from the options
Right click on the Title Bar of your tag image
and select PASTE INTO SELECTION from the options.
DESELECT
LAYERS >>> DUPLICATE
EDIT >>> Repeat Duplicate Layer
, |
STEP 2
CLOSE Copy of Raster 1
CLOSE Copy (2) of Raster 1
ACTIVATE Raster 1
EFFECTS >>> REFLECTION EFFECTS >>>
ROTATING MIRROR
Horizontal Offset = 0
Vertical Offset = n/a
Rotation Angle = 180
Edge Mode = Reflect
PSP9 - PSPX3: IMAGE >>> FLIP
PSPX4 - PSPX7: Use script available for download at top of page.
(Higher versions follow your version's method)
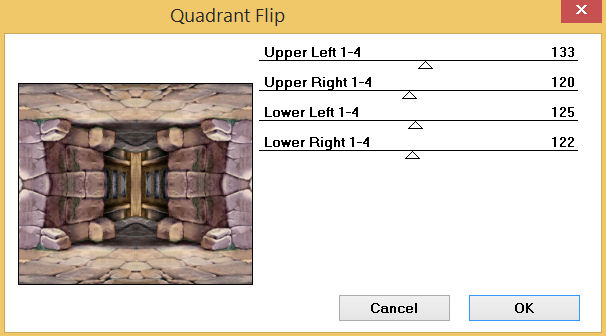
EFFECTS >>> PLUGINS >>> Mirror Rave >>> Quadrant Flip
 . .
|
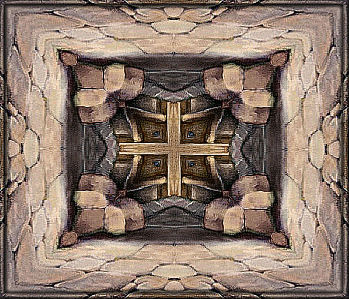
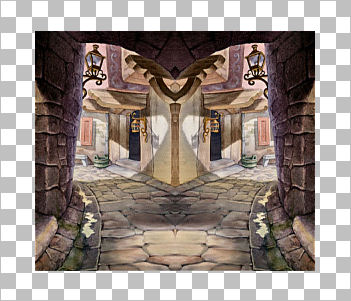
STEP 3
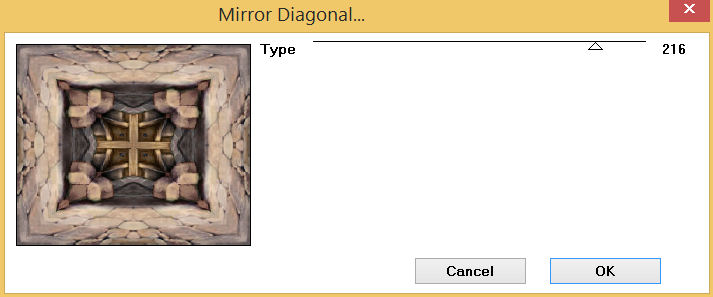
EFFECTS >>> PLUGINS >>> MuRa'sSeamless >>> Mirror Diagonal
|
STEP 4
EFFECTS >>> EDGE EFFECTS >>> ENHANCE MORE
SELECTIONS >>> SELECT ALL
SELECTIONS >>> MODIFY >>> CONTRACT = 12
SELECTIONS >>> INVERT
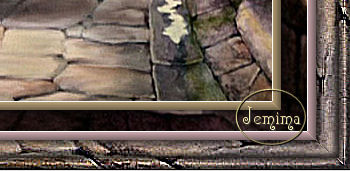
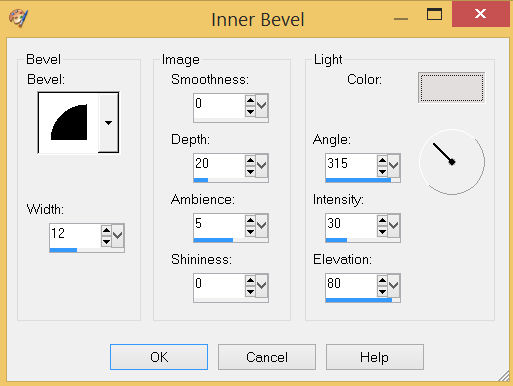
EFFECTS >>> 3D EFFECTS >>> INNER BEVEL
COLOR = #e2dede
 |
STEP 5
EFFECTS >>> 3D EFFECTS >>> DROP SHADOW
Vertical & Horizontal offsets = 4
Colour = Black
Opacity = 80
Blur = 10.00
Repeat Drop Shadow effect changing
Vertical & Horizontal Offsets to - ( minus ) 4
Click OK
ADJUST >>> SHARPNESS >>> SHARPEN MORE
DESELECT
SAVE YOUR WORK |
|
STEP 6
CLOSE Raster 1
OPEN & ACTIVATE Copy of Raster 1
EFFECTS >>> REFLECTION EFFECTS >>> ROTATING MIRROR
Horizontal Offset = 0
Vertical Offset = n/a
Rotation Angle = 0
Edge Mode = Reflect
EFFECTS >>> PLUGINS >>> Mirror Rave >>> Quadrant Flip
Same settings
IMAGE >>> RESIZE = 90%
Check "Lock aspect ratio."
Ensure "Resize all layers" is UNCHECKED
Resample using WEIGHTED AVERAGE
ADJUST >>> SHARPNESS >>> SHARPEN |
|
STEP 7
With your MAGIC WAND
Mode = Replace
Match Mode = RGB Value
Tolerance = 0
Feather = 0
Antialias = UNchecked
Sample Merged = UNCHECKED
PSP9 - PSP2018: Check CONTIGUOUS
PSPX - PSP2018: There is no " Sample Merged"
PSPX - PSP2018: Use all layers = UNChecked
Select the OUTER transparent area
SELECTIONS >>> INVERT
, |
STEP 8
LAYERS >>> NEW RASTER LAYER
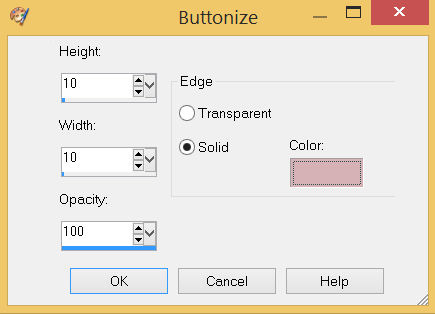
EFFECTS >>> 3D EFFECTS >>> BUTTONIZE
COLOR = #d6b2b7
 , , |
STEP 9
EFFECTS >>> EDGE EFFECTS >>> ENHANCE
EFFECTS >>> PLUGINS >>> Mirror Rave >>> Quadrant Flip
Same settings
EFFECTS >>> 3D EFFECTS >>> DROP SHADOW
Vertical & Horizontal offsets = 4
Colour = Black
Opacity = 70
Blur = 10.00
Repeat Drop Shadow effect changing
Vertical & Horizontal Offsets to - ( minus ) 4
Click OK
DESELECT
LAYERS >>> MERGE >>> MERGE DOWN
SAVE YOUR WORK |
|
STEP 10
CLOSE Copy of Raster 1
OPEN & ACTIVATE Copy (2) of Raster 1
EFFECTS >>> REFLECTION EFFECTS >>> ROTATING MIRROR
Horizontal Offset = 0
Vertical Offset = n/a
Rotation Angle = 0
Edge Mode = Reflect
IMAGE >>> RESIZE = 80%
Check "Lock aspect ratio."
Ensure "Resize all layers" is UNCHECKED
Resample using WEIGHTED AVERAGE
ADJUST >>> SHARPNESS >>> SHARPEN MORE |
|
STEP 11
With your MAGIC WAND
Same settings
Select the OUTER transparent area
SELECTIONS >>> INVERT
LAYERS >>> NEW RASTER LAYER
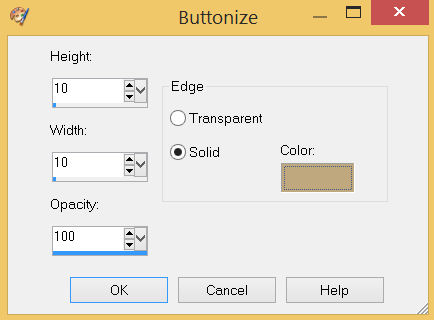
EFFECTS >>> 3D EFFECTS >>> BUTTONIZE
COLOR = #c0a87e
 |
STEP 12
EFFECTS >>> EDGE EFFECTS >>> ENHANCE
EFFECTS >>> PLUGINS >>> Mirror Rave >>> Quadrant Flip
Same settings
Repeat both Drop Shadows
DESELECT
LAYERS >>> MERGE >>> MERGE DOWN |
|
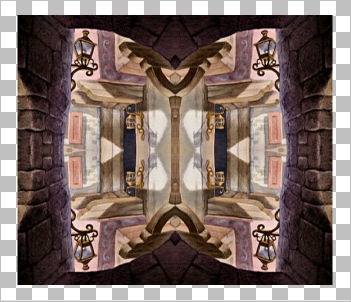
STEP 13
OPEN ALL LAYERS
LAYERS >>> MERGE >>> MERGE VISIBLE
SAVE YOUR WORK
, |
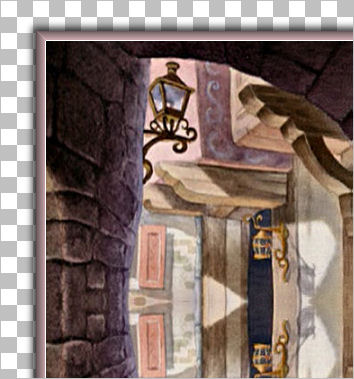
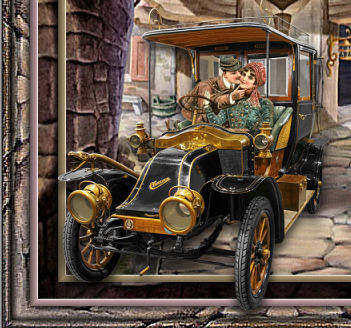
STEP 14
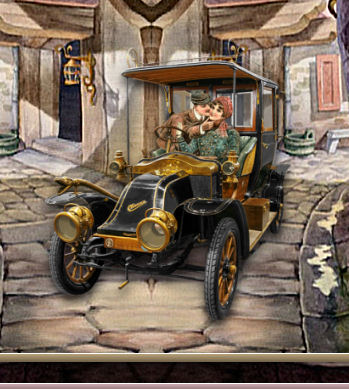
Open up the adjusted-oldtimer-2 image in your PSP workspace
Right click on the Title Bar and select COPY from the options
Right click on the Title Bar of your tag image
and select PASTE AS NEW LAYER from the options.
IMAGE >>> RESIZE = 60%
Check "Lock aspect ratio."
Ensure "Resize all layers" is UNCHECKED
Resample using WEIGHTED AVERAGE
ADJUST >>> SHARPNESS >>> SHARPEN
, |
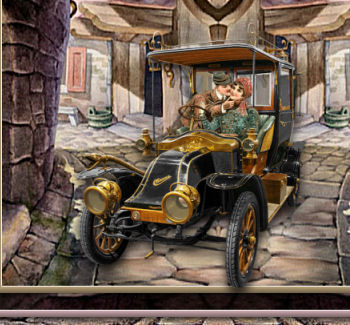
STEP 15
EFFECTS >>> IMAGE EFFECTS >>> OFFSET
Horizontal Offset = - ( minus ) 110
Vertical Offset = - ( minus ) 80
Edge Mode = Transparent
EFFECTS >>> 3D EFFECTS >>> DROP SHADOW
Vertical offset = 9
Horizontal offset = 0
Colour = Black
Opacity = 80
Blur = 20.00
Rename this layer CAR 6 |
|
STEP 16
LAYERS >>> DUPLICATE
CLOSE CAR 6
IMAGE >>> RESIZE = 85%
Check "Lock aspect ratio."
Ensure "Resize all layers" is UNCHECKED
Resample using WEIGHTED AVERAGE
EFFECTS >>> IMAGE EFFECTS >>> OFFSET
Horizontal Offset = 60
Vertical Offset = 0
Edge Mode = Transparent
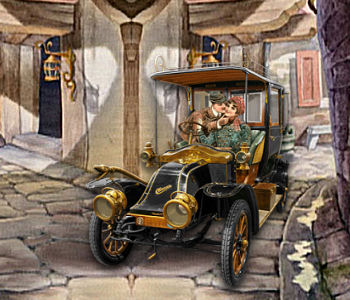
Rename this layer CAR 5
|
|
STEP 17
LAYERS >>> DUPLICATE
CLOSE CAR 5
IMAGE >>> RESIZE = 85%
Check "Lock aspect ratio."
Ensure "Resize all layers" is UNCHECKED
Resample using WEIGHTED AVERAGE
EFFECTS >>> IMAGE EFFECTS >>> OFFSET
Horizontal Offset = 45
Vertical Offset = 0
Edge Mode = Transparent
Rename this layer CAR 4
SAVE YOUR WORK
|
|
STEP 18
LAYERS >>> DUPLICATE
CLOSE CAR 4
IMAGE >>> RESIZE = 85%
Check "Lock aspect ratio."
Ensure "Resize all layers" is UNCHECKED
Resample using WEIGHTED AVERAGE
ADJUST >>> SHARPNESS >>> SHARPEN
EFFECTS >>> IMAGE EFFECTS >>> OFFSET
Horizontal Offset = 45
Vertical Offset = 0
Edge Mode = Transparent
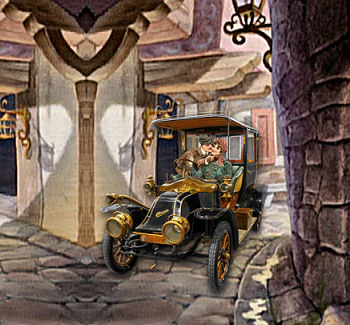
Rename this layer CAR 3 |
|
STEP 19
LAYERS >>> DUPLICATE
CLOSE CAR 3
IMAGE >>> RESIZE = 80%
Check "Lock aspect ratio."
Ensure "Resize all layers" is UNCHECKED
Resample using WEIGHTED AVERAGE
ADJUST >>> SHARPNESS >>> SHARPEN
EFFECTS >>> IMAGE EFFECTS >>> OFFSET
Horizontal Offset = 50
Vertical Offset = 20
Edge Mode = Transparent
Rename this layer CAR 2 |
|
STEP 20
LAYERS >>> DUPLICATE
CLOSE CAR 2
IMAGE >>> RESIZE = 80%
Check "Lock aspect ratio."
Ensure "Resize all layers" is UNCHECKED
Resample using WEIGHTED AVERAGE
ADJUST >>> SHARPNESS >>> SHARPEN
EFFECTS >>> IMAGE EFFECTS >>> OFFSET
Horizontal Offset = 55
Vertical Offset = 20
Edge Mode = Transparent
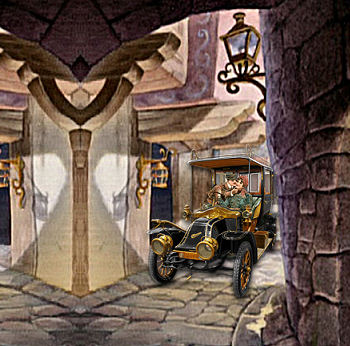
Rename this layer CAR 1
SAVE YOUR WORK |
|
STEP 21
ACTIVATE the Merged layer
LAYERS >>> NEW RASTER LAYER
SELECT your TEXT tool
With a font of your choice add your name
LAYERS >>> MERGE >>> MERGE DOWN |
|
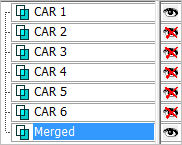
STEP 22
Set up LAYER PALETTE as shown
Right click on Title Bar and select
Copy merged from the options
|
|
STEP 23
In ANIMATION SHOP
Right click the workspace and select
'Paste As New Animation' from the options.
~~~~~~~~~~~~~~~~~~~~~~~~~~~~~~
Back to PSP.
CLOSE CAR 1
OPEN & ACTIVATE CAR 2
Right click on Title Bar and select
Copy merged from the option
In ANIMATION SHOP
Select >>>
'Paste After Current' icon on top menu
~~~~~~~~~~~~~~~~~~~~~~~~~~~~~~
Back to PSP.
CLOSE CAR 2
OPEN & ACTIVATE CAR 3
Right click on Title Bar and select Copy merged from the option
In ANIMATION SHOP
Select >>> 'Paste After Current' icon on top menu
~~~~~~~~~~~~~~~~~~~~~~~~~~~~~~
Back to PSP.
CLOSE CAR 3
OPEN & ACTIVATE CAR 4
Right click on Title Bar and select Copy merged from the option
In ANIMATION SHOP
Select >>> 'Paste After Current' icon on top menu
, |
STEP 24
Back to PSP.
CLOSE CAR 4
OPEN & ACTIVATE CAR 5
Right click on Title Bar and select Copy merged from the option
In ANIMATION SHOP
Select >>> 'Paste After Current' icon on top menu
~~~~~~~~~~~~~~~~~~~~~~~~~~~~~~
Back to PSP.
CLOSE CAR 5
OPEN & ACTIVATE CAR 6
Right click on Title Bar and select Copy merged from the option
In ANIMATION SHOP
Select >>> 'Paste After Current' icon on top menu
~~~~~~~~~~~~~~~~~~~~~~~~~~~~~~
Back to PSP.
CLOSE CAR 6
Right click on Title Bar and select Copy from the option
In ANIMATION SHOP
Select >>> 'Paste After Current' icon on top menu
, |
STEP 25
Edit >> Select All
Right click on Title Bar of frames
Select 'Frame Properties' from the options
Display time = 30
, |
STEP 26
View >> Animation
and while it is still running,
File >> Save As
Locate the folder in which you wish to save it.
Name your animation.
With the Gif Optimiser keep pressing NEXT
until you get to the last one... click FINISH
Close the Animation
Close the frames.
Close Animation Shop
, |
| |
|
| |
|