STEP 1
Open a new image 800 x 600
Transparent background
PSP9: Colour Depth = 16 Million Colors (24bit)
PSPX-PSP2018: Colour Depth RGB = 8bits/channel
SELECTIONS >>> SELECT ALL
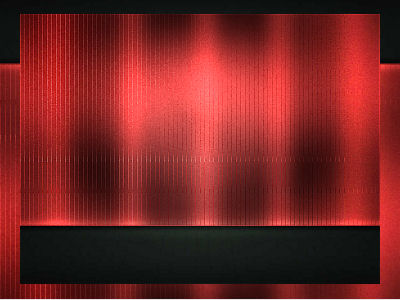
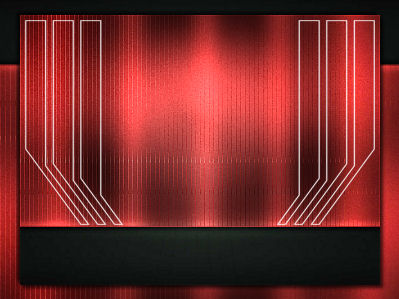
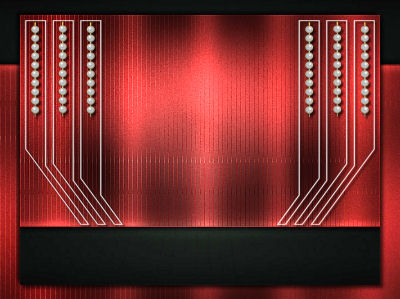
Open up the red-and-black image in your PSP workspace
Right click on the Title Bar and select COPY from the options
.Right click on the Title Bar of your tag image
and select PASTE INTO SELECTION from the options.
DESELECT
,
|
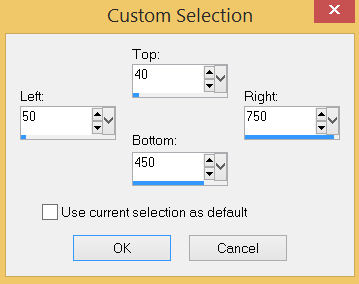
STEP 2
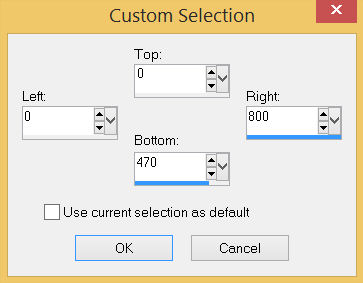
Choose your SELECTION TOOL then click on the
CUSTOM SELECTION symbol
and enter these coordinates.
|
|
STEP 3
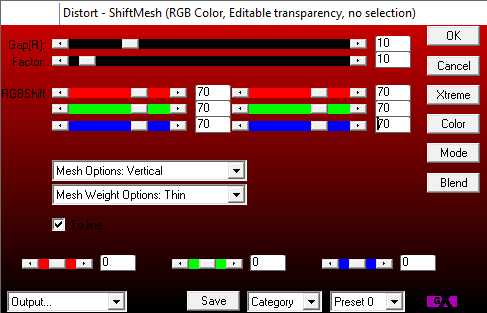
EFFECTS >>> PLUGINS >>> AP01 Innovations >>> Distort -.ShiftMesh
(If EXPOSE doesn't show up immediately click one of the other options until it appears on the list)
(If you have an older version
of this plugin SEE BELOW )
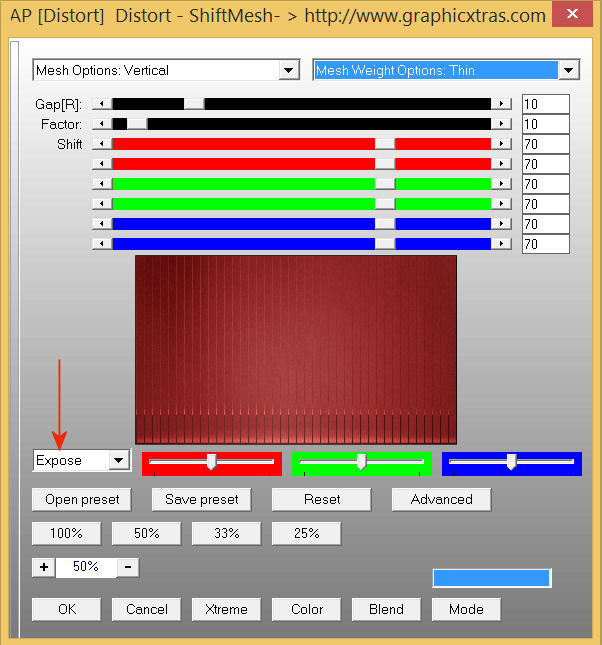
(If you have an older version of this plugin forget about the EXPOSE setting)
|
STEP 4
EDIT >>> Repeat Distort - ShiftMesh
EFFECTS >>> PLUGINS >>> GREG'S FACTORY OUTPUT VOL2 >>> POOL SHADOW
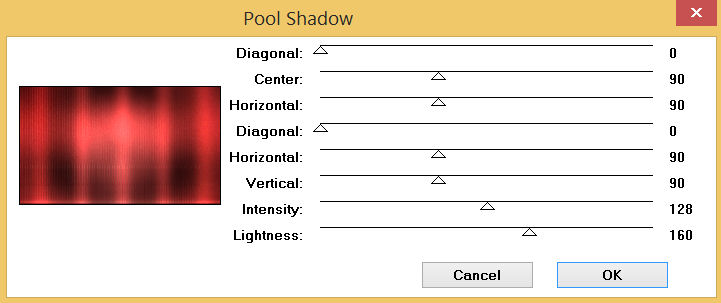
DESELECT
SAVE YOUR WORK
.
|
STEP 5
PSP9 - PSPX3: IMAGE >>> FLIP
PSPX4 - PSPX7: Use script available for download at top of page.
(Higher versions follow your version's method)
LAYERS >>> DUPLICATE
PSP9 - PSPX3: IMAGE >>> FLIP
PSPX4 - PSPX7: Use script available for download at top of page.
(Higher versions follow your version's method)
IMAGE >>> RESIZE = 90%
Check "Lock aspect ratio."
Ensure "Resize all layers" is UNCHECKED
Resample using WEIGHTED AVERAGE
ADJUST >>> SHARPNESS >>> SHARPEN MORE
,
|
|
STEP 6
EFFECTS >>> 3D EFFECTS >>> DROP SHADOW
Vertical & Horizontal offsets = 6
Colour = Black
Opacity = 70
Blur = 10.00
Repeat Drop Shadow effect changing
Vertical & Horizontal Offsets to - ( minus ) 6
Click OK
SAVE YOUR WORK
|
STEP 7
LAYERS >>> NEW RASTER LAYER
Choose your SELECTION TOOL then click on the
CUSTOM SELECTION symbol
and enter these coordinates.
|
|
STEP 8
Open up the Image6 image in your PSP workspace
With Copy of Raster 2 active
Right click on the Title Bar and select COPY from the options
Right click on the Title Bar of your tag image
and select PASTE INTO SELECTION from the options.
ADJUST >>> COLOUR BALANCE >>> NEGATIVE IMAGE
PSPX - PSP2018: IMAGE >>> NEGATIVE IMAGE
DESELECT
|
|
STEP 9
EFFECTS >>> 3D EFFECTS >>> DROP SHADOW
Vertical & Horizontal offsets = 4
Colour = Black
Opacity = 70
Blur = 5.00
SAVE YOUR WORK
,
|
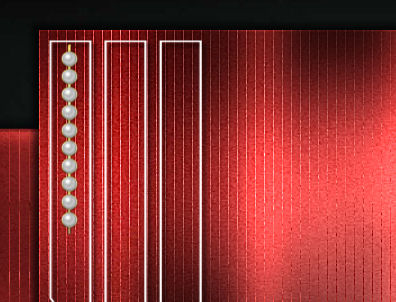
STEP 10
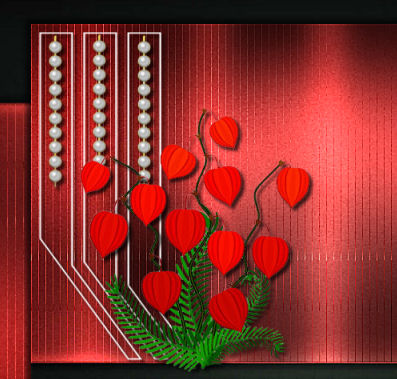
Open up the pearl_border_by_gautamdas image
in your PSP workspace
Right click on the Title Bar and select COPY from the options
Right click on the Title Bar of your tag image
and select PASTE AS NEW LAYER from the options.
.
IMAGE >>> RESIZE = 90%
Check "Lock aspect ratio."
Ensure "Resize all layers" is UNCHECKED
Resample using WEIGHTED AVERAGE
ADJUST >>> SHARPNESS >>> SHARPEN
Reposition with your MOVER tool ,
|
|
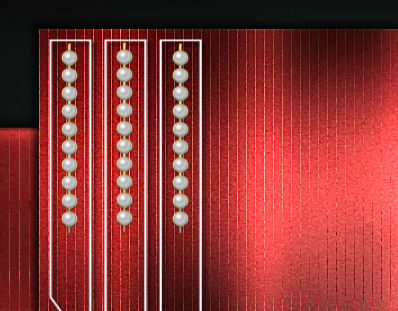
STEP 11
Right click on the Title Bar of your tag image
and select COPY from the options
Right click on the Title Bar of your tag image
and select PASTE AS NEW SELECTION from the options.
Place in middle space
Right click on the Title Bar of your tag image
and select PASTE AS NEW SELECTION from the options.
Place in right space as shown
DESELECT
|
|
STEP 12
LAYERS >>> DUPLICATE
PSP9 - PSPX3: IMAGE >>> MIRROR
PSPX4 - PSPX7: Use script available for download at top of page.
(Higher versions follow your version's method)
LAYERS >>> MERGE >>> MERGE DOWN
EFFECTS >>> 3D EFFECTS >>> DROP SHADOW
Vertical & Horizontal offsets = 4
Colour = Black
Opacity = 70
Blur = 5.00
SAVE YOUR WORK |
|
STEP 13
Open up the 8-ferns-vines-flowers image
in your PSP workspace
Right click on the Title Bar and select COPY from the options
Right click on the Title Bar of your tag image
and select PASTE AS NEW LAYER from the options.
.
EFFECTS >>> IMAGE EFFECTS >>> OFFSET
Horizontal Offset = - ( minus ) 155
Vertical Offset = 0
Edge Mode = Transparent
, |
STEP 14
EFFECTS >>> 3D EFFECTS >>> DROP SHADOW
Vertical & Horizontal offsets = 4
Colour = Black
Opacity = 70
Blur = 5.00, |
|
STEP 15
Open up the 19328746 image
in your PSP workspace
Right click on the Title Bar and select COPY from the options
Right click on the Title Bar of your tag image
and select PASTE AS NEW LAYER from the options.
PSP9 - PSPX3: IMAGE >>> MIRROR
PSPX4 - PSPX7: Use script available for download at top of page.
(Higher versions follow your version's method)
.
IMAGE >>> RESIZE = 50%
Check "Lock aspect ratio."
Ensure "Resize all layers" is UNCHECKED
Resample using WEIGHTED AVERAGE
ADJUST >>> SHARPNESS >>> SHARPEN
SAVE YOUR WORK
, |
STEP 16
EFFECTS >>> IMAGE EFFECTS >>> OFFSET
Horizontal Offset = 220
Vertical Offset = - ( minus ) 40
Edge Mode = Transparent
EFFECTS >>> 3D EFFECTS >>> DROP SHADOW
Vertical offset = 0
Horizontal offset = 5
Colour = Black
Opacity = 70
Blur = 20.00 |
|
STEP 17
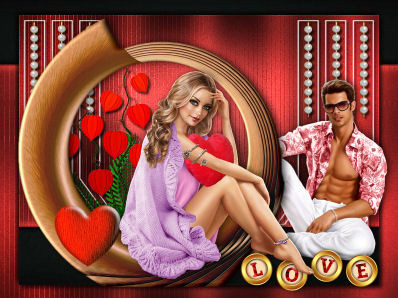
Open up the valentine-2054340 image in your PSP workspace
Right click on the Title Bar and select COPY from the options
Right click on the Title Bar of your tag image
and select PASTE AS NEW LAYER from the options.
IMAGE >>> RESIZE = 75%
Check "Lock aspect ratio."
Ensure "Resize all layers" is UNCHECKED
Resample using WEIGHTED AVERAGE
ADJUST >>> SHARPNESS >>> SHARPEN
, |
STEP 18
EFFECTS >>> IMAGE EFFECTS >>> OFFSET
Horizontal Offset = - ( minus ) 95
Vertical Offset = - ( minus ) 5
Edge Mode = Transparent
EFFECTS >>> 3D EFFECTS >>> DROP SHADOW
Same settings
SAVE YOUR WORK |
|
STEP 19
Open up the love-2015287 image in your PSP workspace
Right click on the Title Bar and select COPY from the options
Right click on the Title Bar of your tag image
and select PASTE AS NEW LAYER from the options.
IMAGE >>> RESIZE = 30%
Check "Lock aspect ratio."
Ensure "Resize all layers" is UNCHECKED
Resample using WEIGHTED AVERAGE
ADJUST >>> SHARPNESS >>> SHARPEN
, |
STEP 20
EFFECTS >>> IMAGE EFFECTS >>> OFFSET
Horizontal Offset = 220
Vertical Offset = - ( minus ) 240
Edge Mode = Transparent
EFFECTS >>> 3D EFFECTS >>> DROP SHADOW
Same settings
SAVE YOUR WORK |
|
STEP 21
Open up the b3ef6156 image in your PSP workspace
Right click on the Title Bar and select COPY from the options
Right click on the Title Bar of your tag image
and select PASTE AS NEW LAYER from the options.
IMAGE >>> RESIZE = 65%
Check "Lock aspect ratio."
Ensure "Resize all layers" is UNCHECKED
Resample using WEIGHTED AVERAGE
ADJUST >>> SHARPNESS >>> SHARPEN
, |
STEP 22
EFFECTS >>> IMAGE EFFECTS >>> OFFSET
Horizontal Offset = 35
Vertical Offset = - ( minus ) 50
Edge Mode = Transparent
EFFECTS >>> 3D EFFECTS >>> DROP SHADOW
Same settings
SAVE YOUR WORK |
|
STEP 23
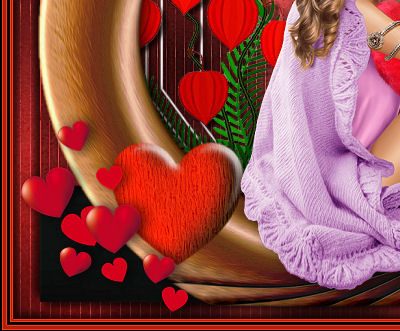
Open up the Hearts_Picture image in your PSP workspace
Right click on the Title Bar and select COPY from the options
Right click on the Title Bar of your tag image
and select PASTE AS NEW LAYER from the options.
IMAGE >>> RESIZE = 30%
Check "Lock aspect ratio."
Ensure "Resize all layers" is UNCHECKED
Resample using WEIGHTED AVERAGE
ADJUST >>> SHARPNESS >>> SHARPEN
, |
STEP 24
EFFECTS >>> IMAGE EFFECTS >>> OFFSET
Horizontal Offset = - ( minus ) 295
Vertical Offset = - ( minus ) 185
Edge Mode = Transparent
EFFECTS >>> 3D EFFECTS >>> DROP SHADOW
Same settings
SAVE YOUR WORK |
|
STEP 25
LAYERS >>> MERGE >>> MERGE VISIBLE
LAYERS >>> NEW RASTER LAYER
SELECTIONS >>> SELECT ALL
Flood fill with BLACK
SELECTIONS >>> MODIFY >>> CONTRACT = 2
EDIT >>> CLEAR
Flood fill with RED #b41d0b
SELECTIONS >>> MODIFY >>> CONTRACT = 5
EDIT >>> CLEAR
Flood fill with BLACK
SELECTIONS >>> MODIFY >>> CONTRACT = 3
EDIT >>> CLEAR
Flood fill with RED #b41d0b
SELECTIONS >>> MODIFY >>> CONTRACT = 3
EDIT >>> CLEAR
DESELECT |
|
STEP 26
EFFECTS >>> 3D EFFECTS >>> DROP SHADOW
Vertical & Horizontal offsets = 5
Colour = Black
Opacity = 70
Blur = 10.00
Repeat Drop Shadow effect changing
Vertical & Horizontal Offsets to - ( minus ) 5
Click OK
EFFECTS >>> EDGE EFFECTS >>> ENHANCE
LAYERS >>> MERGE >>> MERGE VISIBLE |
|
STEP 27
LAYERS >>> NEW RASTER LAYER
SELECT your TEXT tool
With a font of your choice add your name
, |
|
STEP 28
LAYERS >>> MERGE >>> MERGE ALL (Flatten)
Save as .jpg image
, |
| |
|
| |
|