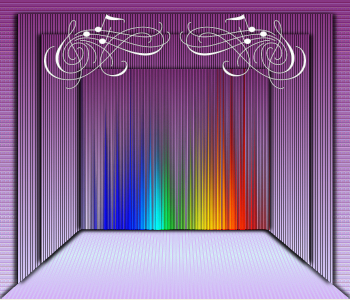
This animation is created using a different method from my other animations.
We are going to create 4 separate animations then combine them
to create
the single animation above.
Remember to save often. |
STEP 1
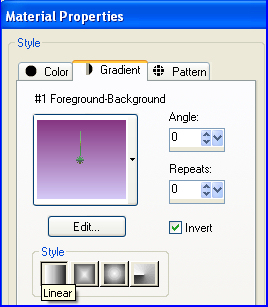
In your MATERIALS PALETTE
Load PURPLE ' #863682 ' in your foreground
Load LILAC ' #d4c9f7 ' in your background
Click on the GRADIENT option on your Foreground
Locate the "Foreground-background" gradient
and use these settings.
|
|
STEP 2
Open a new image 700 x 600
Transparent background
PSPX - X2: Colour Depth = 8bits/channel
PSPX3-X9: Colour Depth RGB = 8bits/channel
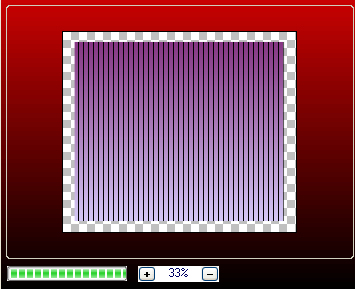
Flood fill with the Gradient
LAYERS >>> DUPLICATE
CLOSE Copy of Raster 1
ACTIVATE
Raster 1
EFFECTS >>> PLUGINS >>> Neology >>> Vasarely Mosaics
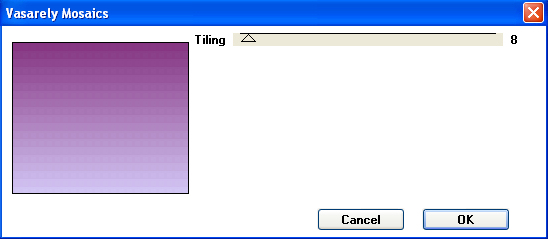
.
|
STEP 3
EFFECTS >>> EDGE EFFECTS >>> ENHANCE MORE
EDIT >>> Repeat Enhance Edges More
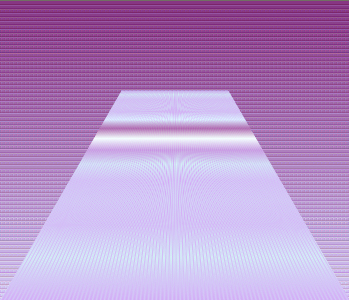
LAYERS >>> DUPLICATE
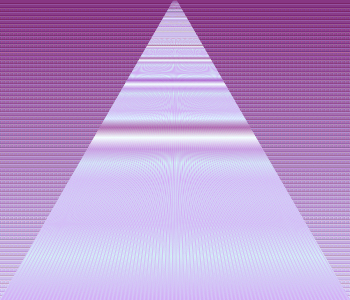
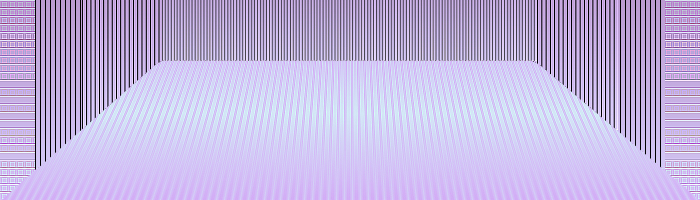
EFFECTS>>> GEOMETRIC EFFECTS >>>
Perspective - Vertical
DISTORTION = - (minus) 100
EDGE MODE = Transparent
|
|
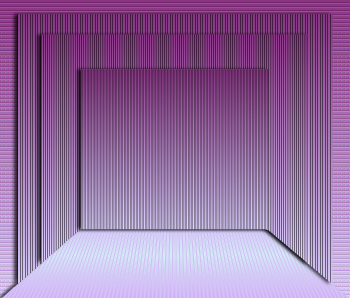
STEP 4
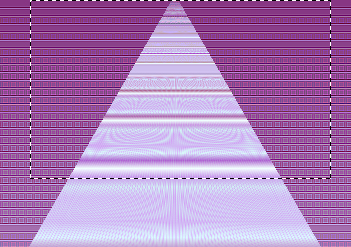
Choose your SELECTION TOOL
Selection Type = Rectangle
Mode = Replace
Feather = 0
Antialias = UNChecked
Select the area shown
|
|
STEP 5
EDIT >>> CLEAR
DESELECT
|
|
STEP 6
OPEN & ACTIVATE top layer
IMAGE >>> RESIZE = 90%
Ensure "Resize all layers" is UNCHECKED
Resample using WEIGHTED AVERAGE
Check "Lock aspect ratio"
EFFECTS >>> PLUGINS >>> AP 01 [Innovations] >>> Lines -SilverLining
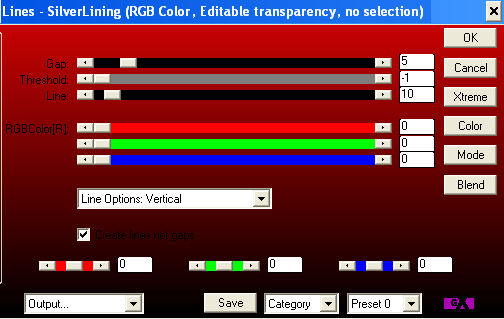
 ,
, |
STEP 7
LAYERS >>> DUPLICATE
IMAGE >>> RESIZE = 85%
Same settings
ADJUST >>> SHARPNESS >>> SHARPEN
LAYERS >>> DUPLICATE
IMAGE >>> RESIZE = 70%
Same settings
SAVE YOUR WORK |
|
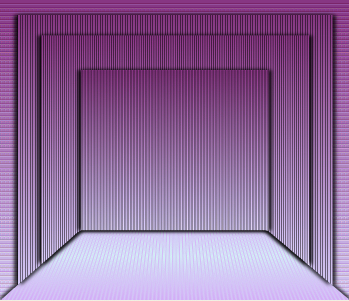
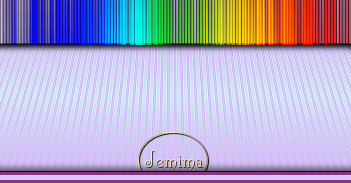
STEP 8
Choose your FREEHAND SELECTION TOOL
Selection Type = Point to Point
Mode = Replace
Feather = 0
Smoothing = 6
Antialias = Checked
Select the area shown following the arrows to "4" then release
 , , |
STEP 9
ACTIVATE Copy (2) of Raster 1
EDIT >>> CLEAR
ACTIVATE Copy of Raster 1
(Directly below
Copy (2) of Raster 1)
EDIT >>> CLEAR
ACTIVATE Copy of Raster 1
(Directly above Raster 1)
SELECTIONS >>> INVERT
EDIT >>> CLEAR
DESELECT
SAVE YOUR WORK |
STEP 10
EFFECTS >>> 3D EFFECTS >>> DROP SHADOW
Vertical offset = 0
Horizontal offset = - ( minus ) 7
Colour = Black
Opacity = 75
Blur = 10.00
ACTIVATE Copy of Raster 1
(Directly below
Copy (2) of Raster 1)
EDIT >>> Repeat Drop Shadow
ACTIVATE Copy (2) of Raster 1
EDIT >>> Repeat Drop Shadow
ACTIVATE Copy (3) of Raster 1
EDIT >>> Repeat Drop Shadow |
|
STEP 11
EFFECTS >>> 3D EFFECTS >>> DROP SHADOW
Vertical offset = 0
Horizontal offset = 7
Colour = Black
Opacity = 75
Blur = 10.00
ACTIVATE Copy (2) of Raster 1
EDIT >>> Repeat Drop Shadow
ACTIVATE Copy of Raster 1
(Directly below Copy (2) of Raster 1)
EDIT >>> Repeat Drop Shadow
ACTIVATE Copy of Raster 1
(Directly above Raster 1)
EDIT >>> Repeat Drop Shadow |
|
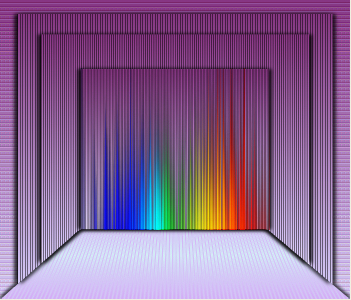
STEP 12
ACTIVATE TOP Layer
Open up the pixz6cm.png image in your PSP workspace
Right click on the Title Bar and select COPY from the options
Right click on the Title Bar of your tag image
and select PASTE AS NEW LAYER from the options.
IMAGE >>> RESIZE = 54%
Ensure "Resize all layers" is UNCHECKED
Resample using WEIGHTED AVERAGE
Check "Lock aspect ratio"
In your LAYER PALETTE change the
BLEND MODE to HARD LIGHT |
|
STEP 13
LAYERS >>> MERGE >>> MERGE VISIBLE
Open up the notes-clipart-free image in your PSP workspace
Right click on the Title Bar and select COPY from the options
Right click on the Title Bar of your tag image
and select PASTE AS NEW LAYER from the options.
IMAGE >>> RESIZE = 75%
Ensure "Resize all layers" is UNCHECKED
Resample using WEIGHTED AVERAGE
Check "Lock aspect ratio"
, |
STEP 14
ADJUST >>> COLOUR BALANCE >>> NEGATIVE IMAGE
PSPX - X9: IMAGE >>> NEGATIVE IMAGE
EFFECTS >>> IMAGE EFFECTS >>> OFFSET
Horizontal Offset = 0
Vertical Offset = 195
Edge Mode = Transparent
LAYERS >>> DUPLICATE
LAYERS >>> MERGE >>> MERGE VISIBLE
Rename this layer Background
SAVE YOUR WORK
|
|
STEP 14B
Open up the BeHappyFrame image in your PSP workspace
Right click on the Title Bar and select COPY from the options
Right click on the Title Bar of your tag image
and select PASTE AS NEW LAYER from the options.
LAYERS >>> MERGE >>> MERGE VISIBLE
LAYERS >> NEW RASTER LAYER
Select your TEXT TOOL
with font and settings of your choice
add your name
LAYERS >>> MERGE >>> MERGE VISIBLE
SAVE YOUR WORK
|
|
We are now going to tackle PART 2
.
|
| |
|