.COLOURS USED
 |
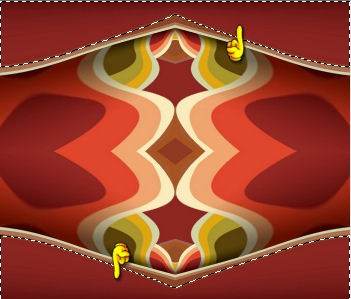
STEP 1
Open up the Lines-Inside-8 image in your PSP workspace
WINDOW >>> DUPLICATE
Close the original Image
LAYERS >>> Promote background Layer
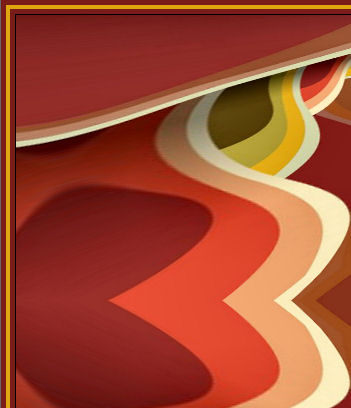
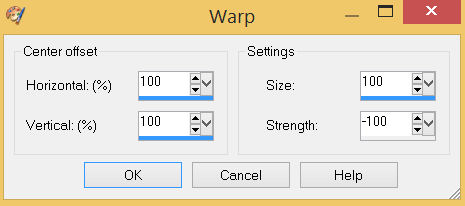
EFFECTS >>> DISTORTION EFFECTS >>> WARP
,
|
STEP 2
EFFECTS >>> REFLECTION EFFECTS >>>
ROTATING MIRROR
Horizontal Offset = 0
Vertical Offset = n/a
Rotation angle = 180
Edge Mode =Reflect.
IMAGE >>> FLIP
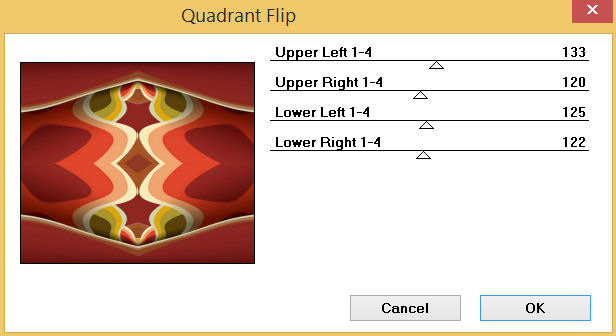
EFFECTS >>> PLUGINS >>> Mirror Rave >>> Quadrant Flip
PSP9 - PSPX2: ADJUST >>> BRIGHTNESS and CONTRAST >>> CLARIFY
Strength of effect = 5
PSPX3: BRIGHTNESS and CONTRAST >>> LOCAL TONE
Mapping strength = 5
PSPX4 - PSPX9: Block Size = 8
Rename this layer BGD
|
STEP 3
With your MAGIC WAND
Mode = Add (Shift)
Match Mode = RGB Value
Tolerance = 21
Feather = 2
Antialias = Checked
Sample Merged = UNCHECKED
PSP9 - X9: Check CONTIGUOUS
PSPX - X9: There is no " Sample Merged"
PSPX - X9: Use all layers = UNChecked
PSP9 - X9: ANTIALIAS = Outside
Select the areas indicated.
|
|
STEP 4
LAYERS >>> NEW RASTER LAYER
Flood fill selections with BLUE #2342a9
Rename this layer BLUE
LAYERS >>> NEW RASTER LAYER
Flood fill selections with PURPLE #7e1e87
Rename this layer PURPLE
LAYERS >>> NEW RASTER LAYER
Flood fill selections with GREEN #005814
Rename this layer GREEN
LAYERS >>> NEW RASTER LAYER
Flood fill selections with ORANGE #e0462c
Rename this layer ORANGE
DESELECT
SAVE YOUR WORK |
|
NOTE: We won't be renaming the rest of the layers
since we will be merging them at the end.
|
STEP 5
CLOSE the top 4 layers BUT keep the ORANGE layer active.
LAYERS >>> NEW RASTER LAYER
Flood fill with MAROON #7a1d18
SELECTIONS >>> SELECT ALL
SELECTIONS >>> MODIFY >>> CONTRACT = 5
EDIT >>> CLEAR
Flood fill with YELLOW #e0a80f
SELECTIONS >>> MODIFY >>> CONTRACT = 4
EDIT >>> CLEAR
Flood fill with MAROON #7a1d18
SELECTIONS >>> MODIFY >>> CONTRACT = 5
EDIT >>> CLEAR
Flood fill with BLACK #000000
SELECTIONS >>> MODIFY >>> CONTRACT = 1
EDIT >>> CLEAR
DESELECT |
|
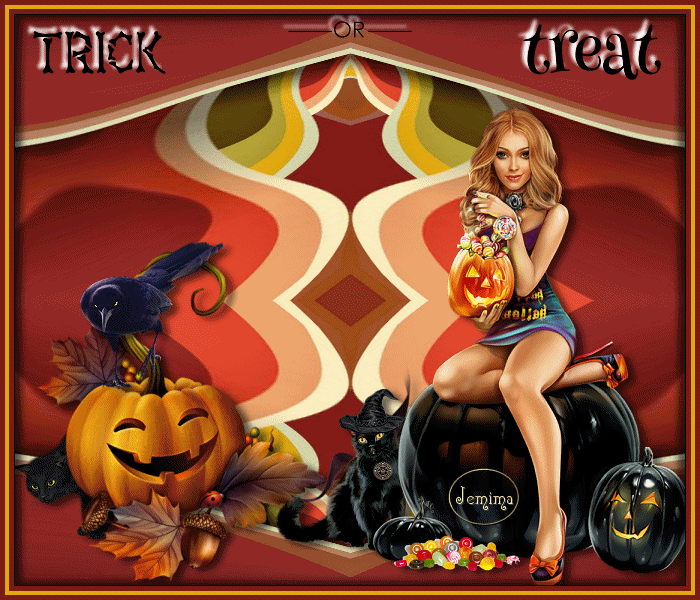
STEP 6
ACTIVATE the ORANGE layer but keep closed
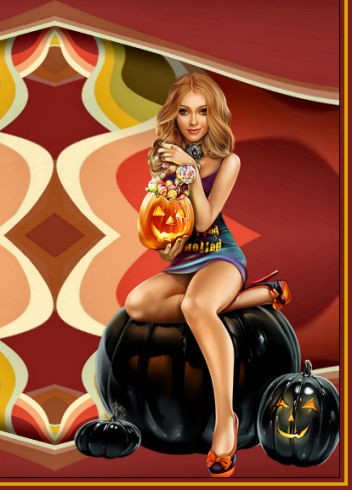
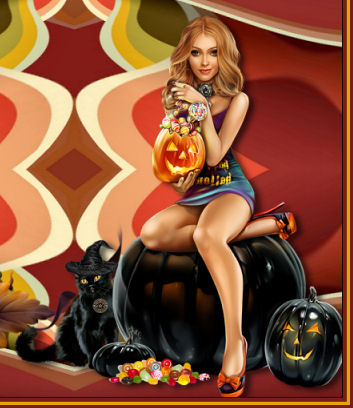
Open up the halloween beauty image in your PSP workspace
Right click on the Title Bar and select COPY from the options
Right click on the Title Bar of your tag image
and select PASTE AS NEW LAYER from the options.
IMAGE >>> MIRROR
IMAGE >>> RESIZE = 60%
Ensure "Resize all layers" is UNCHECKED
Resample using WEIGHTED AVERAGE
Check "Lock aspect ratio"
ADJUST >>> SHARPNESS >>> SHARPEN
Reposition with your MOVER tool |
|
STEP 7
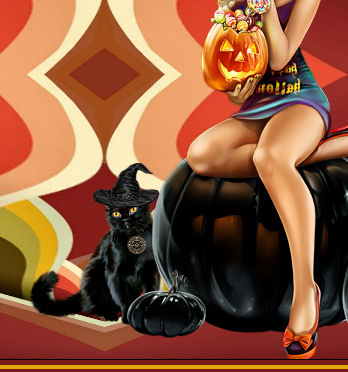
ACTIVATE the GREEN layer but keep closed
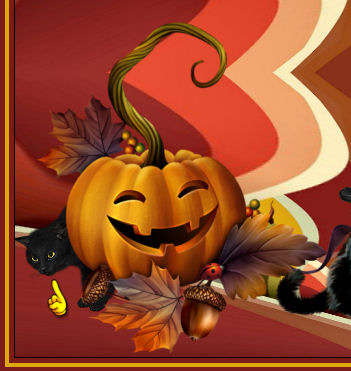
Open up the HalloweenCat image in your PSP workspace
Right click on the Title Bar and select COPY from the options
Right click on the Title Bar of your tag image
and select PASTE AS NEW LAYER from the options.
IMAGE >>> RESIZE = 35%
Ensure "Resize all layers" is UNCHECKED
Resample using WEIGHTED AVERAGE
Check "Lock aspect ratio"
ADJUST >>> SHARPNESS >>> SHARPEN
Reposition with your MOVER tool |
|
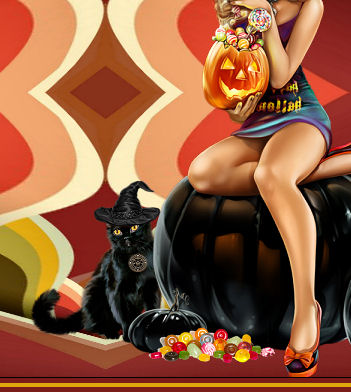
STEP 8
ACTIVATE Raster 2
Open up the candy image in your PSP workspace
Right click on the Title Bar and select COPY from the options
Right click on the Title Bar of your tag image
and select PASTE AS NEW LAYER from the options.
IMAGE >>> RESIZE = 40%
Ensure "Resize all layers" is UNCHECKED
Resample using WEIGHTED AVERAGE
Check "Lock aspect ratio"
ADJUST >>> SHARPNESS >>> SHARPEN
Reposition with your MOVER tool
SAVE YOUR WORK
|
|
STEP 9
ACTIVATE the GREEN layer but keep closed
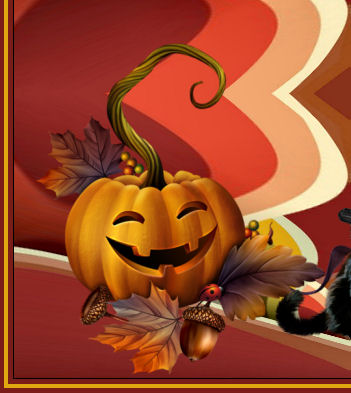
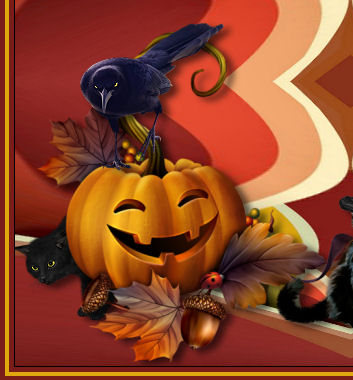
Open up the pumpkin-2c image in your PSP workspace
Right click on the Title Bar and select COPY from the options
Right click on the Title Bar of your tag image
and select PASTE AS NEW LAYER from the options.
IMAGE >>> RESIZE = 65%
Ensure "Resize all layers" is UNCHECKED
Resample using WEIGHTED AVERAGE
Check "Lock aspect ratio"
ADJUST >>> SHARPNESS >>> SHARPEN
Reposition with your MOVER tool |
|
STEP 10
ACTIVATE the GREEN layer but keep closed
Open up the kosh218 image in your PSP workspace
Right click on the Title Bar and select COPY from the options
Right click on the Title Bar of your tag image
and select PASTE AS NEW LAYER from the options.
IMAGE >>> MIRROR
IMAGE >>> RESIZE = 25%
Ensure "Resize all layers" is UNCHECKED
Resample using WEIGHTED AVERAGE
Check "Lock aspect ratio"
ADJUST >>> SHARPNESS >>> SHARPEN
Reposition with your MOVER tool |
|
STEP 11
ACTIVATE Raster 5
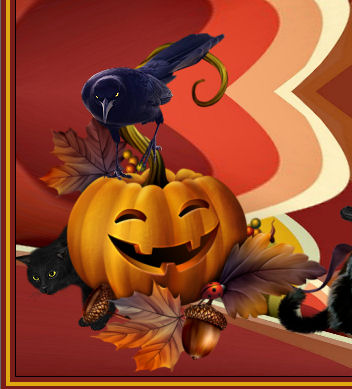
Open up the crow image in your PSP workspace
Right click on the Title Bar and select COPY from the options
Right click on the Title Bar of your tag image
and select PASTE AS NEW LAYER from the options.
IMAGE >>> MIRROR
IMAGE >>> RESIZE = 30%
Ensure "Resize all layers" is UNCHECKED
Resample using WEIGHTED AVERAGE
Check "Lock aspect ratio"
ADJUST >>> SHARPNESS >>> SHARPEN
Reposition with your MOVER tool
SAVE YOUR WORK
|
|
STEP 12
ACTIVATE Raster 5
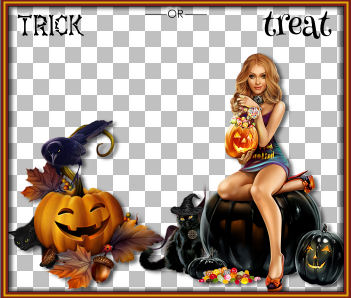
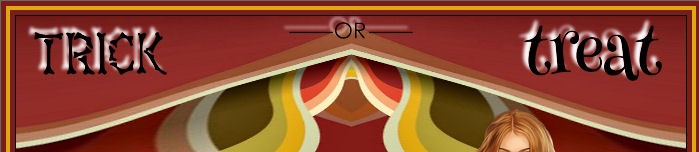
Open up the trickortreat image in your PSP workspace
Choose your SELECTION TOOL
Selection Type = Rectangle
Mode = Replace
Feather = 0
Antialias = UNChecked
Select the word "TRICK"
Right click on the Title Bar and select COPY from the options
DESELECT
|
STEP 13
Right click on the Title Bar of your tag image
and select PASTE AS NEW LAYER from the options.
IMAGE >>> RESIZE = 25%
Ensure "Resize all layers" is UNCHECKED
Resample using WEIGHTED AVERAGE
Check "Lock aspect ratio"
Reposition with your MOVER tool |
|
STEP 14
Back to the trickortreat image in your PSP workspace
Choose your SELECTION TOOL
Same settings
Select the word "-----OR-----"
Right click on the Title Bar and select COPY from the options
DESELECT |
STEP 15
Right click on the Title Bar of your tag image
and select PASTE AS NEW LAYER from the options.
IMAGE >>> RESIZE = 25%
Ensure "Resize all layers" is UNCHECKED
Resample using WEIGHTED AVERAGE
Check "Lock aspect ratio"
EFFECTS >>> IMAGE EFFECTS >>> OFFSET
Horizontal Offset = 0
Vertical Offset = 270
Edge Mode = Transparent
LAYERS >>> MERGE >>> MERGE DOWN |
|
STEP 16
Back to the trickortreat image in your PSP workspace
Choose your SELECTION TOOL
Same settings
Select the word "TREAT"
Right click on the Title Bar and select COPY from the options
DESELECT |
STEP 17
Right click on the Title Bar of your tag image
and select PASTE AS NEW LAYER from the options.
IMAGE >>> RESIZE = 25%
Ensure "Resize all layers" is UNCHECKED
Resample using WEIGHTED AVERAGE
Check "Lock aspect ratio"
Reposition with your MOVER tool
LAYERS >>> MERGE >>> MERGE DOWN
SAVE YOUR WORK |
|
STEP 18
EFFECTS >>> 3D EFFECTS >>> DROP SHADOW
Vertical & Horizontal offsets = - ( minus ) 5
Colour = WHITE
Opacity = 100
Blur = 5.00
 ,
, |
STEP 19
ACTIVATE Raster 4
EFFECTS >>> 3D EFFECTS >>> DROP SHADOW
Vertical offset = 4
Horizontal offset = 7
Colour = Black
Opacity = 60
Blur = 10.00
ACTIVATE Raster 2
EDIT >>> Repeat Drop Shadow
ACTIVATE Raster 3
EDIT >>> Repeat Drop Shadow
|
|
STEP 20
ACTIVATE Raster 7
EDIT >>> Repeat Drop Shadow
ACTIVATE Raster 5
EDIT >>> Repeat Drop Shadow
ACTIVATE Raster 6
EDIT >>> Repeat Drop Shadow |
|
STEP 21
ACTIVATE Raster 1
EFFECTS >>> 3D EFFECTS >>> DROP SHADOW
Vertical offset = 4
Horizontal offset = 7
Colour = Black
Opacity = 60
Blur = 10.00
EFFECTS >>> 3D EFFECTS >>> DROP SHADOW
Vertical offset = - ( minus ) 4
Horizontal offset = - ( minus ) 7
Colour = Black
Opacity = 60
Blur = 10.00 |
|
STEP 22
CLOSE the BGD layer
Ensure the BLUE, PURPLE, GREEN and ORANGE layers
are closed
LAYERS >>> MERGE >>> MERGE VISIBLE
SAVE YOUR WORK |
|
STEP 23
LAYERS >>> NEW RASTER LAYER
Select your TEXT TOOL
with font and settings of your choice
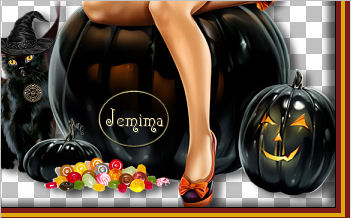
add your name
LAYERS >>> MERGE >>> MERGE DOWN
SAVE YOUR WORK |
|
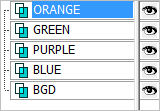
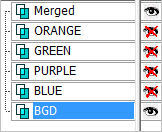
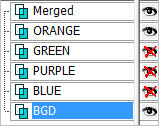
STEP 24
Set up LAYER PALETTE as shown
Right click on Title Bar and select
Copy from the options, |
|
STEP 25
In ANIMATION SHOP
Right click the workspace and select
'Paste As New Animation' from the options.
Back to PSP.
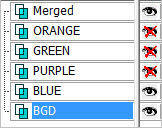
Set up LAYER PALETTE as shown
Right click on Title Bar and select
Copy merged from the options, |
|
STEP 26
In ANIMATION SHOP
Right click the workspace and select
'Paste As New Animation' from the options.
Back to PSP.
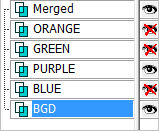
Set up LAYER PALETTE as shown
Right click on Title Bar and select
Copy merged from the options |
|
STEP 27
In ANIMATION SHOP
Right click the workspace and select
'Paste As New Animation' from the options.
Back to PSP.
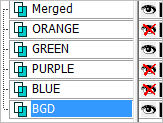
Set up LAYER PALETTE as shown
Right click on Title Bar and select
Copy merged from the options, |
|
STEP 28
In ANIMATION SHOP
Right click the workspace and select
'Paste As New Animation' from the options.
Back to PSP.
Set up LAYER PALETTE as shown
Right click on Title Bar and select
Copy merged from the options, |
|
STEP 29
In ANIMATION SHOP
Right click the workspace and select
'Paste As New Animation' from the options.
Edit >> Select All
Right click on Title Bar of frames
Select 'Frame Properties' from the options
Display time = 30
, |
STEP 30
View >> Animation
and while it is still running,
File >> Save As
Locate the folder in which you wish to save it.
Name your animation.
With the Gif Optimiser keep pressing NEXT
until you get to the last one... click FINISH
Close the Animation
Close the frames.
Close Animation Shop, |
|
|
|
|