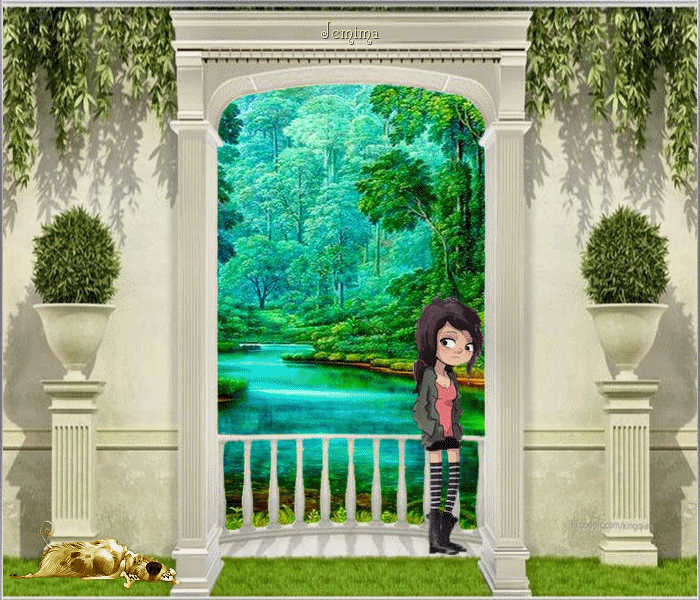
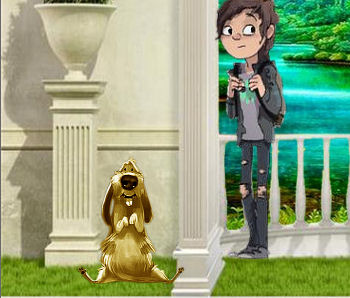
STEP 1
Open up the balcony scene image in your PSP workspace
WINDOW >>> DUPLICATE
Close the original Image
Rename this layer FOREGROUND
|
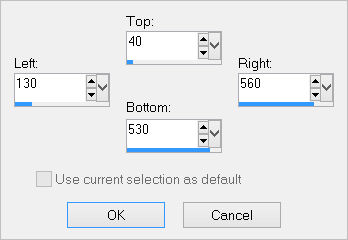
STEP 2
Choose your SELECTION TOOL then click on the
CUSTOM SELECTION symbol
and enter these coordinates. .
|
|
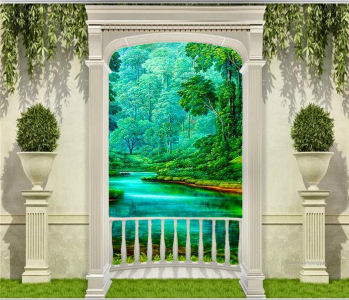
STEP 3
LAYERS >>> NEW RASTER LAYER
LAYERS >>> ARRANGE >>> MOVE DOWN
Open up the landscape-3 image in your PSP workspace
Right click on the Title Bar and select COPY from the options
Right click on the Title Bar of your tag image
and select PASTE INTO SELECTION from the options.
DESELECT
Rename this layer BACKGROUND
SAVE YOUR WORK
|
|
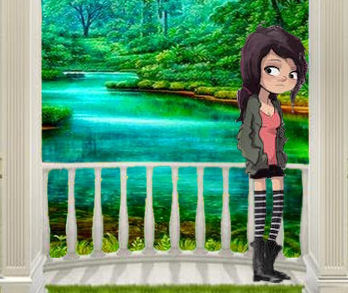
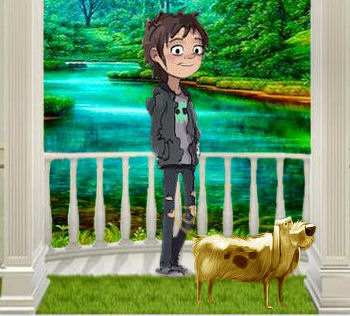
STEP 4
ACTIVATE FOREGROUND
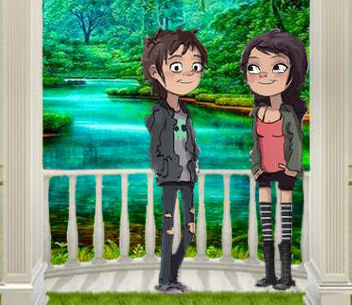
Open up the make friends image in your PSP workspace
Activate Layer 5
Right click on the Title Bar and select COPY from the options.
Right click on the Title Bar of your tag image
and select PASTE AS NEW LAYER from the options.
EFFECTS >>> IMAGE EFFECTS >>> OFFSET
Horizontal Offset = 100
Vertical Offset = - ( minus ) 125
Edge Mode = Transparent
Rename this layer Girl 1
|
|
STEP 5
ACTIVATE BACKGROUND
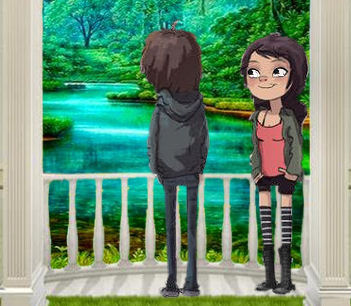
Back to the make friends image in your PSP workspace
Activate Layer 2
Right click on the Title Bar and select COPY from the options.
Right click on the Title Bar of your tag image
and select PASTE AS NEW LAYER from the options.
EFFECTS >>> IMAGE EFFECTS >>> OFFSET
Horizontal Offset = - ( minus ) 110
Vertical Offset = - ( minus ) 90
Edge Mode = Transparent
Rename this layer Boy 1
|
|
STEP 6
ACTIVATE & CLOSE Girl 1
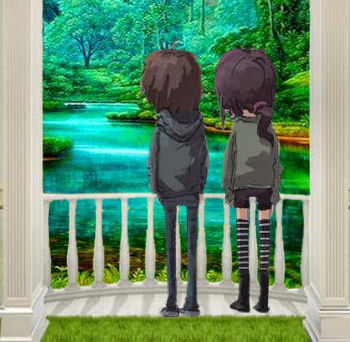
Back to the make friends image in your PSP workspace
Activate Layer 7
Right click on the Title Bar and select COPY from the options.
Right click on the Title Bar of your tag image
and select PASTE AS NEW LAYER from the options.
EFFECTS >>> IMAGE EFFECTS >>> OFFSET
Horizontal Offset = 100
Vertical Offset = - ( minus ) 120
Edge Mode = Transparent
Rename this layer Girl 2
SAVE YOUR WORK
|
|
STEP 7
CLOSE Boy 1
Remain on Girl 2 layer
Back to the make friends image in your PSP workspace
Activate Layer 4
Right click on the Title Bar and select COPY from the options.
Right click on the Title Bar of your tag image
and select PASTE AS NEW LAYER from the options.
EFFECTS >>> IMAGE EFFECTS >>> OFFSET
Horizontal Offset = - ( minus ) 100
Vertical Offset = - ( minus ) 125
Edge Mode = Transparent
Rename this layer Boy 2
|
|
STEP 8
CLOSE Boy 2 but keep active
Back to the make friends image in your PSP workspace
Activate Layer 6
Right click on the Title Bar and select COPY from the options.
Right click on the Title Bar of your tag image
and select PASTE AS NEW LAYER from the options.
EFFECTS >>> IMAGE EFFECTS >>> OFFSET
Horizontal Offset = 0
Vertical Offset = - ( minus ) 120
Edge Mode = Transparent
Rename this layer Boy 3
|
|
STEP 9
CLOSE Girl 2
Back to the make friends image in your PSP workspace
Activate Layer 3
Right click on the Title Bar and select COPY from the options.
Right click on the Title Bar of your tag image
and select PASTE AS NEW LAYER from the options.
EFFECTS >>> IMAGE EFFECTS >>> OFFSET
Horizontal Offset = 100
Vertical Offset = - ( minus ) 125
Edge Mode = Transparent
Rename this layer Girl 3
SAVE YOUR WORK
|
|
STEP 10
CLOSE Boy 3
Back to the make friends image in your PSP workspace
Activate Layer 2
Right click on the Title Bar and select COPY from the options.
Right click on the Title Bar of your tag image
and select PASTE AS NEW LAYER from the options.
EFFECTS >>> IMAGE EFFECTS >>> OFFSET
Horizontal Offset = 0
Vertical Offset = - ( minus ) 125
Edge Mode = Transparent
Rename this layer Boy 4
|
|
STEP 11
CLOSE Boy 4
Back to the make friends image in your PSP workspace
Activate Layer 8
Right click on the Title Bar and select COPY from the options.
Right click on the Title Bar of your tag image
and select PASTE AS NEW LAYER from the options.
EFFECTS >>> IMAGE EFFECTS >>> OFFSET
Horizontal Offset = 0
Vertical Offset = - ( minus ) 120
Edge Mode = Transparent
Rename this layer Boy 5 |
|
STEP 12
CLOSE Girl 3
Back to the make friends image in your PSP workspace
Activate Layer 1
Right click on the Title Bar and select COPY from the options.
Right click on the Title Bar of your tag image
and select PASTE AS NEW LAYER from the options.
EFFECTS >>> IMAGE EFFECTS >>> OFFSET
Horizontal Offset = 75
Vertical Offset = - ( minus ) 120
Edge Mode = Transparent
Rename this layer Girl 4
SAVE YOUR WORK |
|
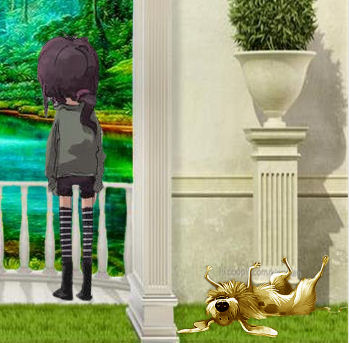
STEP 13
CLOSE Girl 4 and Boy 5
ACTIVATE FOREGROUND
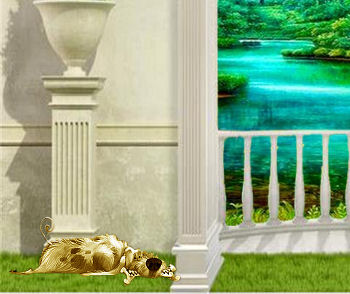
Open up the playful pup image in your PSP workspace
Activate Layer 1
Right click on the Title Bar and select COPY from the options.
Right click on the Title Bar of your tag image
and select PASTE AS NEW LAYER from the options.
EFFECTS >>> IMAGE EFFECTS >>> OFFSET
Horizontal Offset = - ( minus ) 255
Vertical Offset = - ( minus ) 255
Edge Mode = Transparent
Rename this layer pup 1 |
|
STEP 14
CLOSE pup 1
OPEN & ACTIVATE Boy 2
Open up the playful pup image in your PSP workspace
Activate Layer 2
Right click on the Title Bar and select COPY from the options.
Right click on the Title Bar of your tag image
and select PASTE AS NEW LAYER from the options.
EFFECTS >>> IMAGE EFFECTS >>> OFFSET
Horizontal Offset = - ( minus ) 220
Vertical Offset = - ( minus ) 220
Edge Mode = Transparent
Rename this layer pup 2
SAVE YOUR WORK
|
|
STEP 15
CLOSE Boy 2 and pup 2
OPEN & ACTIVATE Boy 3
Open up the playful pup image in your PSP workspace
Activate Layer 3
Right click on the Title Bar and select COPY from the options.
Right click on the Title Bar of your tag image
and select PASTE AS NEW LAYER from the options.
EFFECTS >>> IMAGE EFFECTS >>> OFFSET
Horizontal Offset = - ( minus ) 100
Vertical Offset = - ( minus ) 240
Edge Mode = Transparent
Rename this layer pup 3 |
|
STEP 16
CLOSE Boy 3 and pup 3
OPEN & ACTIVATE Boy 4
Open up the playful pup image in your PSP workspace
Activate Layer 4
Right click on the Title Bar and select COPY from the options.
Right click on the Title Bar of your tag image
and select PASTE AS NEW LAYER from the options.
EFFECTS >>> IMAGE EFFECTS >>> OFFSET
Horizontal Offset = 70
Vertical Offset = - ( minus ) 240
Edge Mode = Transparent
Rename this layer pup 4 |
|
STEP 17
CLOSE Boy 4 and pup 4
OPEN & ACTIVATE Girl 4
Open up the playful pup image in your PSP workspace
Activate Layer 5
Right click on the Title Bar and select COPY from the options.
Right click on the Title Bar of your tag image
and select PASTE AS NEW LAYER from the options.
EFFECTS >>> IMAGE EFFECTS >>> OFFSET
Horizontal Offset = 265
Vertical Offset = - ( minus ) 250
Edge Mode = Transparent
Rename this layer pup 5
SAVE YOUR WORK
|
|
STEP 18
ACTIVATE the FOREGROUND layer
LAYERS >> NEW RASTER LAYER
Select your TEXT TOOL
with font and settings of your choice
add your name
LAYERS >>> MERGE >>> MERGE DOWN
|
|
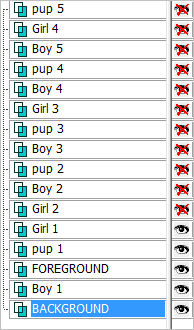
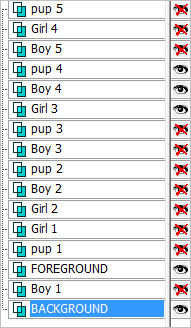
STEP 19
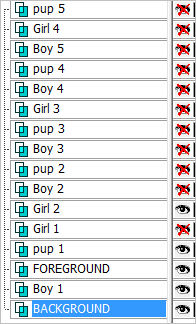
Set up LAYER PALETTE as shown
Right click on Title Bar and select
Copy merged from the options, |
|
STEP 20
In ANIMATION SHOP
Right click the workspace and select
'Paste As New Animation' from the options.
Back to PSP.
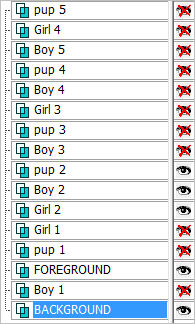
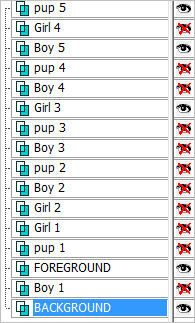
Set up LAYER PALETTE as shown
Right click on Title Bar and select
Copy merged from the options. |
|
STEP 21
In ANIMATION SHOP
Select >>>
'Paste After Current' icon on top menu
Back to PSP.
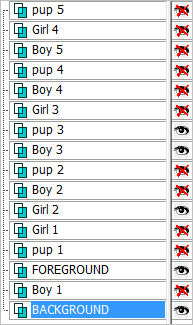
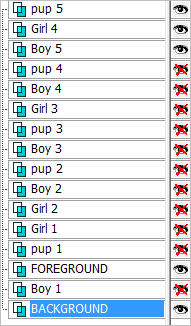
Set up LAYER PALETTE as shown
Right click on Title Bar and select
Copy merged from the options. |
|
STEP 22
In ANIMATION SHOP
Select >>> 'Paste After Current' icon on top menu
Back to PSP.
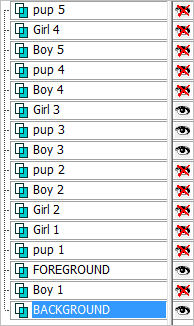
Set up LAYER PALETTE as shown
Right click on Title Bar and select
Copy merged from the options. |
|
STEP 23
In ANIMATION SHOP
Select >>> 'Paste After Current' icon on top menu
Back to PSP.
Set up LAYER PALETTE as shown
Right click on Title Bar and select
Copy merged from the options. |
|
STEP 24
In ANIMATION SHOP
Select >>> 'Paste After Current' icon on top menu
Back to PSP.
Set up LAYER PALETTE as shown
Right click on Title Bar and select
Copy merged from the options. |
|
STEP 25
In ANIMATION SHOP
Select >>> 'Paste After Current' icon on top menu
Back to PSP.
Set up LAYER PALETTE as shown
Right click on Title Bar and select
Copy merged from the options. |
|
STEP 26
In ANIMATION SHOP
Select >>> 'Paste After Current' icon on top menu
Back to PSP.
Set up LAYER PALETTE as shown
Right click on Title Bar and select
Copy merged from the options. |
|
STEP 27
In ANIMATION SHOP
Select >>> 'Paste After Current' icon on top menu
Back to PSP.
Set up LAYER PALETTE as shown
Right click on Title Bar and select
Copy merged from the options. |
|
STEP 28
In ANIMATION SHOP
Select >>> 'Paste After Current' icon on top menu
Edit >> Select All
Right click on Title Bar of frames
Select 'Frame Properties' from the options
Display time = 70
~~~~~~~~~~~~~~~
Scroll the arrow on the bottom of the frame to last frame
( F:9)
Right click inside the frame (F:9)
Select 'Frame Properties' from the options
Display time = 120
, |
STEP 29
View >> Animation
and while it is still running,
File >> Save As
Locate the folder in which you wish to save it.
Name your animation.
With the Gif Optimiser keep pressing NEXT
until you get to the last one... click FINISH
Close the Animation
Close the frames.
Close Animation Shop
, |
|
|
|
|
|
|