STEP 1
Open a new image 700 x 600
Transparent background
PSP9: Colour Depth = 16 Million Colors (24bit)
PSPX-X9: Colour Depth RGB = 8bits/channel
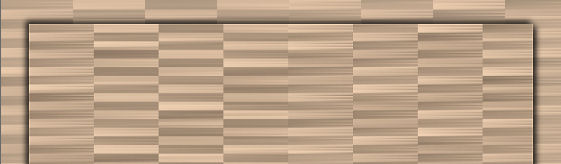
Flood fill with DARK CREME #d9bca0
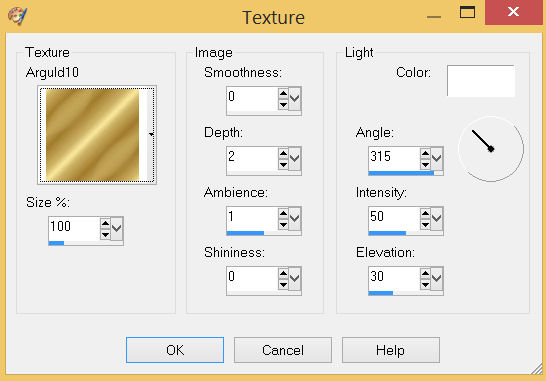
EFFECTS >>> TEXTURE EFFECTS >>> TEXTURE
TEXTURE = Arguld10
COLOUR = White
.
|
STEP 2
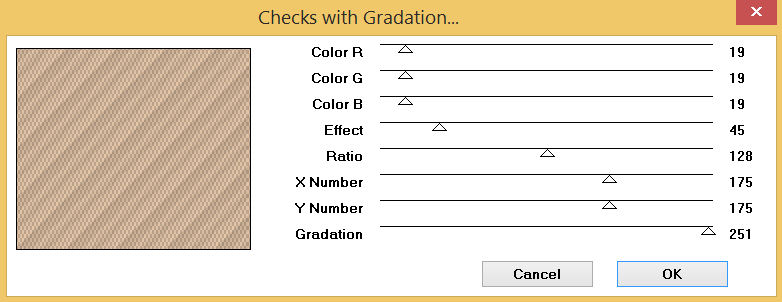
EFFECTS >>> PLUGINS >>> MuRa's Seamless >>> Checks with Gradation..
|
STEP 3
EFFECTS >>> PLUGINS >>> Filter Factory Gallery Q >>> Mosaic.

|
STEP 4
LAYERS >>> DUPLICATE
IMAGE >>> RESIZE = 90%
Ensure "Resize all layers" is UNCHECKED
Resample using WEIGHTED AVERAGE
ADJUST >>> SHARPNESS >>> SHARPEN
PSP9 - PSPX2:ADJUST >>> BRIGHTNESS and CONTRAST >>> CLARIFY
Strength of effect = 5
PSPX3- PSPX6/X9: ADJUST >>> BRIGHTNESS and CONTRAST >>> LOCAL TONE MAPPING
Mapping strength = 3
PSPX6/X9: Block size = 8
EFFECTS >>> 3D EFFECTS >>> DROP SHADOW
Vertical & Horizontal offsets = 4
Colour = Black
Opacity = 80
Blur = 10.00
Repeat Drop Shadow effect changing
Vertical & Horizontal Offsets to - ( minus ) 4
Click OK
|
STEP 5
LAYERS >>> NEW RASTER LAYER
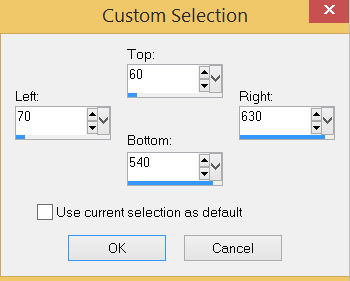
Choose your SELECTION TOOL then click on the
CUSTOM SELECTION symbol
and enter these coordinates.
|
|
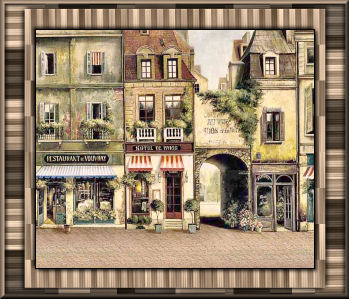
STEP 6
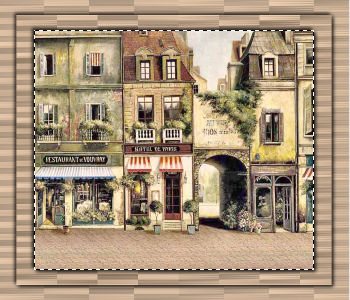
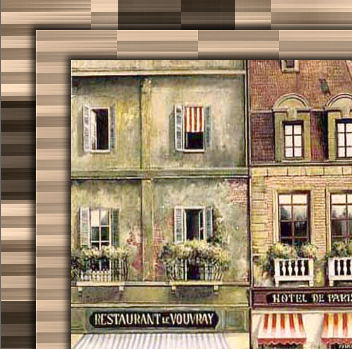
Open up the Fabrice de Villeneuve 1954 image
in your PSP workspace
Right click on the Title Bar and select COPY from the options
Right click on the Title Bar of your tag image
and select PASTE INTO SELECTION from the options.
EFFECTS >>> 3D EFFECTS >>> DROP SHADOW
Vertical & Horizontal offsets = 4
Colour = Black
Opacity = 80
Blur = 10.00
Repeat Drop Shadow effect changing
Vertical & Horizontal Offsets to - ( minus ) 4
Click OK
|
|
STEP 7
SELECTIONS >>> INVERT
ACTIVATE Raster 1
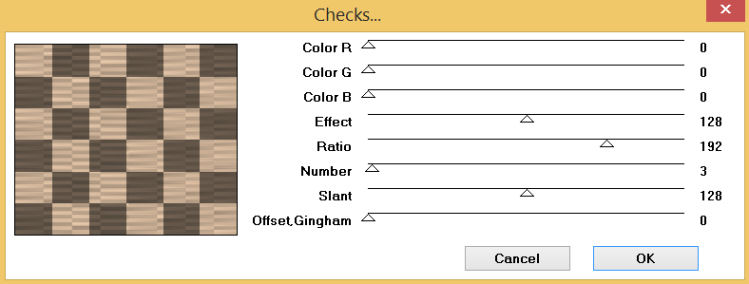
EFFECTS >>> PLUGINS >>> MuRa's Seamless >>> Checks
,
|
STEP 8
PSP9 - PSPX2:ADJUST >>> BRIGHTNESS and CONTRAST >>> CLARIFY
Strength of effect = 5
PSPX3- PSPX6/X9: ADJUST >>> BRIGHTNESS and CONTRAST >>> LOCAL TONE MAPPING
Mapping strength = 3
PSPX6/X9: Block size = 8
~~~~~~~~~~~~~~~~~
Repeat above 2 more times
DESELECT
SAVE YOUR WORK
|
|
STEP 9
VIEW >>> RULERS
CLOSE Raster 2
ACTIVATE Copy of Raster 1
PSP9: IMAGE >>> ROTATE >>> FREE ROTATE = RIGHT 90
Ensure "All layers" is UNCHECKED
PSPX - PSPX9: IMAGE >>> FREE ROTATE = RIGHT 90
Ensure "All layers" is UNCHECKED
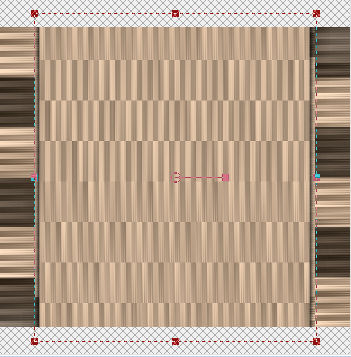
Select your RASTER DEFORM tool
Mode = SCALE
use default settings
PSPX-X9:Select your PICK tool
Pull the bottom edge of your image down to reveal nodes.
|
|
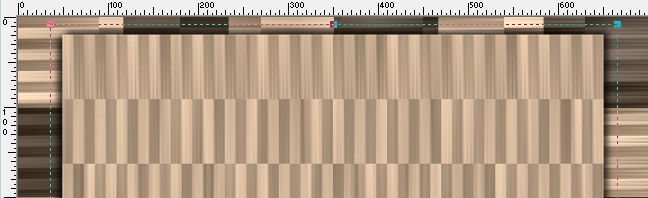
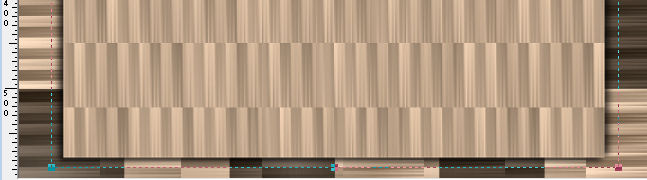
STEP 10
Push the lower centre node UP level with the 590 pixel mark on your left ruler
Pull the top centre node DOWN level with the 10 pixel mark on your left ruler
Move the centre right node right level with the 665 pixel mark
on your top ruler.
Move the centre leftt node left level with the 35 pixel mark
on your top ruler.
TOP
BOTTOM
Click the RESET RECTANGLE arrow
Select the MOVER tool to disengage the DEFORMATION tool (PICK tool)
,
|
STEP 11
PSP9 - PSPX2:ADJUST >>> BRIGHTNESS and CONTRAST >>> CLARIFY
Strength of effect = 5
PSPX3- PSPX6/X9: ADJUST >>> BRIGHTNESS and CONTRAST >>> LOCAL TONE MAPPING
Mapping strength = 3
PSPX6/X9: Block size = 8
~~~~~~~~~~~~~~~~~
Repeat above 1 more time
OPEN & ACTIVATE Raster 2
|
|
STEP 12
Choose your SELECTION TOOL then click on the
CUSTOM SELECTION symbol
Same settings
LAYERS >>> NEW RASTER LAYER
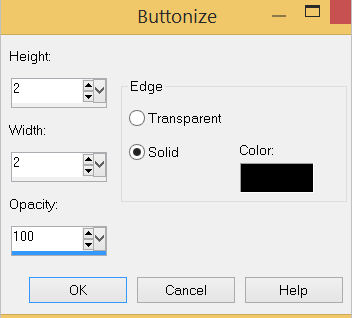
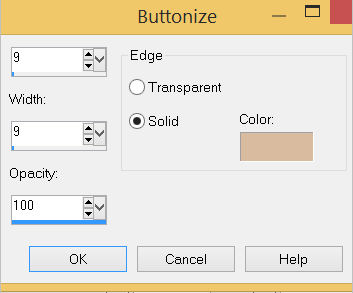
EFFECTS >>> 3D EFFECTS >>> BUTTONIZE |
|
STEP 13
DESELECT
LAYERS >>> MERGE >>> MERGE VISIBLE
LAYERS >>> NEW RASTER LAYER
EFFECTS >>> 3D EFFECTS >>> BUTTONIZE
COLOUR = CREME #d9bca0
|
|
STEP 14
EFFECTS >>> 3D EFFECTS >>> DROP SHADOW
Vertical & Horizontal offsets = 4
Colour = Black
Opacity = 80
Blur = 10.00
Repeat Drop Shadow effect changing
Vertical & Horizontal Offsets to - ( minus ) 4
Click OK
LAYERS >>> MERGE >>> MERGE VISIBLE
SAVE YOUR WORK |
|
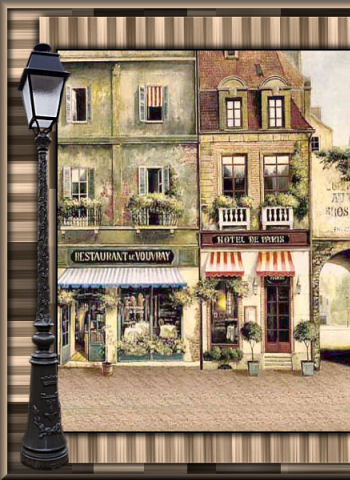
STEP 15
Open up the reverbere_by_jean52 image
in your PSP workspace
Choose your SELECTION TOOL
Selection Type = Rectangle
Mode = Replace
Feather = 0
Antialias = UNChecked
Select the lamp post
Right click on the Title Bar and select COPY from the options
Right click on the Title Bar of your tag image
and select PASTE AS NEW LAYER from the options.
IMAGE >>> RESIZE = 95%
Ensure "Resize all layers" is UNCHECKED
Resample using WEIGHTED AVERAGE
ADJUST >>> SHARPNESS >>> SHARPEN MORE
Reposition with your MOVER tool |
|
STEP 16
Open up the 38_larkin2 image
in your PSP workspace
Right click on the Title Bar and select COPY from the options
Right click on the Title Bar of your tag image
and select PASTE AS NEW LAYER from the options.
IMAGE >>> RESIZE = 60%
Ensure "Resize all layers" is UNCHECKED
Resample using WEIGHTED AVERAGE
ADJUST >>> SHARPNESS >>> SHARPEN MORE
Reposition with your MOVER tool |
|
STEP 17
EFFECTS >>> 3D EFFECTS >>> DROP SHADOW
Vertical offset = 18
Horizontal offset = - ( minus ) 2
Colour = Black
Opacity = 80
Blur = 10.00
CHECK 'Shadow on a new layer'
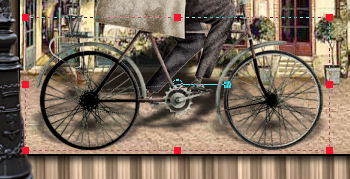
Select your RASTER DEFORM tool
Mode = SCALE
use default settings
PSPX-X9:Select your PICK tool
|
|
STEP 18
Push the lower centre node UP level with the 535 pixel mark
on your left ruler
Pull the upper centre node DOWN level with the 400 pixel mark
on your left ruler
|
|
STEP 19
Click the RESET RECTANGLE arrow
Select the MOVER tool to disengage the DEFORMATION tool (PICK tool)
ACTIVATE Raster 2
LAYERS >>> MERGE >>> MERGE DOWN
Rename this layer Raster 2
SAVE YOUR WORK |
STEP 20
CLOSE Raster 2
ACTIVATE Raster 1
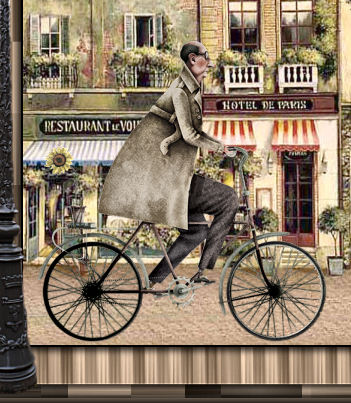
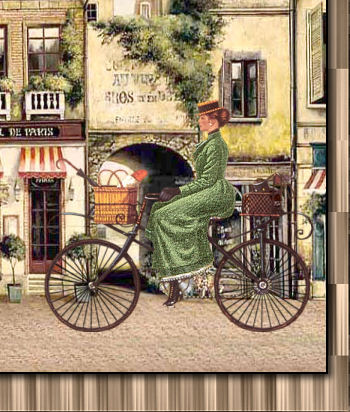
Open up the VintageLadyCycle image in your PSP workspace
Right click on the Title Bar and select COPY from the options
Right click on the Title Bar of your tag image
and select PASTE AS NEW LAYER from the options.
IMAGE >>> RESIZE = 60%
Ensure "Resize all layers" is UNCHECKED
Resample using WEIGHTED AVERAGE
ADJUST >>> SHARPNESS >>> SHARPEN MORE
Reposition with your MOVER tool
Rename this layer Raster 3
|
|
STEP 21
EFFECTS >>> 3D EFFECTS >>> DROP SHADOW
Same settings
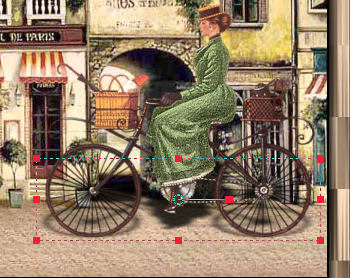
Select your RASTER DEFORM tool
Mode = SCALE
use default settings
PSPX-X9:Select your PICK tool |
|
STEP 22
Pull the upper centre node DOWN level with the 420 pixel mark
on your left ruler
Push the lower centre node UP level with the 500 pixel mark
on your left ruler
|
|
STEP 23
Click the RESET RECTANGLE arrow
Select the MOVER tool to disengage the DEFORMATION tool (PICK tool)
ACTIVATE Raster 3
LAYERS >>> MERGE >>> MERGE DOWN
OPEN & ACTIVATE Raster 2
SAVE YOUR WORK |
|
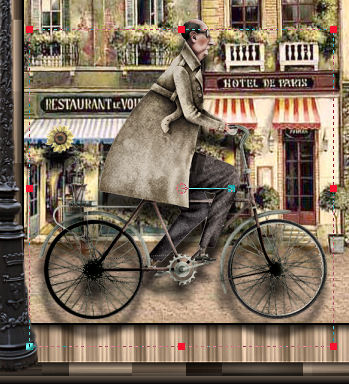
STEP 24
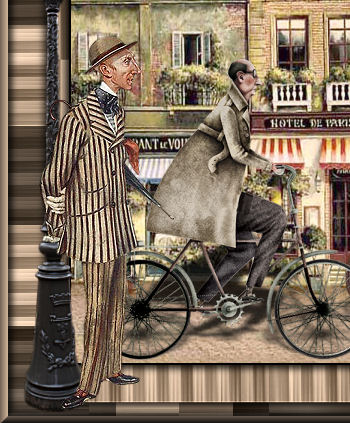
Open up the vanity-fair-spy image in your PSP workspace
Right click on the Title Bar and select COPY from the options
Right click on the Title Bar of your tag image
and select PASTE AS NEW LAYER from the options.
IMAGE >>> RESIZE = 65%
Ensure "Resize all layers" is UNCHECKED
Resample using WEIGHTED AVERAGE
ADJUST >>> SHARPNESS >>> SHARPEN
Reposition with your MOVER tool |
|
STEP 25
LAYERS >>> MERGE >>> MERGE VISIBLE
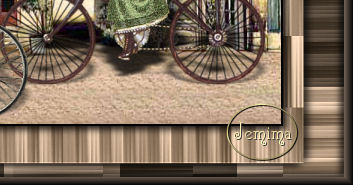
LAYERS >>> NEW RASTER LAYER
SELECT your TEXT tool
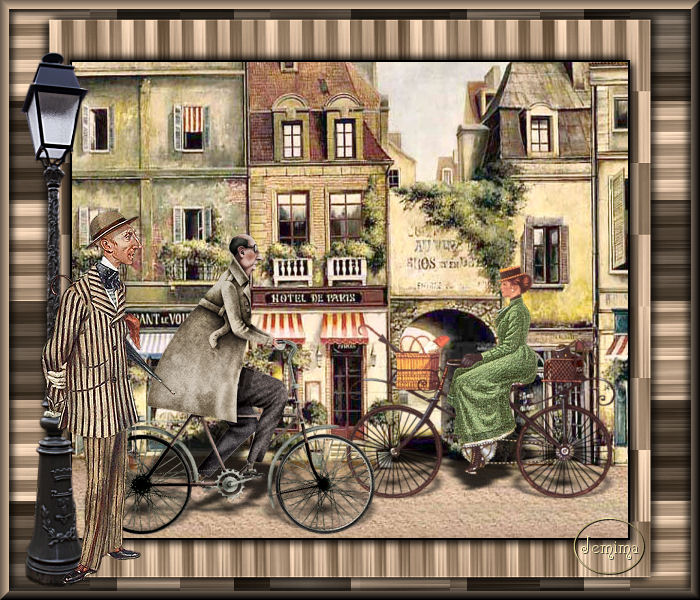
With a font of your choice add your name |
|
STEP 26
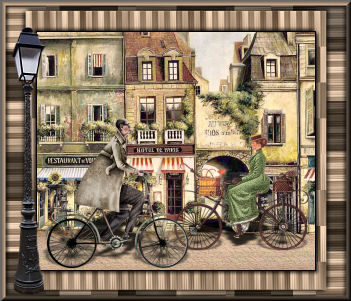
LAYERS >>> MERGE >>> MERGE ALL (Flatten)
Save as .jpg image
, |
| |
|
| |
|