|
|
STEP 1
Open up the red-abstract-background-1 image in your PSP workspace
WINDOW >>> DUPLICATE
Close the original Image
LAYERS >>> Promote background layer.
LAYERS >>> DUPLICATE
CLOSE Copy of Raster 1
ACTIVATE Raster 1
IMAGE >>> FLIP
|
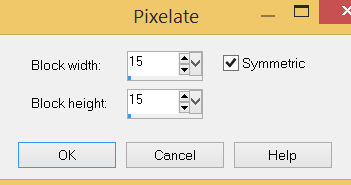
STEP 2
.EFFECTS >>> DISTORTION EFFECTS >>> PIXELATE
|
|
STEP 3
EFFECTS >>> EDGE EFFECTS >>> ENHANCE MORE.
|
|
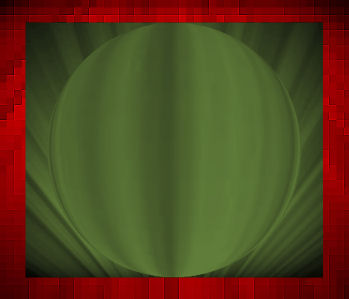
STEP 4
OPEN & ACTIVATE Copy of Raster 1
EFFECTS>>> GEOMETRIC EFFECTS >>> SPHERIZE
Strength = 100
Shape = Circle
EDIT >>> Repeat Spherize
EDIT >>> Repeat Spherize
EDIT >>> Repeat Spherize
ADJUST >>> HUE & SATURATION >>> COLORIZE
Hue = 60
Saturation = 95
IMAGE >>> RESIZE = 85%
Check "Lock aspect ratio."
Ensure "Resize all layers" is UNCHECKED
Resample using WEIGHTED AVERAGE
|
|
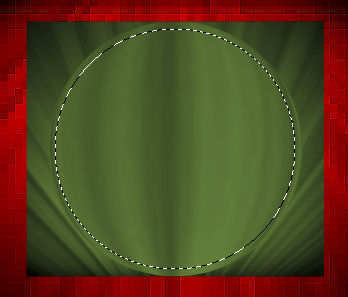
STEP 5
VIEW >>> RULERS
Choose your SELECTION TOOL
Selection Type = CIRCLE
Mode = Replace
Feather = 0
Antialias = Checked
Place your cursor at 350 pixels across
and 300 pixels down.
Pull down level with the 545 pixel mark on your left ruler.
,
|
|
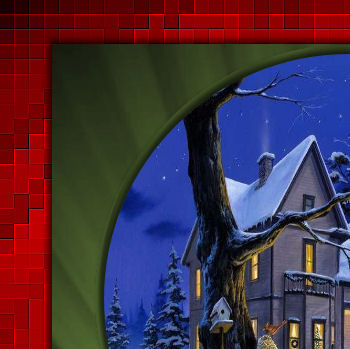
STEP 6
LAYERS >>> NEW RASTER LAYER
Open up the scene90 image in your PSP workspace
Right click on the Title Bar and select COPY from the options
Right click on the Title Bar of your tag image
and select PASTE INTO SELECTION from the options.
DESELECT
SAVE YOUR WORK
|
|
STEP 7
EFFECTS >>> 3D EFFECTS >>> DROP SHADOW
Vertical & Horizontal offsets = 4
Colour = Black
Opacity = 70
Blur = 10.00
ACTIVATE Copy of Raster 1
EDIT >>> Repeat Drop Shadow
Repeat Drop Shadow effect changing
Vertical & Horizontal Offsets to - ( minus ) 4
Click OK
ACTIVATE Raster 2
EDIT >>> Repeat Drop Shadow
|
|
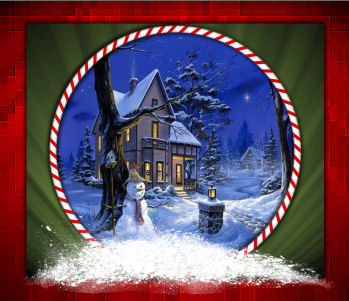
STEP 8
Open up the Candy_Cane_Frame image in your PSP workspace
Right click on the Title Bar and select COPY from the options
Right click on the Title Bar of your tag image
and select PASTE AS NEW LAYER from the options.
IMAGE >>> RESIZE = 85%
Check "Lock aspect ratio."
Ensure "Resize all layers" is UNCHECKED
Resample using WEIGHTED AVERAGE
Repeat both Drop Shadows
SAVE YOUR WORK
|
|
STEP 9
Open up the wsn-18 image in your PSP workspace
Right click on the Title Bar and select COPY from the options
Right click on the Title Bar of your tag image
and select PASTE AS NEW LAYER from the options.
EFFECTS >>> IMAGE EFFECTS >>> OFFSET
Horizontal Offset = 0
Vertical Offset = - ( minus ) 205
Edge Mode = Transparent |
|
STEP 10
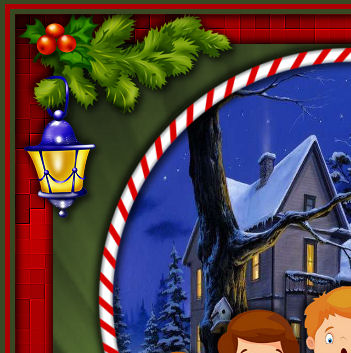
Open up the corner-351 image in your PSP workspace
Right click on the Title Bar and select COPY from the options
Right click on the Title Bar of your tag image
and select PASTE AS NEW LAYER from the options.
IMAGE >>> RESIZE = 35%
Check "Lock aspect ratio."
Ensure "Resize all layers" is UNCHECKED
Resample using WEIGHTED AVERAGE
ADJUST >>> SHARPNESS >>> SHARPEN
,
|
STEP 11
EFFECTS >>> IMAGE EFFECTS >>> OFFSET
Horizontal Offset = - ( minus ) 225
Vertical Offset = 185
Edge Mode = Transparent |
|
STEP 12
LAYERS >>> DUPLICATE
IMAGE >>> MIRROR
LAYERS >>> MERGE >>> MERGE DOWN
Repeat both Drop Shadows
SAVE YOUR WORK
 , , |
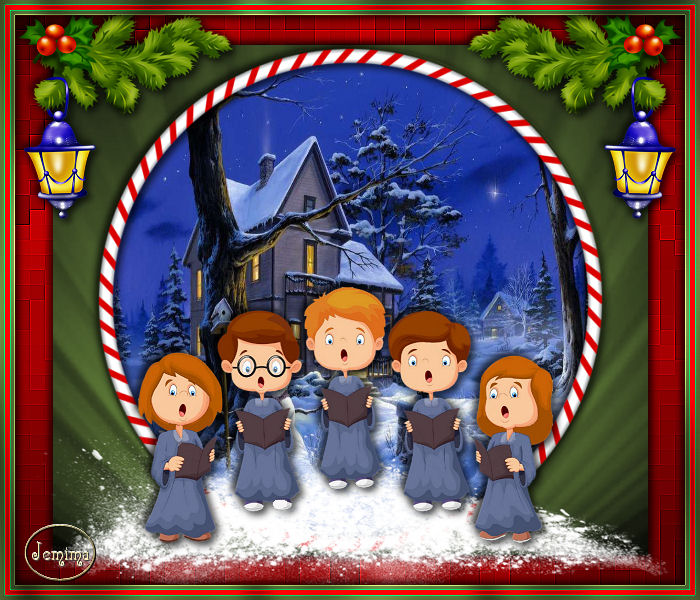
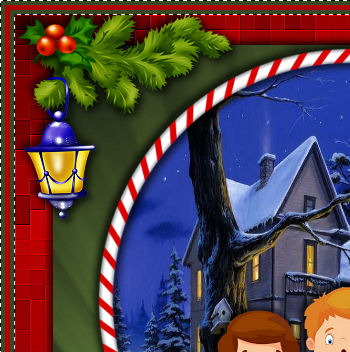
STEP 13
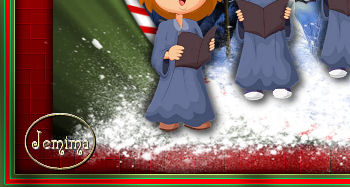
Open up the Children-choir image in your PSP workspace
Right click on the Title Bar and select COPY from the options
Right click on the Title Bar of your tag image
and select PASTE AS NEW LAYER from the options.
IMAGE >>> RESIZE = 50%
Check "Lock aspect ratio."
Ensure "Resize all layers" is UNCHECKED
Resample using WEIGHTED AVERAGE
ADJUST >>> SHARPNESS >>> SHARPEN
, |
STEP 14
EFFECTS >>> IMAGE EFFECTS >>> OFFSET
Horizontal Offset = - ( minus ) 5
Vertical Offset = - ( minus ) 115
Edge Mode = Transparent
Repeat both Drop Shadows

LAYERS >>> MERGE >>> MERGE VISIBLE
SAVE YOUR WORK |
STEP 15
LAYERS >>> NEW RASTER LAYER
SELECTIONS >>> SELECT ALL
Flood fill with DARK GREEN #384823
SELECTIONS >>> MODIFY >>> CONTRACT = 5
EDIT >>> CLEAR
Flood fill with RED #ae0003
SELECTIONS >>> MODIFY >>> CONTRACT = 5
EDIT >>> CLEAR
Flood fill with DARK GREEN #384823
SELECTIONS >>> MODIFY >>> CONTRACT = 5
EDIT >>> CLEAR
SELECTIONS >>> INVERT |
|
STEP 16
Repeat both Drop Shadows
DESELECT
SAVE YOUR WORK
|
|
STEP 17
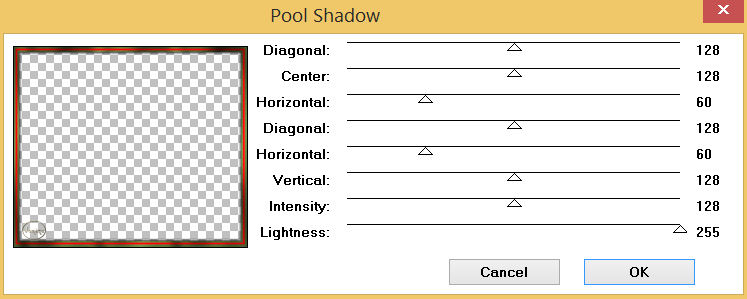
EFFECTS >>> PLUGINS >>> GREG'S FACTORY OUTPUT VOL2 >>> POOL SHADOW
EFFECTS >>> EDGE EFFECTS >>> ENHANCE
LAYERS >>> MERGE >>> MERGE VISIBLE |
STEP 18
LAYERS >>> NEW RASTER LAYER
SELECT your TEXT tool
With a font of your choice add your name |
|
STEP 19
LAYERS >>> MERGE >>> MERGE ALL (Flatten)
Save as .jpg image
, |
| |
|
| |
|