STEP 1
Open a new image 700 x 600
Transparent background
PSP9: Colour Depth = 16 Million Colors (24bit)
PSPX-X9: Colour Depth RGB = 8bits/channel.
|
STEP 2
Open up the violet-leaves image in your PSP workspace
Choose your SELECTION TOOL
Selection Type = Rectangle
Mode = Replace
Feather = 0
Antialias = UNChecked
Select the small leaves on top right corner
Right click on the Title Bar and select COPY from the options
Right click on the Title Bar of your frame image
and select PASTE AS NEW LAYER from the options.
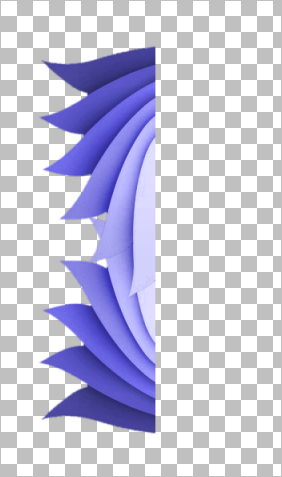
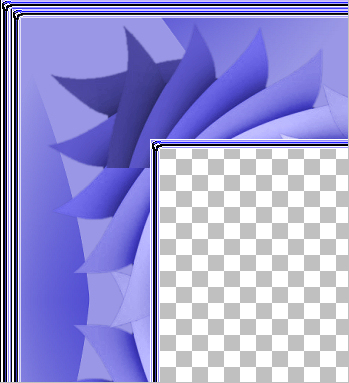
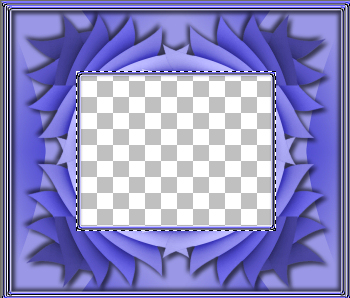
EFFECTS >>> IMAGE EFFECTS >>> OFFSET
Horizontal Offset = - ( minus ) 230
Vertical Offset = - ( minus ) 85
Edge Mode = Transparent
LAYERS >>> DUPLICATE
IMAGE >>> FLIP |
|
STEP 3
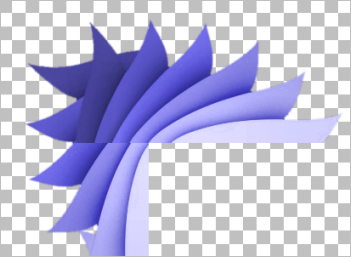
LAYERS >>> DUPLICATE
PSP9: IMAGE >>> ROTATE >>> FREE ROTATE = RIGHT 90
Ensure "All layers" is UNCHECKED
PSPX - PSPX9: IMAGE >>> FREE ROTATE = RIGHT 90
Ensure "All layers" is UNCHECKED
IMAGE >>> MIRROR
EFFECTS >>> IMAGE EFFECTS >>> OFFSET
Horizontal Offset = - ( minus ) 315
Vertical Offset =120
Edge Mode = Transparent |
|
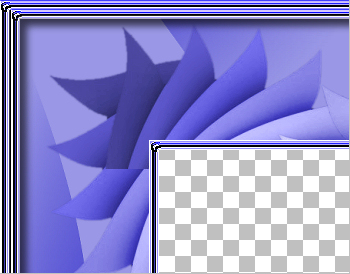
STEP 4
LAYERS >>> DUPLICATE
IMAGE >>> MIRROR
LAYERS >>> MERGE >>> MERGE DOWN
LAYERS >>> DUPLICATE
IMAGE >>> FLIP
LAYERS >>> MERGE >>> MERGE DOWN |
|
STEP 5
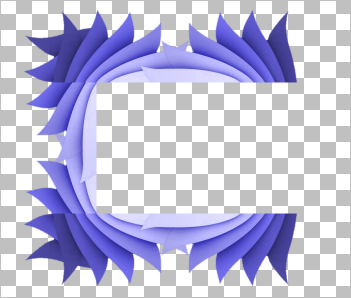
ACTIVATE Copy of Raster 2
LAYERS >>> MERGE >>> MERGE DOWN
LAYERS >>> DUPLICATE
IMAGE >>> MIRROR
LAYERS >>> MERGE >>> MERGE DOWN
ACTIVATE Copy (2) of Raster 2
LAYERS >>> MERGE >>> MERGE DOWN |
|
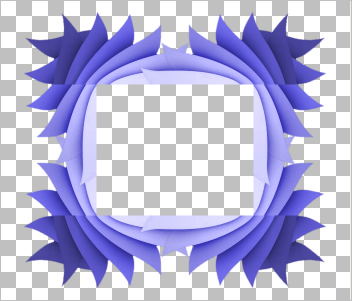
STEP 6
ACTIVATE Raster 1
Flood fill with LILAC #9a98e6
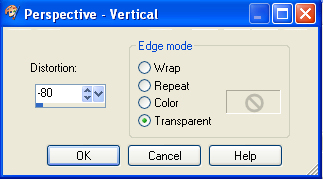
EFFECTS>>> GEOMETRIC EFFECTS >>>
Perspective - Vertical |
|
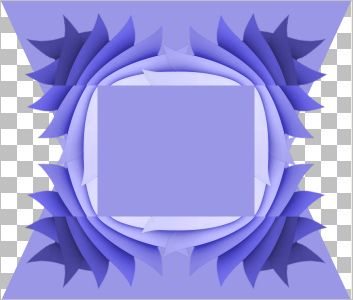
STEP 7
LAYERS >>> DUPLICATE
IMAGE >>> FLIP
LAYERS >>> MERGE >>> MERGE DOWN |
|
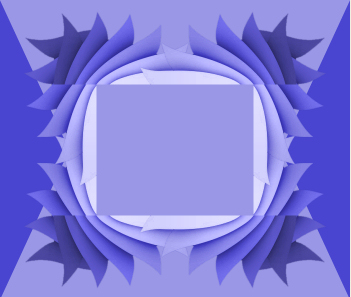
STEP 8
LAYERS >>> NEW RASTER LAYER
Flood fill with PURPLE #4945d0
LAYERS >>> ARRANGE >>> MOVE DOWN
ACTIVATE Raster 1
LAYERS >>> MERGE >>> MERGE DOWN |
|
STEP 9
EFFECTS >>> PLUGINS >>> SIMPLE >>> QUICK TILE
EFFECTS >>> DISTORTION EFFECTS >>> PUNCH
Strength = 100%
|
|
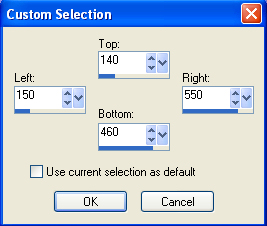
STEP 10
ACTIVATE Raster 2
Choose your SELECTION TOOL then click on the
CUSTOM SELECTION symbol
and enter these coordinates. |
|
STEP 11
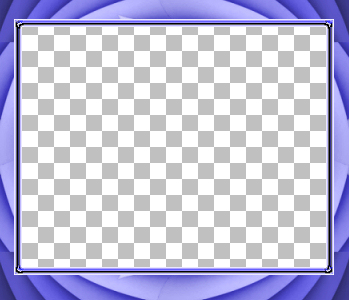
EDIT >>> CLEAR
ACTIVATE Raster 3
EDIT >>> CLEAR
ACTIVATE Raster 2
LAYERS >>> NEW RASTER LAYER
Flood fill the selection with PURPLE
SELECTIONS >>> MODIFY >>> CONTRACT = 10
EDIT >>> CLEAR
DESELECT
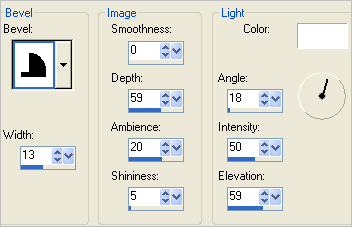
EFFECTS >>> 3D EFFECTS >>> INNER BEVEL |
|
STEP 12
EFFECTS >>> EDGE EFFECTS >>> ENHANCE |
|
STEP 13
LAYERS >>> NEW RASTER LAYER
Flood fill with PURPLE
SELECTIONS >>> SELECT ALL
SELECTIONS >>> MODIFY >>> CONTRACT = 10
EDIT >>> CLEAR
DESELECT
EFFECTS >>> 3D EFFECTS >>> INNER BEVEL
Same settings
EFFECTS >>> EDGE EFFECTS >>> ENHANCE
LAYERS >>> DUPLICATE
IMAGE >>> RESIZE = 97%
Ensure "Resize all layers" is UNCHECKED
Resample using WEIGHTED AVERAGE
ADJUST >>> SHARPNESS >>> SHARPEN
LAYERS >>> MERGE >>> MERGE DOWN |
|
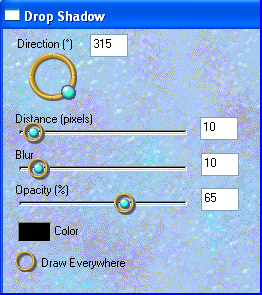
STEP 14
EFFECTS >>> PLUGINS >>> EYE CANDY 3 >>>
DROP SHADOW
~~~~~~~~~~~~~~~~~~~
OR
EFFECTS >>> PLUGINS >>> EYE CANDY 4000 >>>
SHADOWLAB
Center Offset Direction = 315
Center Offset Distance = 10.00
Overall Opacity = 65
Overall Blur (Pixels) = 10.00
Perspectivel Blur (Pixels) = 0.00
Color = BLACK
Check 'Draw Only Outside Selection' |
|
STEP 15
EDIT >>> Repeat Drop Shadow.. change DIRECTION to 135
~~~~~~~~~~~~~~~~~~~
OR
EDIT >>> Repeat Shadowlab.. change DIRECTION to 135 |
|
STEP 16
ACTIVATE Raster 2
EFFECTS >>> PLUGINS >>> EYE CANDY 3 >>>
DROP SHADOW
Same settings
EDIT >>> Repeat Drop Shadow.. change DIRECTION to 315
~~~~~~~~~~~~~~~~~~~
OR
EFFECTS >>> PLUGINS >>> EYE CANDY 4000 >>>
SHADOWLAB
Same settings
EDIT >>> Repeat Shadowlab.. change DIRECTION to 315 |
|
STEP 17
ACTIVATE Raster 1
With your MAGIC WAND
Mode = Replace
Match Mode = RGB Value
Tolerance = 0
Feather = 0
Antialias = UNchecked
Sample Merged = UNCHECKED
PSP9 - X9: Check CONTIGUOUS
PSPX - X9: There is no " Sample Merged"
Select the OUTER frame area
SELECTIONS >>> INVERT
|
|
STEP 18
EFFECTS >>> PLUGINS >>> EYE CANDY 3 >>>
DROP SHADOW
Same settings
EDIT >>> Repeat Drop Shadow.. change DIRECTION to 135
DESELECT
~~~~~~~~~~~~~~~~~~~
OR
EFFECTS >>> PLUGINS >>> EYE CANDY 4000 >>>
SHADOWLAB
Same settings
EDIT >>> Repeat Shadowlab.. change DIRECTION to 135
DESELECT
|
|
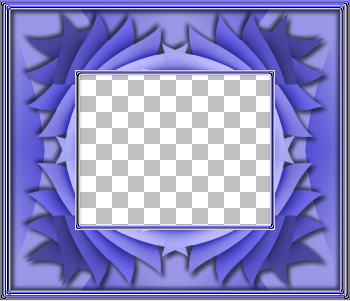
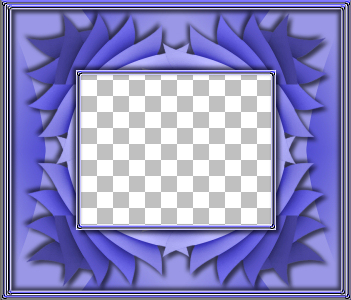
STEP 19
LAYERS >>> MERGE >>> MERGE VISIBLE
Save as .pspimage image
, |
STEP 20
Open up the orchids_blossoms_62 image
in your PSP workspace
Right click on the Title Bar and select COPY from the options
Right click on the Title Bar of your frame image
and select PASTE AS NEW LAYER from the options.
IMAGE >>> RESIZE = 55%
Ensure "Resize all layers" is UNCHECKED
Resample using WEIGHTED AVERAGE
ADJUST >>> SHARPNESS >>> SHARPEN
EFFECTS >>> IMAGE EFFECTS >>> OFFSET
Horizontal Offset = - ( minus ) 260
Vertical Offset = 140
Edge Mode = Transparent
|
|
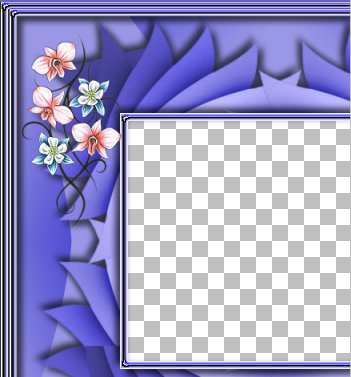
STEP 21
LAYERS >>> DUPLICATE
IMAGE >>> MIRROR
LAYERS >>> MERGE >>> MERGE DOWN
LAYERS >>> DUPLICATE
IMAGE >>> FLIP
LAYERS >>> MERGE >>> MERGE DOWN |
|
STEP 22
EFFECTS >>> PLUGINS >>> EYE CANDY 3 >>>
DROP SHADOW
~~~~~~~~~~~~~~~~~~~
OR
EFFECTS >>> PLUGINS >>> EYE CANDY 4000 >>>
SHADOWLAB
Center Offset Direction = 315
Center Offset Distance = 6.00
Overall Opacity = 65
Overall Blur (Pixels) = 10.00
Perspectivel Blur (Pixels) = 0.00
Color = BLACK
Check 'Draw Only Outside Selection |
|
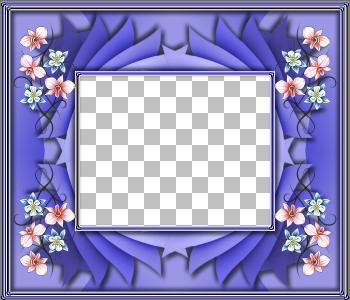
STEP 23
LAYERS >>> MERGE >>> MERGE VISIBLE
Save as .pspimage image
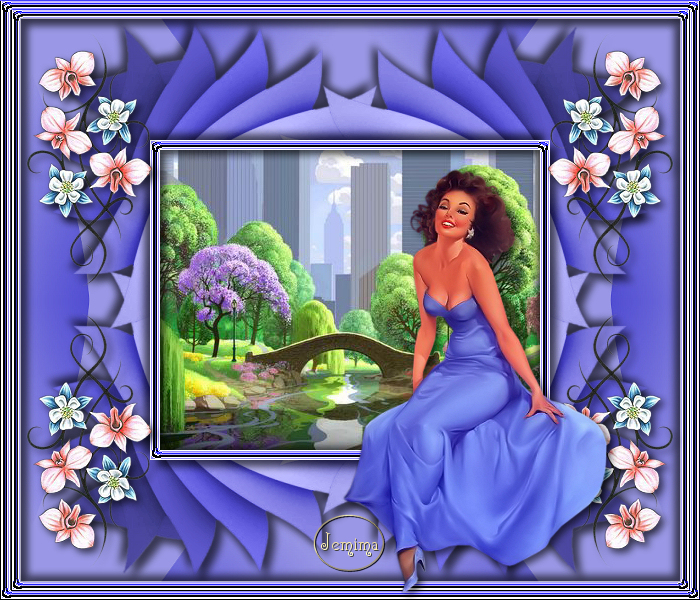
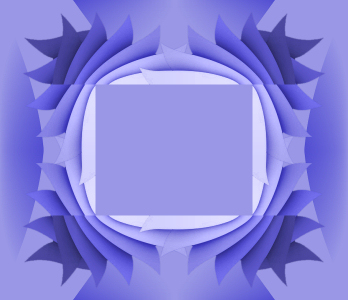
This is your frame
.
|
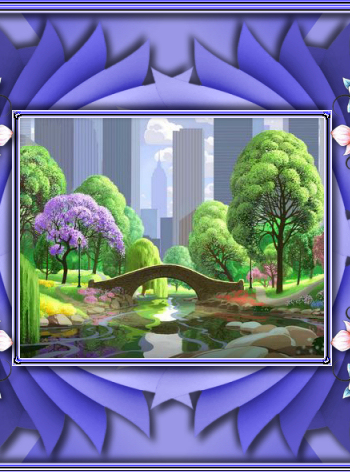
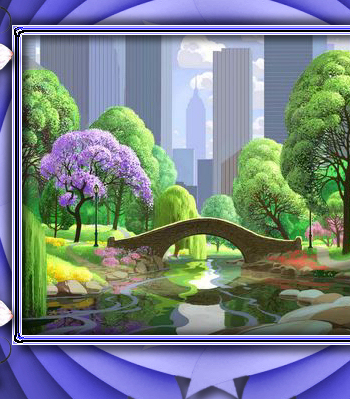
STEP 24
Open up the concept-zhaoping-wei image
in your PSP workspace
Right click on the Title Bar and select COPY from the options
Right click on the Title Bar of your frame image
and select PASTE AS NEW LAYER from the options.
LAYERS >>> ARRANGE >>> MOVE DOWN |
|
STEP 25
ACTIVATE the Merged layer
EFFECTS >>> PLUGINS >>> EYE CANDY 3 >>>
DROP SHADOW
Same settings
EDIT >>> Repeat Drop Shadow.. change DIRECTION to 135
~~~~~~~~~~~~~~~~~~~
OR
EFFECTS >>> PLUGINS >>> EYE CANDY 4000 >>>
SHADOWLAB
Same settings
EDIT >>> Repeat Shadowlab.. change DIRECTION to 135
LAYERS >>> MERGE >>> MERGE VISIBLE |
|
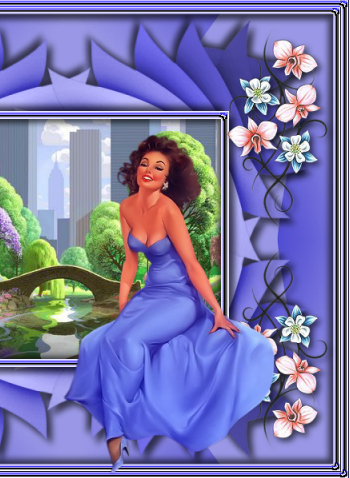
STEP 26
Open up the Gerry-Lady87-8 maart 2008 image
in your PSP workspace
Right click on the Title Bar and select COPY from the options
Right click on the Title Bar of your frame image
and select PASTE AS NEW LAYER from the options.
IMAGE >>> RESIZE = 90%
Ensure "Resize all layers" is UNCHECKED
Resample using WEIGHTED AVERAGE
ADJUST >>> SHARPNESS >>> SHARPEN
Reposition with your MOVER tool |
|
STEP 27
EFFECTS >>> PLUGINS >>> EYE CANDY 3 >>>
DROP SHADOW
Same settings
BUT
change DIRECTION to 315
~~~~~~~~~~~~~~~~~~~
OR
EFFECTS >>> PLUGINS >>> EYE CANDY 4000 >>>
SHADOWLAB
Same settings
BUT
change DIRECTION to 315 |
|
STEP 28
LAYERS >>> NEW RASTER LAYER
Select your TEXT tool
and with a font of your choice add your name.
LAYERS >>> MERGE >>> MERGE ALL (Flatten)
Save as .jpg image
, |
| |
|
| |
|