STEP 10
Open up the Love_Couple_Silhouette image
in your PSP workspace
Right click on the Title Bar and select COPY from the options
Right click on the Title Bar of your tag image
and select PASTE AS NEW LAYER from the options.
IMAGE >>> RESIZE = 75%
Ensure "Resize all layers" is UNCHECKED
Resample using WEIGHTED AVERAGE
EFFECTS >>> IMAGE EFFECTS >>> OFFSET
Horizontal Offset = - (minus) 140
Vertical Offset = 30
Edge Mode = Transparent
, |
STEP 11
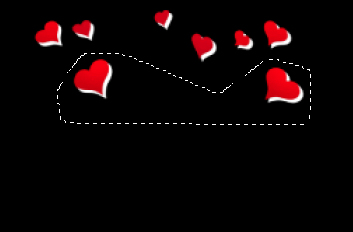
Choose your FREEHAND SELECTION TOOL
Selection Type = Point to Point
Mode = Replace
Feather = 0
Smoothing = 6
Antialias = Checked
Select the hearts as shown
|
|
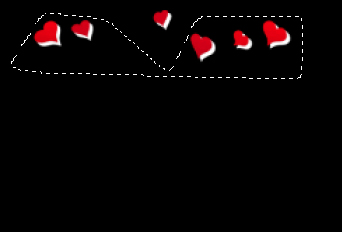
STEP 12
Right click on the Title Bar and select CUT from the options
DESELECT
Right click in your PSP workspace and select
Paste As New Image
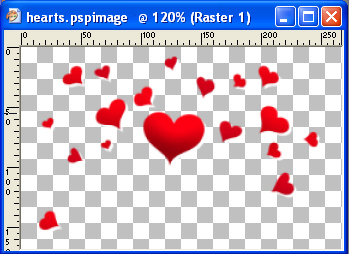
Save as ' hearts.pspimage '
ACTIVATE your tag and SAVE YOUR WORK
, |
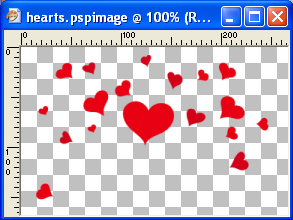
STEP 13
Working on the ' hearts.pspimage '
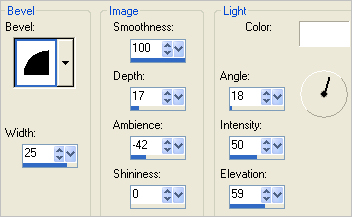
EFFECTS >>> 3D EFFECTS >>> INNER BEVEL |
|
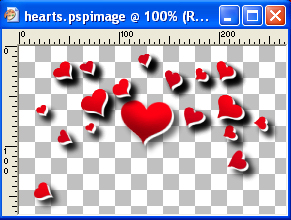
STEP 14
EFFECTS >>> 3D EFFECTS >>> DROP SHADOW
Vertical & Horizontal offsets = 2
Colour = WHITE
Opacity = 100
Blur = 0
SAVE YOUR WORK
|
|
STEP 15
So you can see what you're working on...
LAYERS >>> NEW RASTER LAYER
Flood fill with BLACK
LAYERS >>> ARRANGE >>> MOVE DOWN
ACTIVATE Raster 1
LAYERS >>> DUPLICATE
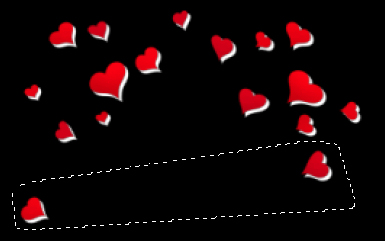
Choose your FREEHAND SELECTION TOOL
Same settings
Select the heart indicated
|
|
STEP 16
EDIT >>> CLEAR
DESELECT
CLOSE Raster 1 |
|
STEP 17
LAYERS >>> DUPLICATE
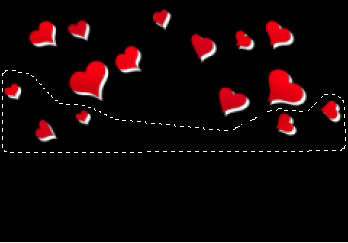
Choose your FREEHAND SELECTION TOOL
Same settings
Select the hearts indicated |
|
STEP 18
EDIT >>> CLEAR
DESELECT
CLOSE Copy of Raster 1 |
|
STEP 19
LAYERS >>> DUPLICATE
Choose your FREEHAND SELECTION TOOL
Same settings
Select the hearts indicated, |
|
STEP 20
EDIT >>> CLEAR
DESELECT
CLOSE Copy (2) of Raster 1
**********
LAYERS >>> DUPLICATE
Choose your FREEHAND SELECTION TOOL
Same settings
Select the hearts indicated |
|
STEP 21
EDIT >>> CLEAR
DESELECT
CLOSE Copy (3) of Raster 1
**********
LAYERS >>> DUPLICATE
Choose your FREEHAND SELECTION TOOL
Same settings
Select the hearts indicated |
|
STEP 22
EDIT >>> CLEAR
DESELECT
CLOSE Copy (4) of Raster 1
**********
LAYERS >>> DUPLICATE
Choose your FREEHAND SELECTION TOOL
Same settings
Select the hearts indicated, |
|
STEP 23
EDIT >>> CLEAR
DESELECT
CLOSE Copy (5) of Raster 1
|
|
STEP 24
Open all layers
CLOSE Raster 2
With Copy (6) of Raster 1 active
EFFECTS >>> PLUGINS >>> EYE CANDY 3 >>>
DROP SHADOW
Same settings
ACTIVATE Copy (5) of Raster 1 ..... EDIT >>> Repeat Drop Shadow..
ACTIVATE Copy (4) of Raster 1 ..... EDIT >>> Repeat Drop Shadow..
ACTIVATE Copy (3) of Raster 1 ..... EDIT >>> Repeat Drop Shadow..
ACTIVATE Copy (2) of Raster 1 ..... EDIT >>> Repeat Drop Shadow..
ACTIVATE Copy of Raster 1 ..... EDIT >>> Repeat Drop Shadow..
ACTIVATE Raster 1 ..... EDIT >>> Repeat Drop Shadow..
SAVE YOUR WORK
and minimize
|
|
|
| |
|
|