STEP 1
Open a new image 700 x 600
Transparent background
PSPX - X2: Colour Depth = 8bits/channel
PSPX3-X8: Colour Depth RGB = 8bits/channel
|
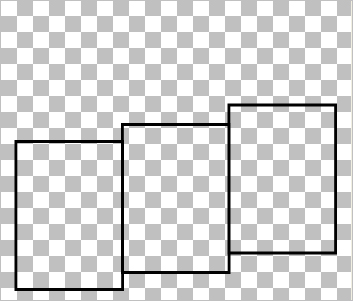
STEP 2
Open up the FamilyFrames image in your PSP workspace
Right click on the Title Bar and select
COPY from the options
Right click on the Title Bar of your tag image
and select PASTE AS NEW LAYER from the options.
EFFECTS >>> IMAGE EFFECTS >>> OFFSET
Horizontal Offset = 0
Vertical Offset = - ( minus ) 95
Edge Mode = Transparent
Rename this layer frames
|
|
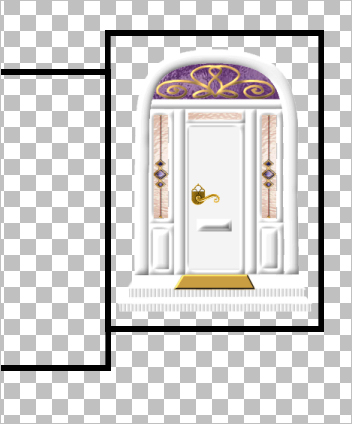
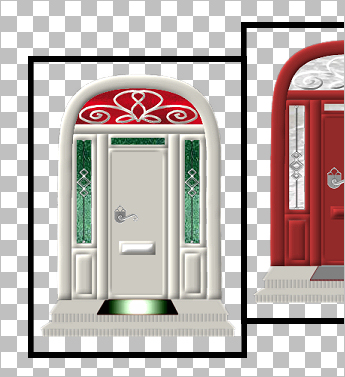
STEP 3
Open up the Joyceyselegantdoor2 image
in your PSP workspace
Right click on the Title Bar and select
COPY from the options
Right click on the Title Bar of your tag image
and select PASTE AS NEW LAYER from the options.
IMAGE >>> RESIZE = 75%
Ensure "Resize all layers" is UNCHECKED
Resample using WEIGHTED AVERAGE
ADJUST >>> SHARPNESS >>> SHARPEN
EFFECTS >>> IMAGE EFFECTS >>> OFFSET
Horizontal Offset = 213
Vertical Offset = - ( minus ) 57
Edge Mode = Transparent
Rename this layer door 1 |
|
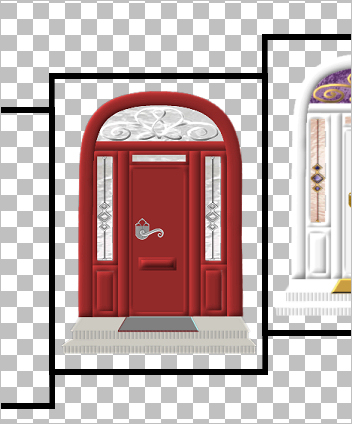
STEP 4
Open up the Joyceyselegantdoorred image
in your PSP workspace
Right click on the Title Bar and select
COPY from the options
Right click on the Title Bar of your tag image
and select PASTE AS NEW LAYER from the options.
IMAGE >>> RESIZE = 75%
Ensure "Resize all layers" is UNCHECKED
Resample using WEIGHTED AVERAGE
ADJUST >>> SHARPNESS >>> SHARPEN
EFFECTS >>> IMAGE EFFECTS >>> OFFSET
Horizontal Offset = 0
Vertical Offset = - ( minus ) 95
Edge Mode = Transparent
Rename this layer door 2 |
|
STEP 5
Open up the Joyceyselegantdoor image
in your PSP workspace
Right click on the Title Bar and select
COPY from the options
Right click on the Title Bar of your tag image
and select PASTE AS NEW LAYER from the options.
IMAGE >>> RESIZE = 75%
Ensure "Resize all layers" is UNCHECKED
Resample using WEIGHTED AVERAGE
ADJUST >>> SHARPNESS >>> SHARPEN
EFFECTS >>> IMAGE EFFECTS >>> OFFSET
Horizontal Offset = - ( minus ) 213
Vertical Offset = - ( minus ) 125
Edge Mode = Transparent
Rename this layer door 3
SAVE YOUR WORK
|
|
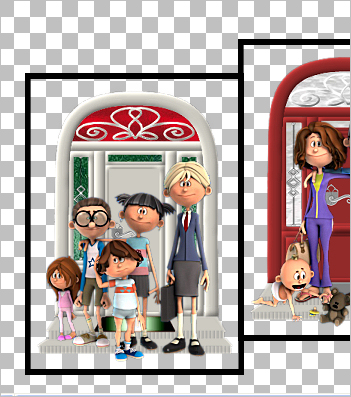
STEP 6
Open up the toon-generations-for-daz-studio (3) image
in your PSP workspace
Right click on the Title Bar and select
COPY from the options
Right click on the Title Bar of your tag image
and select PASTE AS NEW LAYER from the options.
IMAGE >>> RESIZE = 35%
Ensure "Resize all layers" is UNCHECKED
Resample using WEIGHTED AVERAGE
ADJUST >>> SHARPNESS >>> SHARPEN MORE
Reposition with your MOVER tool
Rename this layer grands |
|
STEP 7
Open up the toon-generations-for-daz-studio image
in your PSP workspace
Right click on the Title Bar and select
COPY from the options
Right click on the Title Bar of your tag image
and select PASTE AS NEW LAYER from the options.
IMAGE >>> RESIZE = 45%
Ensure "Resize all layers" is UNCHECKED
Resample using WEIGHTED AVERAGE
ADJUST >>> SHARPNESS >>> SHARPEN MORE
Reposition with your MOVER tool
Rename this layer parents |
|
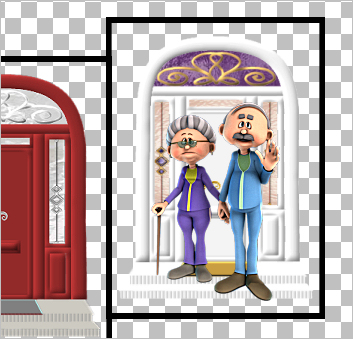
STEP 8
Open up the toon-generations-for-daz-studio (2) image
in your PSP workspace
Right click on the Title Bar and select
COPY from the options
Right click on the Title Bar of your tag image
and select PASTE AS NEW LAYER from the options.
IMAGE >>> RESIZE = 45%
Ensure "Resize all layers" is UNCHECKED
Resample using WEIGHTED AVERAGE
ADJUST >>> SHARPNESS >>> SHARPEN MORE
Reposition with your MOVER tool
Rename this layer kids
SAVE YOUR WORK
|
|
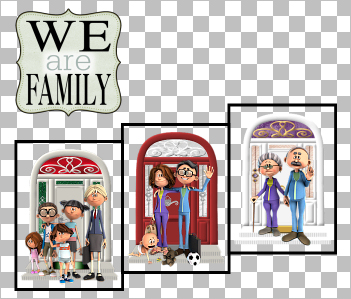
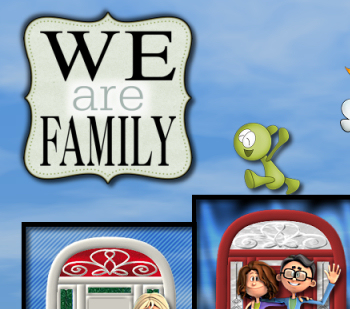
STEP 9
Open up the family-wordart image
in your PSP workspace
Right click on the Title Bar and select
COPY from the options
Right click on the Title Bar of your tag image
and select PASTE AS NEW LAYER from the options.
IMAGE >>> RESIZE = 45%
Ensure "Resize all layers" is UNCHECKED
Resample using WEIGHTED AVERAGE
ADJUST >>> SHARPNESS >>> SHARPEN
EFFECTS >>> IMAGE EFFECTS >>> OFFSET
Horizontal Offset = - ( minus ) 215
Vertical Offset = 175
Edge Mode = Transparent
Rename this layer text |
|
STEP 10
ACTIVATE Raster 1
Flood fill with WHITE
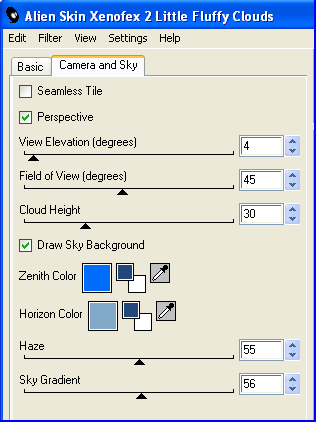
EFFECTS >>> PLUGINS >>> Alien Skin Xenofex 2 >>> Little Fluffy Clouds
Activate "Camera & Sky" Tab
Enter these settings
Zenith Color = #006cfa
Horizon Color = #82aac8
, |
|
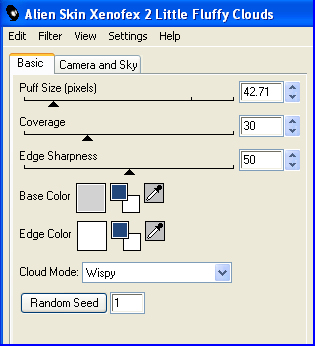
STEP 11
Activate "Basic" Tab
Enter these settings
Base Color = #c0c0c0
Edge Color = WHITE
Click OK
|
|
STEP 12
LAYERS >>> DUPLICATE
ACTIVATE the frames layer
With your MAGIC WAND
Mode = Replace
Match Mode = RGB Value
Tolerance = 0
Feather = 0
Antialias = UNchecked
Sample Merged = UNCHECKED
PSP9 - X8: Check CONTIGUOUS
PSPX - X8: There is no " Sample Merged"
PSPX - X8: Use all layers = UNChecked
Select the area outside the frames |
|
STEP 13
ACTIVATE Copy of Raster 1
EDIT >>> CLEAR
DESELECT
CLOSE layers indicated...
|
|
STEP 14
In your LAYER PALETTE change the
BLEND MODE on Copy of Raster 1 to MULTIPLY
ACTIVATE the frames layer
With your MAGIC WAND ... Same settings
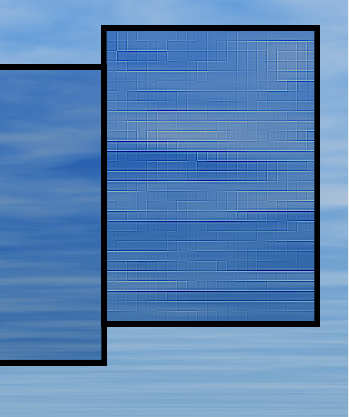
Select the interior of the extreme right frame
ACTIVATE Copy of Raster 1
EFFECTS >>> DISTORTION EFFECTS >>> PIXELATE
BLOCK WIDTH = 10
BLOCK HEIGHT = 10
Symmetric
EFFECTS >>> EDGE EFFECTS >>> ENHANCE MORE
ADJUST >>> SHARPNESS >>> SHARPEN MORE
EDIT >>> Repeat Sharpen More
DESELECT
|
|
STEP 15
ACTIVATE the frames layer
With your MAGIC WAND ... Same settings
Select the interior of the centre frame
ACTIVATE Copy of Raster 1
EFFECTS >>> PLUGINS >>> Greg's Factory Output Vol2 >>> Pool Shadow
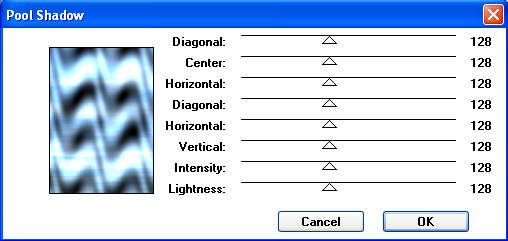
DESELECT
, |
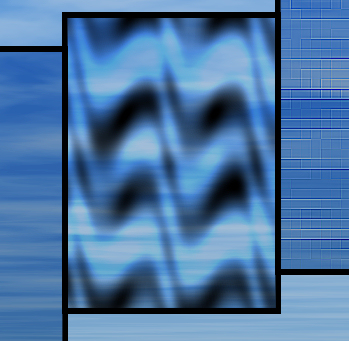
STEP 16
ACTIVATE the frames layer
With your MAGIC WAND ... Same settings
Select the interior of the left frame
ACTIVATE Copy of Raster 1
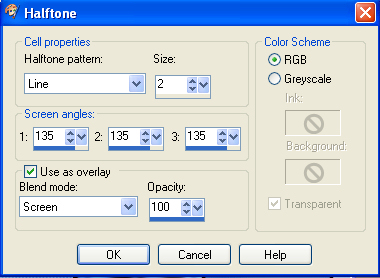
EFFECTS >>> ARTISTIC EFFECTS >>> Halftone
DESELECT
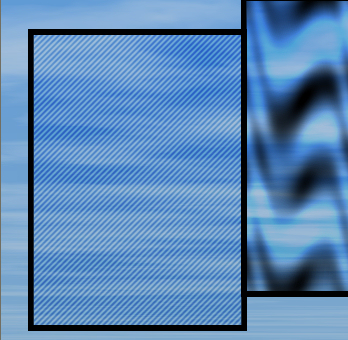
SAVE YOUR WORK
|
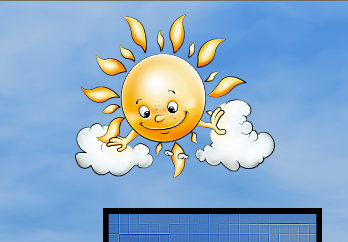
STEP 17
Open up the Sun_with_Clouds image
in your PSP workspace
Right click on the Title Bar and select
COPY from the options
Right click on the Title Bar of your tag image
and select PASTE AS NEW LAYER from the options.
IMAGE >>> RESIZE = 40%
Ensure "Resize all layers" is UNCHECKED
Resample using WEIGHTED AVERAGE
ADJUST >>> SHARPNESS >>> SHARPEN
EFFECTS >>> IMAGE EFFECTS >>> OFFSET
Horizontal Offset = 175
Vertical Offset = 205
Edge Mode = Transparent |
|
STEP 18
OPEN ALL LAYERS
ACTIVATE the frames layer
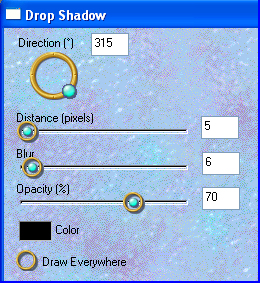
EFFECTS >>> PLUGINS >>> EYE CANDY 3 >>>
DROP SHADOW |
|
STEP 19
ACTIVATE the grands layer
EDIT >>> Repeat Drop Shadow..Same settings
ACTIVATE the parents layer
EDIT >>> Repeat Drop Shadow..Same settings
ACTIVATE the kids layer
EDIT >>> Repeat Drop Shadow..Same settings
ACTIVATE the text layer
EDIT >>> Repeat Drop Shadow..Same settings
EDIT >>> Repeat Drop Shadow.. change DIRECTION to 135
,SAVE YOUR WORK |
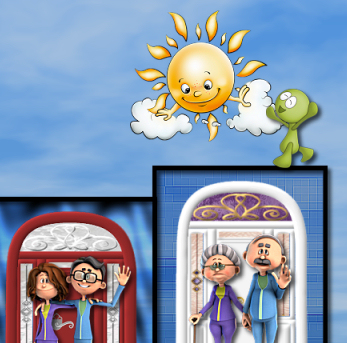
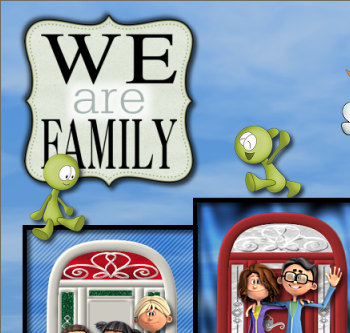
STEP 20
Open up the Americo_BBEG image
in your PSP workspace
Activate AM 3
Right click on the Title Bar and select
COPY from the options
Right click on the Title Bar of your tag image
and select PASTE AS NEW LAYER from the options.
IMAGE >>> RESIZE = 50%
Ensure "Resize all layers" is UNCHECKED
Resample using WEIGHTED AVERAGE
ADJUST >>> SHARPNESS >>> SHARPEN
EFFECTS >>> PLUGINS >>> EYE CANDY 3 >>>
DROP SHADOW
Same settings BUT change direction to 315
Reposition with your MOVER tool
Rename this layer AM1 |
|
STEP 21
Back to the Americo_BBEG image in your PSP workspace
Activate AM 2
Right click on the Title Bar and select
COPY from the options
Right click on the Title Bar of your tag image
and select PASTE AS NEW LAYER from the options.
IMAGE >>> RESIZE = 50%
Ensure "Resize all layers" is UNCHECKED
Resample using WEIGHTED AVERAGE
ADJUST >>> SHARPNESS >>> SHARPEN
EFFECTS >>> PLUGINS >>> EYE CANDY 3 >>>
DROP SHADOW...
Same settings
Reposition with your MOVER tool
Rename this layer AM2 |
|
STEP 22
Back to the Americo_BBEG image in your PSP workspace
Activate AM 1
Right click on the Title Bar and select
COPY from the options
Right click on the Title Bar of your tag image
and select PASTE AS NEW LAYER from the options.
IMAGE >>> MIRROR
IMAGE >>> RESIZE = 50%
Ensure "Resize all layers" is UNCHECKED
Resample using WEIGHTED AVERAGE
ADJUST >>> SHARPNESS >>> SHARPEN
EFFECTS >>> PLUGINS >>> EYE CANDY 3 >>>
DROP SHADOW... Same settings
Reposition with your MOVER tool
Rename this layer AM3 |
|
STEP 23
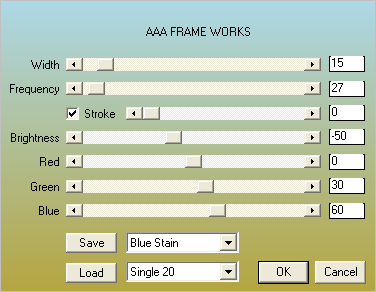
ACTIVATE Raster 1
EFFECTS >>> PLUGINS >>> AAA FRAMES >>> FRAME WORKS
|
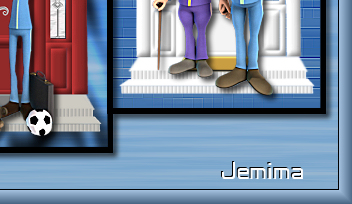
STEP 24
LAYERS >> NEW RASTER LAYER
Select your TEXT TOOL
with font and settings of your choice
add your name |
|
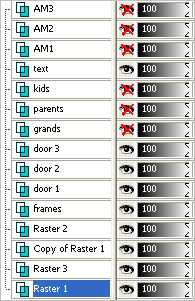
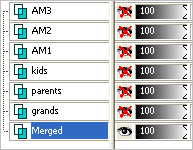
STEP 25
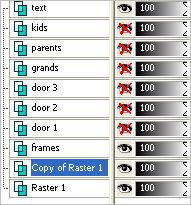
Set up LAYER PALETTE as shown |
|
STEP 26
LAYERS >>> MERGE >>> MERGE VISIBLE
Set up LAYER PALETTE as shown
Right click on Title Bar and select
Copy from the options |
|
STEP 27
In ANIMATION SHOP
Right click the workspace and select
'Paste As New Animation' from the options.
Back to PSP.
Set up LAYER PALETTE as shown
Right click on Title Bar and select
Copy merged from the options |
|
STEP 28
In ANIMATION SHOP
Select
'Paste After Current' icon on top menu
Back to PSP.
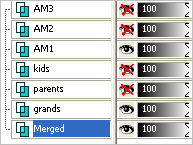
Set up LAYER PALETTE as shown
Right click on Title Bar and select
Copy merged from the options |
|
STEP 29
In ANIMATION SHOP
Select
'Paste After Current' icon on top menu
Back to PSP.
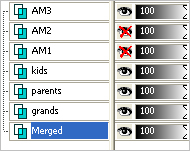
Set up LAYER PALETTE as shown
Right click on Title Bar and select
Copy merged from the options |
|
STEP 30
In ANIMATION SHOP
Select
'Paste After Current' icon on top menu
EDIT >> Select All
Right click on Title Bar of frames
Select 'Frame Properties' from the options
Display time = 80
Right click inside the last frame (F:4) to activate
Select 'Frame Properties' from the options
Display time = 120
|
STEP 31
View >> Animation
and while it is still running,
File >> Save As
Locate the folder in which you wish to save it.
Name your animation.
With the Gif Optimiser keep pressing NEXT
until you get to the last one... click FINISH
Close the Animation
Close the frames.
Close Animation Shop |
| |
|
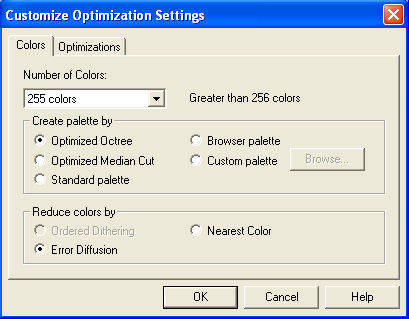
OPTIMIZATION
NOTE:
You may want to use "Optimized Octree" instead of "Median Cut"
under "Customize Optimization" settings
as "Median Cut" may leave a lot of noise on the image
depending on the colour of the background.
|
| |
|
| |
|
| |
|
| |
|