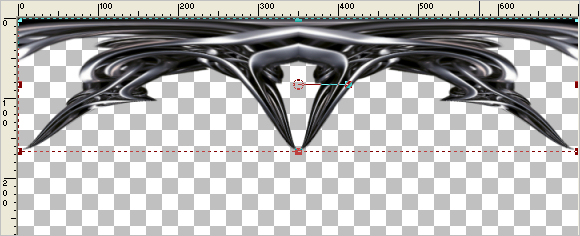
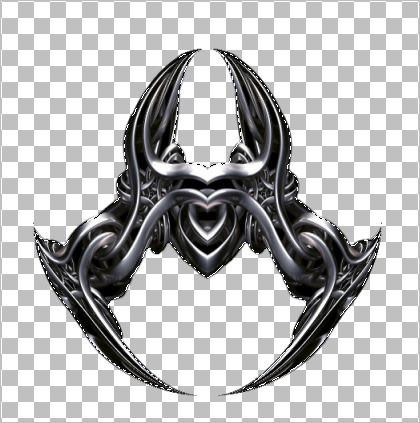
STEP 1
Open up the chains-4349b image in your PSP workspace
WINDOW >>> DUPLICATE
Close the original Image.
EFFECTS>>> GEOMETRIC EFFECTS >>> CIRCLE
Edge Mode = Transparent
IMAGE >>> RESIZE = 80%
Ensure "Resize all layers" is UNCHECKED
Resample using WEIGHTED AVERAGE |
|
STEP 2
LAYERS >>> DUPLICATE
CLOSE Raster 1
EFFECTS >>> REFLECTION EFFECTS >>>
ROTATING MIRROR
Horizontal Offset = 0
Vertical Offset = n/a
Rotation Angle = 180
Edge Mode = Reflect
|
|
STEP 3
CLOSE Copy of Raster 1
OPEN & ACTIVATE Raster 1
EFFECTS >>> DISTORTION EFFECTS >>> POLAR COORDINATES
Polar to Rectangular
EFFECTS >>> REFLECTION EFFECTS >>>
ROTATING MIRROR
Horizontal Offset = 0
Vertical Offset = n/a
Rotation Angle = 0
Edge Mode = Reflect
|
|
STEP 4
ADJUST >>> SHARPNESS >>> SHARPEN
VIEW >>> RULERS
Select your RASTER DEFORM tool
Mode = SCALE
use default settings
PSPX-X8:Select your PICK tool
Push the centre bottom node up to the 166 pixel mark on your left ruler.

Click the RESET RECTANGLE arrow
Select the MOVER tool to disengage the DEFORMATION tool (PICK tool)
ADJUST >>> SHARPNESS >>> SHARPEN
SAVE YOUR WORK
as SP_Elements.pspimage
.
|
STEP 5
Open a new image 700 x 600
Transparent background
PSP9: Colour Depth = 16 Million Colors (24bit)
PSPX-X8: Colour Depth RGB = 8bits/channel
From your SP_Elements image with Raster 1 active
Right click on the Title Bar and select COPY from the options
Right click on the Title Bar of your tag image
and select PASTE AS NEW LAYER from the options.
EFFECTS >>> IMAGE EFFECTS >>> OFFSET
Horizontal Offset = 0
Vertical Offset = 220
Edge Mode = Transparent
|
|
STEP 6
LAYERS >>> DUPLICATE
IMAGE >>> FLIP
ACTIVATE Raster 2
Choose your SELECTION TOOL then click on the
CUSTOM SELECTION symbol
and enter these coordinates. |
|
STEP 7
SELECTIONS >>> INVERT
EDIT >>> CLEAR
DESELECT
|
|
STEP 8
LAYERS >>> DUPLICATE
PSP9: IMAGE >>> ROTATE >>> FREE ROTATE = RIGHT 90
Ensure "All layers" is UNCHECKED
PSPX - PSPX8: IMAGE >>> FREE ROTATE = RIGHT 90
Ensure "All layers" is UNCHECKED
EFFECTS >>> IMAGE EFFECTS >>> OFFSET
Horizontal Offset = 345
Vertical Offset = - (Minus) 220
Edge Mode = Transparent
LAYERS >>> ARRANGE >>> MOVE DOWN |
|
STEP 9
LAYERS >>> DUPLICATE
IMAGE >>> MIRROR
CLOSE Raster 1
LAYERS >>> MERGE >>> MERGE VISIBLE
SAVE YOUR WORK
,
|
STEP 10
CLOSE the Merged layer but keep active.
Return to your SP_Elements image
Open & Activate Copy of Raster 1
Right click on the Title Bar and select COPY from the options
Right click on the Title Bar of your tag image
and select PASTE AS NEW LAYER from the options.
With your MAGIC WAND
Mode = Replace
Match Mode = RGB Value
Tolerance = 10
Feather = 3
Antialias = Checked
Sample Merged = UNCHECKED
PSP9 - X8: Check CONTIGUOUS
PSPX - X8: There is no " Sample Merged"
PSPX - X8: Use all layers = UNChecked
PSP9 - X8: ANTIALIAS = Outside
Select the OUTER transparent area

,
|
STEP 11
Depress your DELETE key 4 times
DESELECT
EFFECTS >>> IMAGE EFFECTS >>> OFFSET
Horizontal Offset = 160
Vertical Offset = - (Minus) 100
Edge Mode = Transparent
LAYERS >>> DUPLICATE
IMAGE >>> MIRROR
LAYERS >>> MERGE >>> MERGE DOWN
|
|
STEP 12
CLOSE Raster 2
OPEN & ACTIVATE Raster 1
SELECTIONS >>> SELECT ALL
Open up the 3d_abstract-HD image in your PSP workspace
Right click on the Title Bar and select COPY from the options
Right click on the Title Bar of your tag image
and select PASTE INTO SELECTION from the options.
DESELECT |
|
STEP 13
EFFECTS >>> REFLECTION EFFECTS >>>
ROTATING MIRROR
Horizontal Offset = 0
Vertical Offset = n/a
Rotation Angle = 180
Edge Mode = Reflect |
|
STEP 14
OPEN ALL LAYERS
ACTIVATE Raster 2
Open up the Renee_tube_steampunk_poule image
in your PSP workspace
Right click on the Title Bar and select COPY from the options
Right click on the Title Bar of your tag image
and select PASTE AS NEW LAYER from the options.
IMAGE >>> RESIZE = 55%
Ensure "Resize all layers" is UNCHECKED
Resample using WEIGHTED AVERAGE
ADJUST >>> SHARPNESS >>> SHARPEN
EFFECTS >>> IMAGE EFFECTS >>> OFFSET
Horizontal Offset = - (Minus) 220
Vertical Offset = - (Minus) 40
Edge Mode = Transparent |
|
STEP 15
Open up the gnome_tinkerer_by_windmaker image
in your PSP workspace
Right click on the Title Bar and select COPY from the options
Right click on the Title Bar of your tag image
and select PASTE AS NEW LAYER from the options.
IMAGE >>> RESIZE = 40%
Ensure "Resize all layers" is UNCHECKED
Resample using WEIGHTED AVERAGE
ADJUST >>> SHARPNESS >>> SHARPEN
EFFECTS >>> IMAGE EFFECTS >>> OFFSET
Horizontal Offset =170
Vertical Offset = - (Minus) 145
Edge Mode = Transparent |
|
STEP 16
Open up the SteampunkWA~Emeraldmyst image
in your PSP workspace
Right click on the Title Bar and select COPY from the options
Right click on the Title Bar of your tag image
and select PASTE AS NEW LAYER from the options.
EFFECTS >>> IMAGE EFFECTS >>> OFFSET
Horizontal Offset =190
Vertical Offset = 170
Edge Mode = Transparent
ADJUST >>> BRIGHTNESS and CONTRAST >>> BRIGHTNESS/CONTRAST
Brightness = 255
Contrast = 45
PSPX6-X8: Linear Mode checked |
|
STEP 17
EFFECTS >>> 3D EFFECTS >>> DROP SHADOW
Vertical offset = 2
Horizontal offset = 1
Colour = Black
Opacity = 100
Blur = 0 |
STEP 18
ACTIVATE Raster 1
Open up the JF-Rays image
in your PSP workspace
Right click on the Title Bar and select COPY from the options
Right click on the Title Bar of your tag image
and select PASTE AS NEW LAYER from the options.
EFFECTS >>> IMAGE EFFECTS >>> OFFSET
Horizontal Offset =0
Vertical Offset = 175
Edge Mode = Transparent |
|
STEP 19
ACTIVATE Raster 2 layer
LAYERS >>> NEW RASTER LAYER
Select your TEXT tool
Using a font of your choice
Add your name |
|
STEP 20
LAYERS >>> MERGE >>> MERGE ALL (Flatten)
IMAGE >>> ADD BORDERS = SYMMETRIC
COLOUR = BLACK
SIZE = 1
Save as .jpg image
,
|
| |
|
| |
|
| |
|