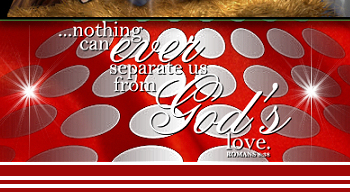
STEP 1
We are going to use a mask as a template.
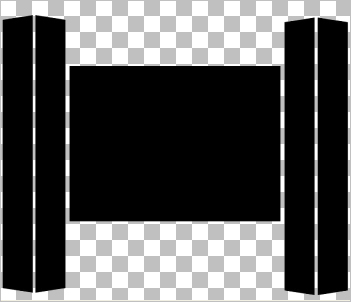
Open up the Monaiekje mask 5 image in your PSP workspace
WINDOW >>> DUPLICATE
Close the original Image
LAYERS >>> Promote background layer
With your MAGIC WAND
Mode = Replace
Match Mode = RGB Value
Tolerance = 10
Feather = 0
Antialias = Checked
Sample Merged = UNCHECKED
PSP9 - X9: Check CONTIGUOUS
PSPX - X9: There is no " Sample Merged"
PSPX - X9: Use all layers = UNChecked
PSP9 - X9: ANTIALIAS = Outside
Select the white area..
EDIT >>> CLEAR
DESELECT |
|
STEP 2
LAYERS >>> NEW RASTER LAYER
SELECTIONS >>> SELECT ALL
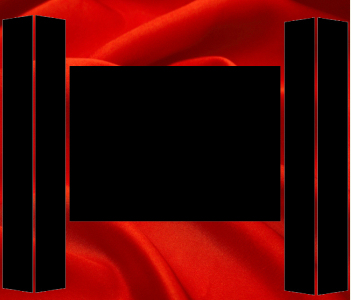
Open up the red-cloth-tn2 image in your PSP workspace
Right click on the Title Bar and select COPY from the options
Right click on the Title Bar of your tag image
and select PASTE INTO SELECTION from the options.
LAYERS >>> ARRANGE >>> MOVE DOWN
DESELECT
|
|
STEP 3
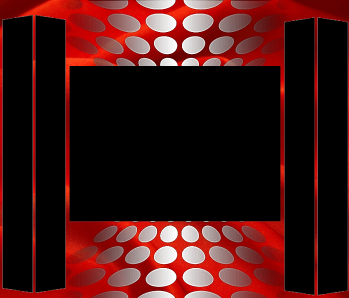
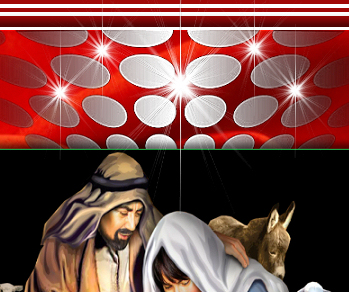
Open up the dotted-abstract image in your PSP workspace
Right click on the Title Bar and select COPY from the options
Right click on the Title Bar of your tag image
and select PASTE AS NEW LAYER from the options.
IMAGE >>> RESIZE = 98%
Ensure "Resize all layers" is UNCHECKED
Resample using WEIGHTED AVERAGE
ADJUST >>> SHARPNESS >>> SHARPEN MORE
LAYERS >>> DUPLICATE
LAYERS >>> MERGE >>> MERGE DOWN
|
|
STEP 4
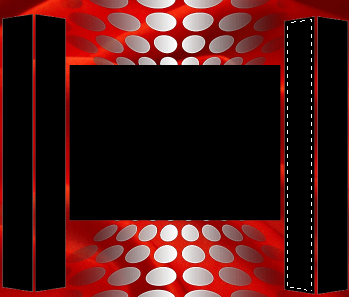
ACTIVATE Raster 1
With your MAGIC WAND ... Same settings
Select the area shown
SELECTIONS >>> MODIFY >>> CONTRACT = 5
LAYERS >>> NEW RASTER LAYER
|
|
STEP 5
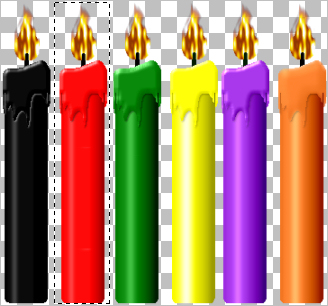
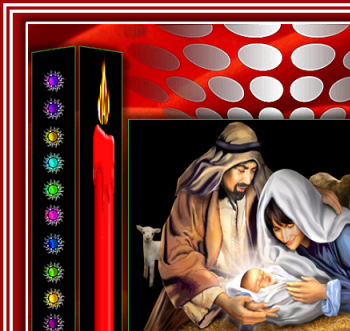
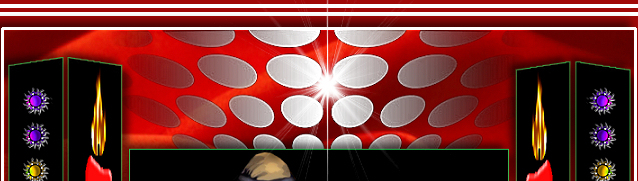
Open up the Candles image in your PSP workspace
Choose your SELECTION TOOL
Selection Type = Rectangle
Mode = Replace
Feather = 0
Antialias = UNChecked
Select the red candle
.
|
|
STEP 6
Right click on the Title Bar and select COPY from the options
Right click on the Title Bar of your tag image
and select PASTE INTO SELECTION from the options.
DESELECT
VIEW >>> RULERS
Select your RASTER DEFORM tool
Mode = SCALE
use default settings
PSPX-X9:Select your PICK tool
Push the centre right node left to the 610 pixel mark
on your top ruler
Click the RESET RECTANGLE arrow
Select the MOVER tool to disengage the
DEFORMATION tool (PICK tool)
ADJUST >>> SHARPNESS >>> SHARPEN
|
|
STEP 7
LAYERS >>> DUPLICATE
IMAGE >>> MIRROR
EFFECTS >>> IMAGE EFFECTS >>> OFFSET
Horizontal Offset = 0
Vertical Offset = 5
Edge Mode = Transparent
LAYERS >>> MERGE >>> MERGE DOWN
SAVE YOUR WORK
|
|
STEP 8
Open up the xmas wickedballs image in your PSP workspace
Right click on the Title Bar and select COPY from the options
Right click on the Title Bar of your tag image
and select PASTE AS NEW LAYER from the options.
IMAGE >>> RESIZE = 70%
Ensure "Resize all layers" is UNCHECKED
Resample using WEIGHTED AVERAGE
ADJUST >>> SHARPNESS >>> SHARPEN MORE
PSP9: IMAGE >>> ROTATE >>> FREE ROTATE = LEFT 90
Ensure "All layers" is UNCHECKED
PSPX - PSPX9: IMAGE >>> FREE ROTATE = LEFT 90
Ensure "All layers" is UNCHECKED
Reposition with your MOVER tool
|
|
STEP 9
LAYERS >>> DUPLICATE
IMAGE >>> MIRROR
LAYERS >>> MERGE >>> MERGE DOWN
EFFECTS >>> 3D EFFECTS >>> DROP SHADOW
Vertical & Horizontal offsets = 1
Colour = WHITE
Opacity = 100
Blur = 0 |
|
STEP 10
ACTIVATE Raster 1
With your MAGIC WAND.... Same settings.
Select the centre black rectangle
SELECTIONS >>> MODIFY >>> CONTRACT = 3
LAYERS >>> NEW RASTER LAYER
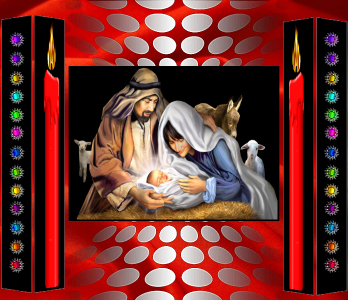
Open up the holy_family_by_joeatta78 image
in your PSP workspace
Right click on the Title Bar and select COPY from the options
Right click on the Title Bar of your tag image
and select PASTE INTO SELECTION from the options.
ADJUST >>> SHARPNESS >>> SHARPEN
DESELECT
|
|
STEP 11
Choose your SELECTION TOOL
Selection Type = Rectangle
Mode = Replace
Feather = 0
Antialias = UNChecked
Select the tuber text and delete
DESELECT
SAVE YOUR WORK
|
|
STEP 12
ACTIVATE Raster 1
SELECTIONS >>> SELECT ALL
SELECTIONS >>> FLOAT
SELECTIONS >>> DEFLOAT
SELECTIONS >>> MODIFY >>> CONTRACT = 1
SELECTIONS >>> INVERT
EDIT >>> CLEAR
Flood fill with GREEN #2db350
SELECTIONS >>> INVERT
SELECTIONS >>> MODIFY >>> EXPAND = 1
SELECTIONS >>> INVERT
EDIT >>> CLEAR
DESELECT |
|
STEP 13
EFFECTS >>> PLUGINS >>> EYE CANDY 3 >>>
DROP SHADOW
OR
EFFECTS >>> PLUGINS >>> EYE CANDY 4000 >>>
SHADOWLAB
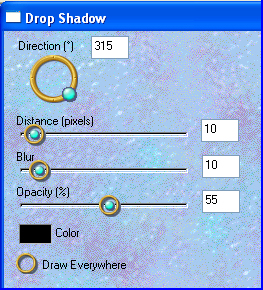
Center Offset Direction = 315
Center Offset Distance = 10.00
Overall Opacity = 55
Overall Blur (Pixels) = 10.00
Perspectivel Blur (Pixels) = 0.00
Color = BLACK
Check 'Draw Only Outside Selection' |
|
STEP 14
EDIT >>> Repeat Drop Shadow.. change DIRECTION to 135
OR
EDIT >>> Repeat Shadowlab.. change DIRECTION to 135 |
|
STEP 15
ACTIVATE Raster 5
Open up the LDD_wordart_0267s image in your PSP workspace
Right click on the Title Bar and select COPY from the options
Right click on the Title Bar of your tag image
and select PASTE AS NEW LAYER from the options.
ADJUST >>> COLOUR BALANCE >>> NEGATIVE IMAGE
PSPX - X9: IMAGE >>> NEGATIVE IMAGE
IMAGE >>> RESIZE = 67%
Ensure "Resize all layers" is UNCHECKED
Resample using WEIGHTED AVERAGE
LAYERS >>> DUPLICATE
LAYERS >>> MERGE >>> MERGE DOWN
Reposition with your MOVER tool
EFFECTS >>> 3D EFFECTS >>> DROP SHADOW
Vertical & Horizontal offsets = 1
Colour = Black
Opacity = 100
Blur = 0
|
|
STEP 16
LAYERS >>> MERGE >>> MERGE VISIBLE
IMAGE >>> RESIZE = 90%
Ensure "Resize all layers" is UNCHECKED
Resample using WEIGHTED AVERAGE
ADJUST >>> SHARPNESS >>> SHARPEN
With your MAGIC WAND.... Same settings.
Select the OUTER transparent area
Flood fill with WHITE
SELECTIONS >>> INVERT
SELECTIONS >>> MODIFY >>> EXPAND = 3
SELECTIONS >>> INVERT
EDIT >>> CLEAR
DESELECT |
|
STEP 17
CLOSE the Merged layer
LAYERS >>> NEW RASTER LAYER
LAYERS >>> ARRANGE >>> MOVE DOWN
Flood fill with RED #a00808
SELECTIONS >>> SELECT ALL
SELECTIONS >>> MODIFY >>> CONTRACT = 4
EDIT >>> CLEAR
Flood fill with WHITE
SELECTIONS >>> MODIFY >>> CONTRACT = 4
EDIT >>> CLEAR
Flood fill with RED #a00808
SELECTIONS >>> MODIFY >>> CONTRACT = 4
EDIT >>> CLEAR
Flood fill with WHITE
SELECTIONS >>> MODIFY >>> CONTRACT = 4
EDIT >>> CLEAR
Flood fill with RED #a00808
DESELECT |
|
STEP 18
OPEN & ACTIVATE the Merged layer
EFFECTS >>> PLUGINS >>> EYE CANDY 3 >>>
DROP SHADOW
Same settings
EDIT >>> Repeat Drop Shadow.. change DIRECTION to 315
~~~~~~~~~~~~~~~~~~
OR
EFFECTS >>> PLUGINS >>> EYE CANDY 4000 >>>
SHADOWLAB
Same settings
EDIT >>> Repeat Shadowlab.. change DIRECTION to 315
SAVE YOUR WORK
|
|
STEP 19
LAYERS >>> MERGE >>> MERGE VISIBLE
LAYERS >>> NEW RASTER LAYER
In your MATERIALS PALETTE
Load WHITE " #ffffff " in your foreground
, |
STEP 20
Select your PAINT BRUSH tool
PRESET =
Stars 012
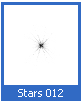

Place your cursor at 360 pixels across and 85 pixels down,
click your mouse 4 times
 , , |
STEP 21
Change the brush size to 250
Add 4 more stars this time clicking only 3 times each.
(You may add more if you wish) |
|
STEP 22
Add 2 more stars in the lower section of your image
ADJUST >>> SHARPNESS >>> SHARPEN
|
|
STEP 23
LAYERS >>> NEW RASTER LAYER
SELECT your TEXT tool
With a font of your choice add your name
, |
STEP 24
LAYERS >>> MERGE >>> MERGE ALL (Flatten)
Save as .jpg image
, |
| |
|
| |
|
| |
|