STEP 1
Open up the wallup-37896 image in your PSP workspace
WINDOW >>> DUPLICATE
Close the original Image
LAYERS >>> Promote background layer
.
.
|
STEP 2
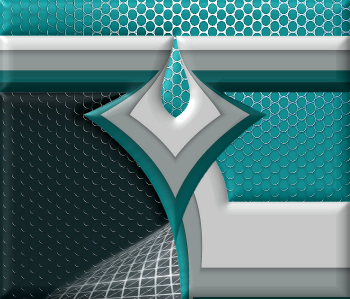
EFFECTS>>> GEOMETRIC EFFECTS >>> PENTAGON
Edge Mode = Repeat
EDIT >>> Repeat Pentagon (3 times)
|
|
STEP 3
With your MAGIC WAND
Mode = Replace
Match Mode = RGB Value
Tolerance = 3
Feather = 2
Antialias = Checked
Sample Merged = UNCHECKED
PSP9 - X8: Check CONTIGUOUS
PSPX - X8: There is no " Sample Merged"
PSPX - X8: Use all layers = UNChecked
PSP9 - X8: ANTIALIAS = Outside
Select the area shown
|
|
STEP 4
EDIT >>> CUT
LAYERS >>> NEW RASTER LAYER
Right click on the Title Bar of your tag image
and select PASTE INTO SELECTION from the options.
DESELECT
|
|
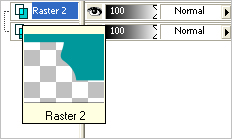
STEP 5
ACTIVATE Raster 1
With your MAGIC WAND
Same settings BUT change TOLERANCE to 16
Select the area shown |
|
STEP 6
EDIT >>> CUT
LAYERS >>> NEW RASTER LAYER
Right click on the Title Bar of your tag image
and select PASTE INTO SELECTION from the options.
DESELECT
|
|
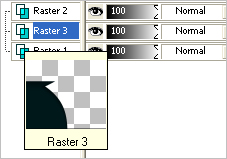
STEP 7
ACTIVATE Raster 1
LAYERS >>> ARRANGE >>> BRING TO TOP
|
|
STEP 8
LAYERS >>> DUPLICATE
EFFECTS >>> REFLECTION EFFECTS >>>
ROTATING MIRROR
Horizontal Offset = 0
Vertical Offset = n/a
Rotation Angle = 180
Edge Mode = Reflect
|
|
STEP 9
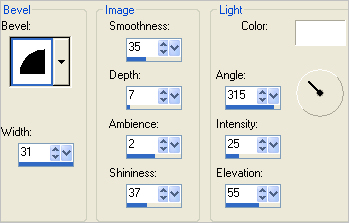
EFFECTS >>> 3D EFFECTS >>> INNER BEVEL
|
|
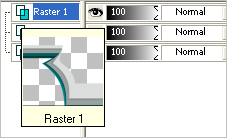
STEP 10
ACTIVATE Raster 1
EDIT >>> Repeat Inner Bevel
ACTIVATE Raster 2
EDIT >>> Repeat Inner Bevel
ACTIVATE Raster 3
EDIT >>> Repeat Inner Bevel |
|
STEP 11
Open up the sql2k8BG.png image in your PSP workspace
Right click on the Title Bar and select COPY from the options
Right click on the Title Bar of your tag image
and select PASTE AS NEW LAYER from the options.
IMAGE >>> MIRROR
|
|
STEP 12
ACTIVATE Raster 2
Open up the Free8-metal-plate image in your PSP workspace
Right click on the Title Bar and select COPY from the options
Right click on the Title Bar of your tag image
and select PASTE AS NEW LAYER from the options.
EFFECTS >>> EDGE EFFECTS >>> ENHANCE MORE
|
|
STEP 13
ACTIVATE Copy of Raster 1
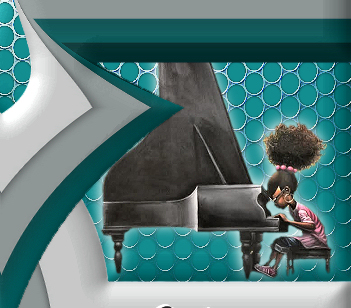
Open up the music-quotes4 image in your PSP workspace
Right click on the Title Bar and select COPY from the options
Right click on the Title Bar of your tag image
and select PASTE AS NEW LAYER from the options.
IMAGE >>> RESIZE = 50%
Ensure "Resize all layers" is UNCHECKED
Resample using WEIGHTED AVERAGE
EFFECTS >>> IMAGE EFFECTS >>> OFFSET
Horizontal Offset = 200
Vertical Offset = - ( minus ) 165
Edge Mode = Transparent |
|
STEP 14
LAYERS >>> DUPLICATE
LAYERS >>> MERGE >>> MERGE DOWN
EFFECTS >>> 3D EFFECTS >>> DROP SHADOW
Vertical & Horizontal offsets = - ( minus ) 2
Colour = WHITE
Opacity = 100
Blur = 0.00 |
|
STEP 15
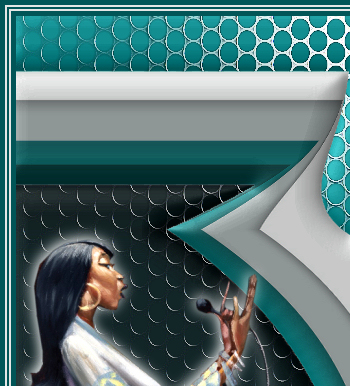
Open up the zm1_000125 image in your PSP workspace
Right click on the Title Bar and select COPY from the options
Right click on the Title Bar of your tag image
and select PASTE AS NEW LAYER from the options.
IMAGE >>> MIRROR
IMAGE >>> RESIZE = 65%
Ensure "Resize all layers" is UNCHECKED
Resample using WEIGHTED AVERAGE
ADJUST >>> SHARPNESS >>> SHARPEN |
STEP 16
EFFECTS >>> IMAGE EFFECTS >>> OFFSET
Horizontal Offset = - ( minus ) 200
Vertical Offset = - ( minus ) 120
Edge Mode = Transparent
EFFECTS >>> 3D EFFECTS >>> DROP SHADOW
Vertical & Horizontal offsets = - ( minus ) 2
Colour = WHITE
Opacity = 100
Blur = 20.00
|
|
STEP 17
Open up the practice_makes_perfect image in your PSP workspace
Right click on the Title Bar and select COPY from the options
Right click on the Title Bar of your tag image
and select PASTE AS NEW LAYER from the options.
IMAGE >>> RESIZE = 50%
Ensure "Resize all layers" is UNCHECKED
Resample using WEIGHTED AVERAGE
ADJUST >>> SHARPNESS >>> SHARPEN |
STEP 18
EFFECTS >>> IMAGE EFFECTS >>> OFFSET
Horizontal Offset = 215
Vertical Offset = 20
Edge Mode = Transparent
LAYERS >>> ARRANGE >>> MOVE DOWN
Edit >>> Repeat Move Layer Down (Twice)
EFFECTS >>> 3D EFFECTS >>> DROP SHADOW
Same settings
|
|
STEP 19
ACTIVATE Raster 7
LAYERS >>> NEW RASTER LAYER
Flood fill with DARK GREEN #015557
SELECTIONS >>> SELECT ALL
SELECTIONS >>> MODIFY >>> CONTRACT = 5
EDIT >>> CLEAR
Flood fill with CREAM #e4e6e5
SELECTIONS >>> MODIFY >>> CONTRACT = 2
EDIT >>> CLEAR
Flood fill with DARK GREEN #015557
SELECTIONS >>> MODIFY >>> CONTRACT = 2
EDIT >>> CLEAR
Flood fill with CREAM #e4e6e5
SELECTIONS >>> MODIFY >>> CONTRACT = 2
EDIT >>> CLEAR
Flood fill with DARK GREEN #015557
SELECTIONS >>> MODIFY >>> CONTRACT = 5
EDIT >>> CLEAR
DESELECT |
|
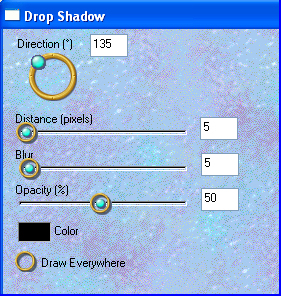
STEP 20
EFFECTS >>> PLUGINS >>> EYE CANDY 3 >>>
DROP SHADOW
OR
EFFECTS >>> PLUGINS >>> EYE CANDY 4000 >>>
SHADOWLAB
Center Offset Direction = 315
Center Offset Distance = 10.00
Overall Opacity = 50
Overall Blur (Pixels) = 10.00
Perspectivel Blur (Pixels) = 0.00
Color = BLACK
Check 'Draw Only Outside Selection' |
|
STEP 21
EFFECTS >>> PLUGINS >>> EYE CANDY 3 >>>
DROP SHADOW
OR
EFFECTS >>> PLUGINS >>> EYE CANDY 4000 >>>
SHADOWLAB
Center Offset Direction = 135
Center Offset Distance = 5.00
Overall Opacity = 50
Overall Blur (Pixels) = 5.00
Perspectivel Blur (Pixels) = 0.00
Color = BLACK
Check 'Draw Only Outside Selection' |
|
STEP 22
ACTIVATE Copy of Raster 1
EFFECTS >>> PLUGINS >>> EYE CANDY 3 >>>
DROP SHADOW
OR
EFFECTS >>> PLUGINS >>> EYE CANDY 4000 >>>
SHADOWLAB
Center Offset Direction = 135
Center Offset Distance = 5.00
Overall Opacity = 50
Overall Blur (Pixels) = 5.00
Perspectivel Blur (Pixels) = 0.00
Color = BLACK
Check 'Draw Only Outside Selection' |
|
STEP 23
ACTIVATE Raster 1
EFFECTS >>> PLUGINS >>> EYE CANDY 3 >>>
DROP SHADOW
Same settings
EDIT >>> Repeat Drop Shadow .. change DIRECTION to 270
OR
EFFECTS >>> PLUGINS >>> EYE CANDY 4000 >>> Shadowlab
Same settings
EDIT >>> Repeat Shadowlab.. change DIRECTION to 270
~~~~~~~~~~~~~~~~~~~~~~~
ACTIVATE Copy of Raster 1
EDIT >>> Repeat Drop Shadow.
OR
EFFECTS >>> PLUGINS >>> EYE CANDY 4000 >>> Shadowlab
Same settings
, |
STEP 24
LAYERS >>> MERGE >>> MERGE VISIBLE
LAYERS >>> NEW RASTER LAYER
SELECT your TEXT tool
With a font of your choice add your name
, |
STEP 25
LAYERS >>> MERGE >>> MERGE ALL (Flatten)
Save as .jpg image
, |
| |
|
| |
|
| |
|