STEP 1
In your MATERIALS PALETTE
Load WHITE ' ffffff ' in your foreground
Load GREEN ' #97a187 ' in your background
Click on the GRADIENT option on your Foreground
Locate the "Foreground-background" gradient
and use these settings. |
|
STEP 2
Open a new image 700 x 600
Transparent background
PSP9: Colour Depth = 16 Million Colors (24bit)
PSPX-X8: Colour Depth RGB = 8bits/channel
Flood fill with the gradient
ADJUST >>> BLUR >>> GAUSSIAN BLUR
Radius = 33.00
EFFECTS >>> REFLECTION EFFECTS >>>
ROTATING MIRROR
Horizontal Offset = 0
Vertical Offset = n/a
Rotation Angle = 180
Edge Mode = Reflect
IMAGE >>> FLIP
ADJUST >>> BLUR >>> GAUSSIAN BLUR
Radius = 33.00
.
|
STEP 3
Open up the mask-Tamer11 image in your PSP workspace
and minimize
LAYERS >>> NEW RASTER LAYER
Flood fill with GREEN
LAYERS >>> NEW MASK LAYER >>> FROM IMAGE |
|
STEP 4
LAYERS >>> MERGE >>> MERGE GROUP
In your LAYER PALETTE change the
BLEND MODE to MULTIPLY
LAYERS >>> DUPLICATE
LAYERS >>> MERGE >>> MERGE DOWN
IMAGE >>> RESIZE = 90%
Ensure "Resize all layers" is UNCHECKED
Resample using WEIGHTED AVERAGE
.
|
|
STEP 5
Open up the Interlude2 image in your PSP workspace
Right click on the Title Bar and select COPY from the options
Right click on the Title Bar of your tag image
and select PASTE AS NEW LAYER from the options.
IMAGE >>> RESIZE = 80%
Ensure "Resize all layers" is UNCHECKED
Resample using WEIGHTED AVERAGE
ADJUST >>> SHARPNESS >>> SHARPEN
EFFECTS >>> IMAGE EFFECTS >>> OFFSET
Horizontal Offset = - ( minus ) 25
Vertical Offset = - ( minus ) 45
Edge Mode = Transparent
|
|
STEP 6
EFFECTS >>> PLUGINS >>> EYE CANDY 3 >>>
PERSPECTIVE SHADOW
|
|
STEP 7
LAYERS >>> NEW RASTER LAYER
Choose your SELECTION TOOL then click on the
CUSTOM SELECTION symbol
and enter these coordinates.
|
|
STEP 8
Flood fill with GREEN
DESELECT
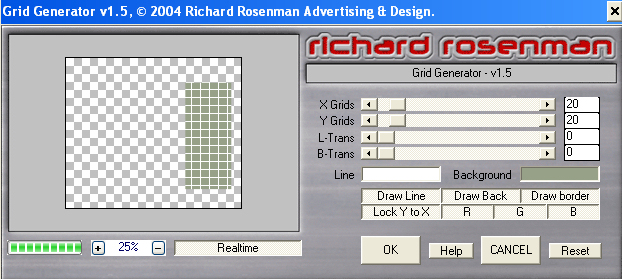
EFFECTS >>> PLUGINS >>> Richard Rosenman >>> Grid Generator
BACKGROUND COLOUR =
#97a187
,
|
STEP 9
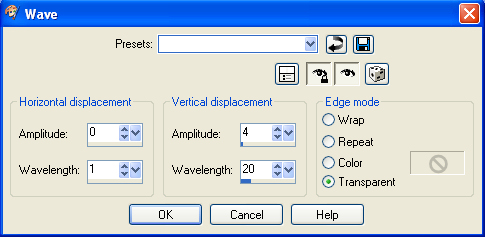
EFFECTS >>> DISTORTION EFFECTS >>> WAVE
 , ,
|
STEP 10
With your MAGIC WAND
Mode = Replace
Match Mode = RGB Value
Tolerance = 0
Feather = 25
Antialias = Checked
Sample Merged = UNCHECKED
PSP9 - X8: Check CONTIGUOUS
PSPX - X8: There is no " Sample Merged"
PSPX - X8: Use all layers = UNChecked
PSP9 - X8: ANTIALIAS = Outside
Select the OUTER area as shown
|
|
STEP 11
Depress your DELETE key 5 times
DESELECT
In your LAYER PALETTE change the OPACITY to 75%
LAYERS >>> DUPLICATE
IMAGE >>> MIRROR
LAYERS >>> MERGE >>> MERGE DOWN
SAVE YOUR WORK |
|
STEP 12
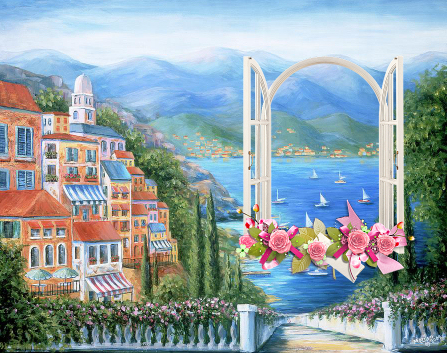
Open up the by-the-sea-marilyn-dunlap image
in your PSP workspace
WINDOW >>> DUPLICATE
Close the original Image
LAYERS >>> Promote background layer
Open up the Window_Pink_Flowers_Frame image in your PSP workspace
Right click on the Title Bar and select COPY from the options
Right click on the Title Bar of your tag image
and select PASTE AS NEW LAYER from the options.
EFFECTS >>> IMAGE EFFECTS >>> OFFSET
Horizontal Offset = 200
Vertical Offset = 15
Edge Mode = Transparent
.
|
STEP 13
LAYERS >>> DUPLICATE
IMAGE >>> MIRROR
LAYERS >>> MERGE >>> MERGE DOWN
With your MAGIC WAND
Mode = Replace
Match Mode = RGB Value
Tolerance = 0
Feather = 4
Antialias = Checked
Sample Merged = UNCHECKED
PSP9 - X8: Check CONTIGUOUS
PSPX - X8: There is no " Sample Merged"
PSPX - X8: Use all layers = UNChecked
PSP9 - X8: ANTIALIAS = Outside
Select the area surrounding the windows |
|
STEP 14
ACTIVATE Raster 1
Depress your DELETE key 3 times
DESELECT |
|
STEP 15
Choose your SELECTION TOOL
Selection Type = Rectangle
Mode = ADD (Shift)
Feather = 0
Antialias = UNChecked
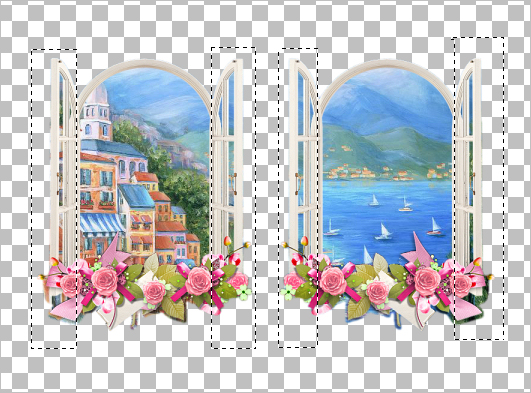
Select the areas shown
 ,
, |
STEP 16
EDIT >>> CLEAR
DESELECT
Still on Raster 1
With your SELECTION TOOL ... same settings
Select the area shown
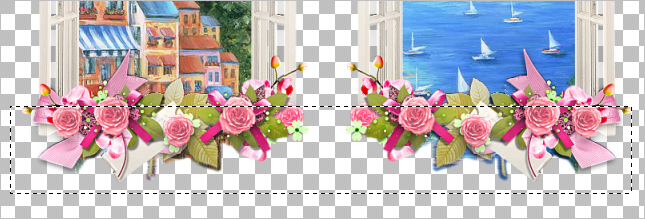
EDIT >>> CLEAR
DESELECT
|
STEP 17
LAYERS >>> MERGE >>> MERGE VISIBLE |
|
STEP 18
With your SELECTION TOOL ... same settings
Select the left window
In your Layer Palette
Right click on the Merged layer and select
LAYERS >>> PROMOTE SELECTION TO LAYER
ACTIVATE the Merged layer
EDIT >>> CLEAR
DESELECT
Still on the Merged layer
EFFECTS >>> IMAGE EFFECTS >>> OFFSET
Horizontal Offset = 70
Vertical Offset = 0
Edge Mode = Transparent
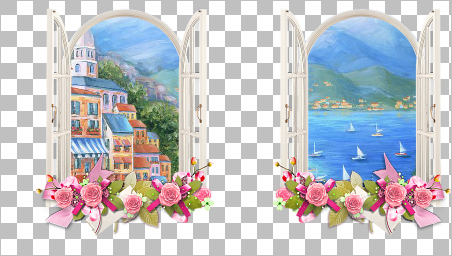
, |
STEP 19
ACTIVATE the Promoted Selection layer
EFFECTS >>> IMAGE EFFECTS >>> OFFSET
Horizontal Offset = - (minus) 70
Vertical Offset = 0
Edge Mode = Transparent
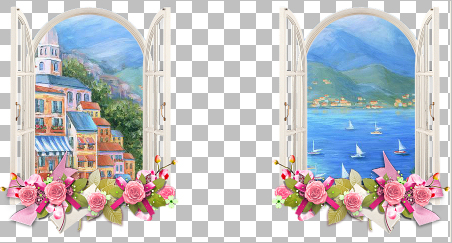
LAYERS >>> MERGE >>> MERGE VISIBLE |
STEP 20
Choose your SELECTION TOOL then click on the
CUSTOM SELECTION symbol
and enter these coordinates. |
|
STEP 21
IMAGE >>> CROP TO SELECTION
IMAGE >>> RESIZE = 70%
Ensure "Resize all layers" is UNCHECKED
Resample using WEIGHTED AVERAGE
ADJUST >>> SHARPNESS >>> SHARPEN
SAVE YOUR WORK
Right click on the Title Bar and select COPY from the options
, |
STEP 22
Return to your Tag image
Right click on the Title Bar of your tag image
and select PASTE AS NEW LAYER from the options.
EFFECTS >>> IMAGE EFFECTS >>> OFFSET
Horizontal Offset = 0
Vertical Offset = 100
Edge Mode = Transparent
LAYERS >>> ARRANGE >>> MOVE DOWN (Twice)
ADJUST >>> SHARPNESS >>> SHARPEN
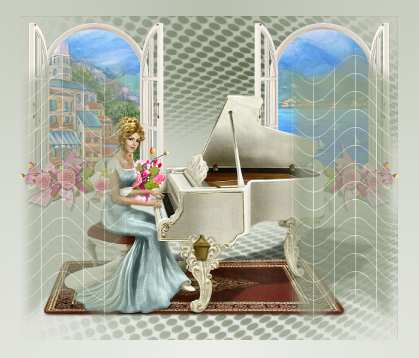
, |
STEP 23
EFFECTS >>> PLUGINS >>> EYE CANDY 3 >>>
DROP SHADOW |
|
STEP 24
CLOSE Raster 1
LAYERS >>> MERGE >>> MERGE VISIBLE
Choose your SELECTION TOOL then click on the
CUSTOM SELECTION symbol
and enter these coordinates. |
|
STEP 25
EFFECTS >>> 3D EFFECTS >>> DROP SHADOW
Vertical & Horizontal offsets = 1
Colour = Black
Opacity = 100
Blur = 0
Repeat Drop Shadow effect changing
Vertical & Horizontal Offsets to - ( minus ) 1
Click OK
SELECTIONS >>> INVERT
SELECTIONS >>> MODIFY >>> CONTRACT = 1
EDIT >>> CLEAR
OPEN & ACTIVATE Raster 1
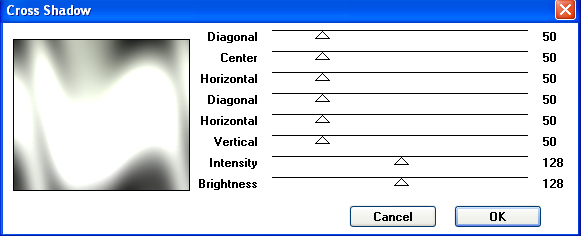
EFFECTS >>> PLUGINS >>> GRAPHICS PLUS >>> Cross Shadow
|
STEP 26
EFFECTS >>> 3D EFFECTS >>> INNER BEVEL |
|
STEP 27
DESELECT |
|
STEP 28
ACTIVATE the Merged layer
Open up the DECO-I6.png image in your PSP workspace
Right click on the Title Bar and select COPY from the options
Right click on the Title Bar of your tag image
and select PASTE AS NEW LAYER from the options.
ADJUST >>> COLOUR BALANCE >>> NEGATIVE IMAGE
PSPX - X8: IMAGE >>> NEGATIVE IMAGE
, |
STEP 29
EFFECTS >>> 3D EFFECTS >>> DROP SHADOW
Vertical & Horizontal offsets = 1
Colour = Black
Opacity = 100
Blur = 0
Repeat Drop Shadow effect changing
Vertical & Horizontal Offsets to - ( minus ) 1
Click OK
IMAGE >>> FLIP |
|
STEP 30
EFFECTS >>> PLUGINS >>> EYE CANDY 3 >>>
DROP SHADOW
Same settings BUT change BLUR to 5 |
|
STEP 31
LAYERS >>> MERGE >>> MERGE VISIBLE
LAYERS >>> NEW RASTER LAYER
SELECT your TEXT tool
With a font of your choice add your name
LAYERS >>> MERGE >>> MERGE ALL (Flatten)
Save as .jpg image
, |
| |
|
| |
|
| |
|