STEP 1
Open a new image 700 x 600
Transparent background
PSP9: Colour Depth = 16 Million Colors (24bit)
PSPX-X8: Colour Depth RGB = 8bits/channel
LAYERS >>> NEW RASTER LAYER
In your MATERIALS PALETTE load lilac #dcd6e7
in the background
|
STEP 2
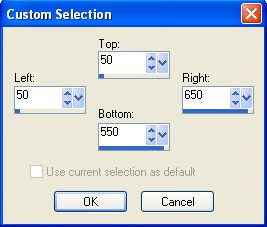
Choose your SELECTION TOOL then click on the
CUSTOM SELECTION symbol
and enter these coordinates. |
|
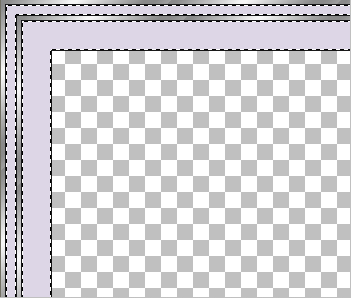
STEP 3
SELECTIONS >>> INVERT
Flood fill with lilac #dcd6e7
DESELECT
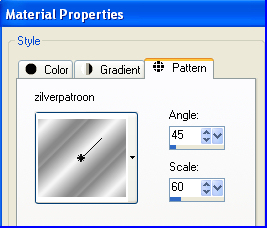
In your MATERIALS PALETTE load
zilverpatroon pattern in the foreground
using these settings |
|
STEP 4
SELECTIONS >>> SELECT ALL
SELECTIONS >>> MODIFY >>> CONTRACT = 4
SELECTIONS >>> INVERT
Flood fill with Pattern
EFFECTS >>> 3D EFFECTS >>> DROP SHADOW
Vertical & Horizontal offsets = 1
Colour = Black
Opacity = 90
Blur = 0
Repeat Drop Shadow effect changing
Vertical & Horizontal Offsets to - ( minus ) 1
Click OK
DESELECT |
|
STEP 5
LAYERS >>> NEW RASTER LAYER
SELECTIONS >>> SELECT ALL
SELECTIONS >>> MODIFY >>> CONTRACT = 16
Flood fill with Pattern
SELECTIONS >>> MODIFY >>> CONTRACT = 4
EDIT >>> CLEAR
DESELECT
EFFECTS >>> 3D EFFECTS >>> DROP SHADOW
Vertical & Horizontal offsets = 1
Colour = Black
Opacity = 90
Blur = 0
Repeat Drop Shadow effect changing
Vertical & Horizontal Offsets to - ( minus ) 1
Click OK
LAYERS >>> MERGE >>> MERGE DOWN
|
|
STEP 6
REPEAT both Drop Shadows
With your MAGIC WAND
Mode = Replace
Match Mode = RGB Value
Tolerance = 0
Feather = 0
Antialias = UNchecked
Sample Merged = UNCHECKED
PSP9 - X8: Check CONTIGUOUS
PSPX - X8: There is no " Sample Merged"
and while depressing your SHIFT KEY...
Select the 2 lilac sections |
|
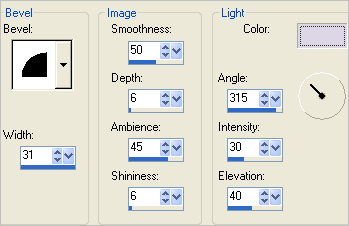
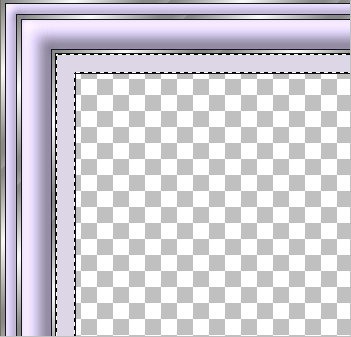
STEP 7
EFFECTS >>> 3D EFFECTS >>> INNER BEVEL
COLOUR = #dcd6e7
DESELECT
|
|
STEP 8
With your MAGIC WAND.... Same settings.
Select the CENTRE transparent area
LAYERS >>> NEW RASTER LAYER
Flood fill with Pattern
SELECTIONS >>> MODIFY >>> CONTRACT = 4
EDIT >>> CLEAR
REPEAT both Drop Shadows
Flood fill with lilac #dcd6e7
SELECTIONS >>> MODIFY >>> CONTRACT = 20
EDIT >>> CLEAR
REPEAT both Drop Shadows
DESELECT
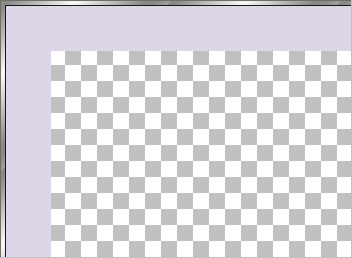
With your MAGIC WAND ... Same settings
Select the border shown
|
|
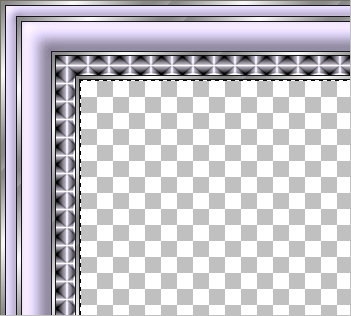
STEP 9
EFFECTS >>> PLUGINS >>> Greg's Factory Output Vol II >>> Waffle
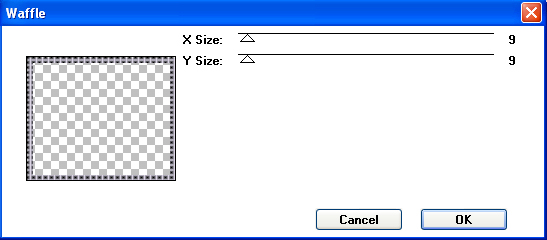
, |
STEP 10
ADJUST >>> SHARPNESS >>> SHARPEN MORE
EDIT >>> Repeat Sharpen More
DESELECT
With your MAGIC WAND ... Same settings
Select the CENTRE transparent area
Flood fill with Pattern
SELECTIONS >>> MODIFY >>> CONTRACT = 4
EDIT >>> CLEAR
REPEAT both Drop Shadows
|
|
STEP 11
LAYERS >>> NEW RASTER LAYER
Flood fill with lilac #dcd6e7
SELECTIONS >>> MODIFY >>> CONTRACT = 35
EDIT >>> CLEAR
REPEAT both Drop Shadows
SELECTIONS >>> INVERT
EFFECTS >>> 3D EFFECTS >>> INNER BEVEL
Same settings
EFFECTS >>> PLUGINS >>> AP 01 [Innovations] >>>Lines >>> SilverLining
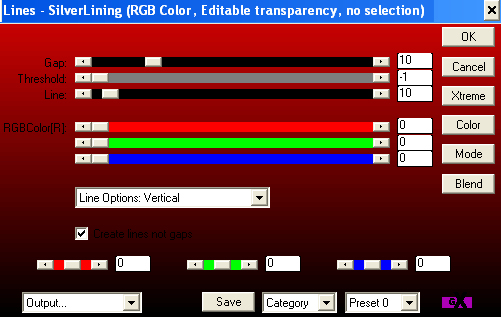
,
|
STEP 12
SELECTIONS >>> INVERT
Flood fill with Pattern
SELECTIONS >>> MODIFY >>> CONTRACT = 4
EDIT >>> CLEAR
REPEAT both Drop Shadows
Flood fill with lilac #dcd6e7
SELECTIONS >>> MODIFY >>> CONTRACT = 25
EDIT >>> CLEAR
REPEAT both Drop Shadows
DESELECT
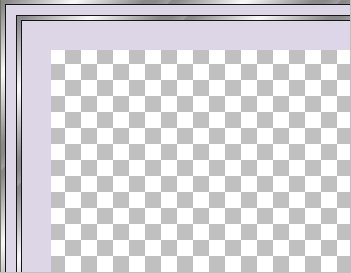
With your MAGIC WAND ... Same settings
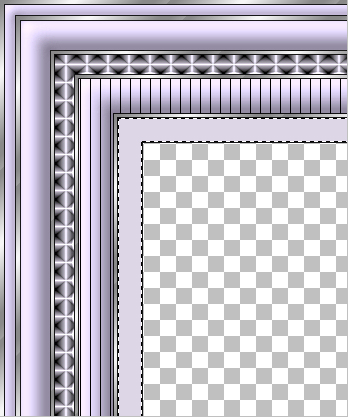
Select the border shown. |
|
STEP 13
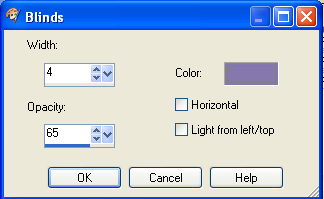
EFFECTS >>> TEXTURE EFFECTS >>> BLINDS
COLOUR =
#8677ad |
|
STEP 14
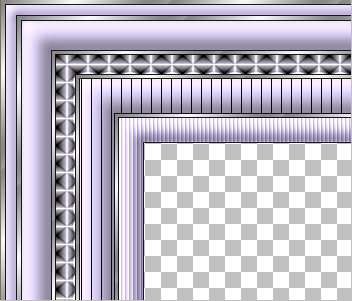
EFFECTS >>> 3D EFFECTS >>> INNER BEVEL
Same settings
BUT
Change AMBIENCE to 70
ADJUST >>> SHARPNESS >>> SHARPEN
DESELECT
|
|
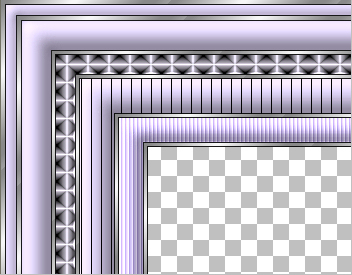
STEP 15
With your MAGIC WAND ... Same settings
Select the CENTRE transparent area
Flood fill with Pattern
SELECTIONS >>> MODIFY >>> CONTRACT = 4
EDIT >>> CLEAR
REPEAT both Drop Shadows
DESELECT |
|
STEP 16
LAYERS >>> MERGE >>> MERGE VISIBLE
Save as .pspimage image
, |
STEP 17
LAYERS >>> NEW RASTER LAYER
LAYERS >>> ARRANGE >>> MOVE DOWN
Flood fill with #cfb6fe |
STEP 18
Open up the LF-MistedWomanRoses-15062014.png image
in your PSP workspace
Right click on the Title Bar and select COPY from the options
Right click on the Title Bar of your frame image
and select PASTE AS NEW LAYER from the options.
IMAGE >>> RESIZE = 70%
Ensure "Resize all layers" is UNCHECKED
Resample using WEIGHTED AVERAGE
ADJUST >>> SHARPNESS >>> SHARPEN
|
|
STEP 19
ACTIVATE the Merged layer
EFFECTS >>> 3D EFFECTS >>> DROP SHADOW
Vertical & Horizontal offsets = 5
Colour = Black
Opacity = 65
Blur = 10.00
Repeat Drop Shadow effect changing
Vertical & Horizontal Offsets to - ( minus ) 5
Click OK
LAYERS >>> MERGE >>> MERGE VISIBLE
|
|
STEP 20
LAYERS >>> NEW RASTER LAYER
Select your TEXT tool
and with a font of your choice add your name
, |
STEP 21
LAYERS >>> MERGE >>> MERGE ALL (Flatten)
Save as .jpg image
|
| |
|
| |
|
| |
|