STEP 1
Open up the GreenSwirl image in your PSP workspace
WINDOW >>> DUPLICATE
MINIMIZE the original Image
LAYERS >>> Promote background layer
EFFECTS >>> REFLECTION EFFECTS >>>
ROTATING MIRROR
Horizontal Offset = 0
Vertical Offset = n/a
Rotation Angle = 0
Edge Mode = Reflect.
LAYERS >>> DUPLICATE (twice)
CLOSE Raster 1
and Copy of Raster 1
On Copy (2) of Raster 1
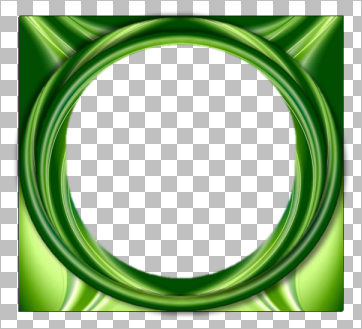
EFFECTS >>> GEOMETRIC EFFECTS >>> CIRCLE
Edge Mode = Transparent
|
|
STEP 2
IMAGE >>> RESIZE = 95%
Ensure "Resize all layers" is UNCHECKED
Resample using WEIGHTED AVERAGE
With your MAGIC WAND
Mode = Replace
Match Mode = RGB Value
Tolerance = 0
Feather = 3
Antialias = Checked
Sample Merged = UNCHECKED
PSP9 - X8: Check CONTIGUOUS
PSPX - X8: There is no " Sample Merged"
PSP9 - X8: ANTIALIAS = Outside
Select the OUTER transparent area
SELECTIONS >>> MODIFY >>> EXPAND = 3
Depress your DELETE KEY 4 times
|
|
STEP 3
SELECTIONS >>> MODIFY >>> EXPAND = 35
SELECTIONS >>> INVERT
EDIT >>> CLEAR
DESELECT
|
|
STEP 4
With your MAGIC WAND ... Same settings
Select the CENTRE transparent area
OPEN & & ACTIVATE Copy of Raster 1
SELECTIONS >>> MODIFY >>> EXPAND = 5
EDIT >>> CLEAR
DESELECT
EFFECTS >>> DISTORTION EFFECTS >>> POLAR COORDINATES
Rectangular to Polar
Edge Mode = Transparent |
|
STEP 5
IMAGE >>> RESIZE = 90%
Ensure "Resize all layers" is UNCHECKED
Resample using WEIGHTED AVERAGE
ACTIVATE Copy (2) of Raster 1
With your MAGIC WAND ... Same settings
Select the CENTRE transparent area
SELECTIONS >>> MODIFY >>> EXPAND = 3
ACTIVATE Copy of Raster 1
EDIT >>> CLEAR
DESELECT
CLOSE Copy (2) of Raster 1
|
|
STEP 6
OPEN & ACTIVATE Raster 1
IMAGE >>> RESIZE = 90%
Ensure "Resize all layers" is UNCHECKED
Resample using WEIGHTED AVERAGE
ACTIVATE Copy of Raster 1
With your MAGIC WAND ... Same settings
Select the CENTRE area of your image
SELECTIONS >>> MODIFY >>> EXPAND = 8
ACTIVATE Raster 1
EDIT >>> CLEAR
DESELECT |
|
STEP 7
ACTIVATE Copy of Raster 1
LAYERS >>> DUPLICATE
IMAGE >>> RESIZE = 91%
Ensure "Resize all layers" is UNCHECKED
Resample using WEIGHTED AVERAGE
ADJUST >>> SHARPNESS >>> SHARPEN
IMAGE >>> FLIP
ACTIVATE Copy of Raster 1
ADJUST >>> SHARPNESS >>> SHARPEN |
|
STEP 8
With your MAGIC WAND ... Same settings
Select the OUTER transparent area
Depress your DELETE KEY 3 times
SELECTIONS >>> INVERT
SELECTIONS >>> MODIFY >>> CONTRACT = 3
EFFECTS >>> PLUGINS >>> EYE CANDY 3 >>>
DROP SHADOW
Settings as shown
--->>>>>>
OR
EFFECTS >>> PLUGINS >>> EYE CANDY 4000 >>>
SHADOWLAB
Center Offset Direction = 315
Center Offset Distance = 10.00
Overall Opacity = 55
Overall Blur (Pixels) = 10.00
Perspectivel Blur (Pixels) = 0.00
Color = BLACK
Check 'Draw Only Outside Selection'
|
|
STEP 9
EDIT >>> Repeat Drop Shadow.. change DIRECTION to 135
OR
EDIT >>> Repeat Shadowlab.. change DIRECTION to 135
DESELECT
In your LAYER PALETTE delete top closed layer
Copy (2) of Raster 1
(The first circle frame created)
~~~~~~~~~~~~~~~~~~~
With Copy (2) of Raster 1 activated
With your MAGIC WAND ... Same settings
Select the OUTER transparent area
SELECTIONS >>> INVERT
EFFECTS >>> PLUGINS >>> EYE CANDY 3 >>>
DROP SHADOW
Same settings
OR
EFFECTS >>> PLUGINS >>> EYE CANDY 4000 >>>
SHADOWLAB
Same settings
|
STEP 10
EDIT >>> Repeat Drop Shadow.. change DIRECTION to 315
OR
EDIT >>> Repeat Shadowlab.. change DIRECTION to 315
DESELECT
|
|
STEP 11
ACTIVATE Raster 1
EFFECTS >>> 3D EFFECTS >>> DROP SHADOW
Vertical & Horizontal offsets = 1
Colour = Black
Opacity = 100
Blur = 0
Repeat Drop Shadow effect changing
Vertical & Horizontal Offsets to - ( minus ) 1
Click OK
IMAGE >>> FLIP
,

|
STEP 12
Maximize the GreenSwirl image in your PSP workspace
Right click on the Title Bar and select COPY from the options
Right click on the Title Bar of your frame image
and select PASTE AS NEW LAYER from the options.
EFFECTS >>> REFLECTION EFFECTS >>>
ROTATING MIRROR
Same settings
EFFECTS >>> DISTORTION EFFECTS >>> PIXELATE
Block width = 40
Block height = 40
Symmetric = Checked
EFFECTS >>> EDGE EFFECTS >>> ENHANCE
IMAGE >>> FLIP
LAYERS >>> ARRANGE >>> MOVE DOWN |
|
STEP 13
ACTIVATE Raster 1
With your MAGIC WAND.... Same settings.
Select the CENTRE area of your image
ACTIVATE Raster 2
EDIT >>> CLEAR
DESELECT |
|
STEP 14
IMAGE >>> CANVAS SIZE |
|
STEP 15
LAYERS >>> NEW RASTER LAYER
LAYERS >>> ARRANGE >>> MOVE DOWN
SELECTIONS >>> SELECT ALL
Maximize the GreenSwirl image in your PSP workspace
Right click on the Title Bar and select COPY from the options
Right click on the Title Bar of your frame image
and select PASTE INTO SELECTION from the options.
EFFECTS >>> REFLECTION EFFECTS >>>
ROTATING MIRROR
Same settings
ADJUST >>> BLUR >>> GAUSSIAN BLUR
Strength = 15.00
DESELECT
|
|
STEP 16
SELECTIONS >>> SELECT ALL
SELECTIONS >>> MODIFY >>> CONTRACT = 8
SELECTIONS >>> INVERT
EFFECTS >>> 3D EFFECTS >>> INNER BEVEL |
|
STEP 17
EFFECTS >>> 3D EFFECTS >>> DROP SHADOW
Vertical & Horizontal offsets = 1
Colour = Black
Opacity = 100
Blur = 0
Repeat Drop Shadow effect changing
Vertical & Horizontal Offsets to - ( minus ) 1
Click OK
Right click on the Title Bar and select COPY from the options
DESELECT
Right click on the Title Bar of your frame image
and select PASTE AS NEW LAYER from the options.
LAYERS >>> ARRANGE >>> BRING TO TOP
|
STEP 18
EFFECTS >>> 3D EFFECTS >>> DROP SHADOW
Vertical & Horizontal offsets = 6
Colour = Black
Opacity = 65
Blur = 10.00
Repeat Drop Shadow effect changing
Vertical & Horizontal Offsets to - ( minus ) 6
Click OK
ADJUST >>> SHARPNESS >>> SHARPEN
|
|
STEP 19
ACTIVATE Raster 2
EFFECTS >>> 3D EFFECTS >>> DROP SHADOW
Vertical & Horizontal offsets = 1
Colour = Black
Opacity = 100
Blur = 0
Repeat Drop Shadow effect changing
Vertical & Horizontal Offsets to - ( minus ) 1
Click OK
ACTIVATE the Raster 1
With your MAGIC WAND.... Same settings.
Select the CENTRE area of your image
ACTIVATE Raster 3
EDIT >>> CLEAR
DESELECT |
|
STEP 20
ACTIVATE Raster 2
With your MAGIC WAND
Mode = Replace
Match Mode = RGB Value
Tolerance = 0
Feather = 0
Antialias = UNchecked
Sample Merged = UNCHECKED
PSP9 - X8: Check CONTIGUOUS
PSPX - X8: There is no " Sample Merged"
Select the OUTER area
, |
|
STEP 21
SELECTIONS >>> INVERT
EFFECTS >>> 3D EFFECTS >>> INNER BEVEL |
|
STEP 21
EFFECTS >>> PLUGINS >>> EYE CANDY 3 >>>
DROP SHADOW
Same settings BUT change
Distance = 8.00
Blur = 8.00
OR
EFFECTS >>> PLUGINS >>> EYE CANDY 4000 >>> Shadowlab
Same settings BUT change
Center Offset Distance = 8.00
Overall Blur (Pixels) = 8.00
EDIT >>> Repeat Drop Shadow.. change DIRECTION to 135
OR
EDIT >>> Repeat Shadowlab.. change DIRECTION to 135
DESELECT |
|
STEP 21B
ACTIVATE Raster 1
With your MAGIC WAND
Same settings
Select the OUTER area
SELECTION >>> INVERT
EFFECTS >>> PLUGINS >>> EYE CANDY 3 >>>
DROP SHADOW
Same settings
OR
EFFECTS >>> PLUGINS >>> EYE CANDY 4000 >>> Shadowlab
Same settings
EDIT >>> Repeat Drop Shadow.. change DIRECTION to 315
OR
EDIT >>> Repeat Shadowlab.. change DIRECTION to 315
DESELECT
|
|
STEP 22
ACTIVATE Copy (2) of Raster 1
LAYERS >>> MERGE >>> MERGE DOWN
EDIT >>> Repeat >> Layer Merge Down
With your MAGIC WAND ... Same settings
Select the CENTRE transparent area
SELECTIONS >>> MODIFY >>> EXPAND = 6
SELECTIONS >>> INVERT
LAYERS >>> NEW RASTER LAYER
LAYERS >>> ARRANGE >>> MOVE DOWN
|
STEP 22B
EFFECTS >>> PLUGINS >>> EYE CANDY 3 >>> DROP SHADOW
Same settings BUT change
Distance = 10.00
Blur = 10.00
OR
EFFECTS >>> PLUGINS >>> EYE CANDY 4000 >>> Shadowlab
Same settings BUT change
Center Offset Distance = 10.00
Overall Blur (Pixels) = 10.00
EDIT >>> Repeat Drop Shadow.. change DIRECTION to 135
OR
EDIT >>> Repeat Shadowlab.. change DIRECTION to 135
DESELECT
ACTIVATE Raster 1
LAYERS >>> MERGE >>> MERGE DOWN
|
|
STEP 23
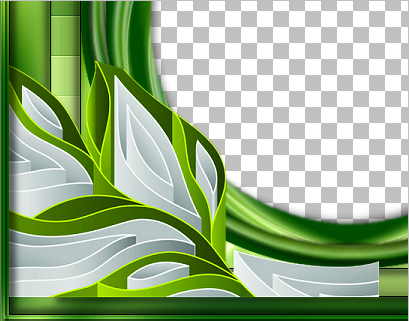
Open up the Curved-paper-511 image in your PSP workspace
Right click on the Title Bar and select COPY from the options
Right click on the Title Bar of your frame image
and select PASTE AS NEW LAYER from the options.
IMAGE >>> RESIZE = 75%
Ensure "Resize all layers" is UNCHECKED
Resample using WEIGHTED AVERAGE
ADJUST >>> SHARPNESS >>> SHARPEN
EFFECTS >>> IMAGE EFFECTS >>> OFFSET
Horizontal Offset = - ( minus ) 160
Vertical Offset = - ( minus ) 155
Edge Mode = Transparent

, |
STEP 24
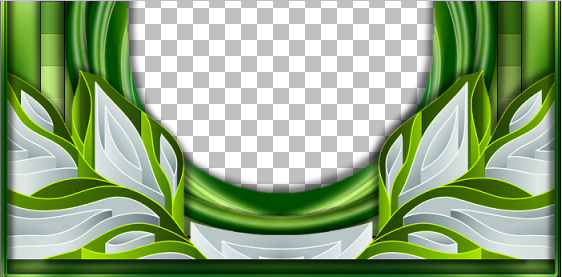
EFFECTS >>> REFLECTION EFFECTS >>>
ROTATING MIRROR
Horizontal Offset = 0
Vertical Offset = n/a
Rotation Angle = 180
Edge Mode = Reflect
EFFECTS >>> PLUGINS >>> EYE CANDY 3 >>> DROP SHADOW
Same settings
OR
EFFECTS >>> PLUGINS >>> EYE CANDY 4000 >>> Shadowlab
Same settings
EDIT >>> Repeat Drop Shadow.. change DIRECTION to 315
OR
EDIT >>> Repeat Shadowlab.. change DIRECTION to 315

LAYERS >>> MERGE >>> MERGE VISIBLE
Save as .pspimage image
,
|
STEP 25
Open up the stramonium by mashamakaut image
in your PSP workspace
Right click on the Title Bar and select COPY from the options
Right click on the Title Bar of your frame image
and select PASTE AS NEW LAYER from the options.
LAYERS >>> ARRANGE >>> MOVE DOWN
IMAGE >>> RESIZE = 85%
Ensure "Resize all layers" is UNCHECKED
Resample using WEIGHTED AVERAGE
ADJUST >>> SHARPNESS >>> SHARPEN
LAYERS >>> MERGE >>> MERGE VISIBLE |
|
STEP 26
LAYERS >>> NEW RASTER LAYER
Select your TEXT tool
and with a font of your choice add your name
LAYERS >>> MERGE >>> MERGE ALL (Flatten)
Save as .jpg image
, |
| |
|
| |
|
| |
|