STEP 1
Open a new image 700 x 600
Transparent background
PSPX - X2: Colour Depth = 8bits/channel
PSPX3-X6: Colour Depth RGB = 8bits/channel
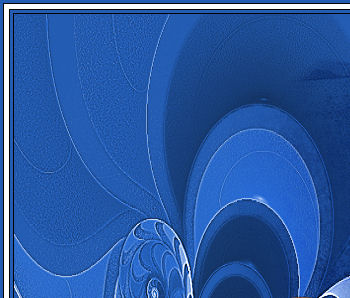
Flood fill with BLUE #235cb3
VIEW >>> RULERS
,
|
STEP 2
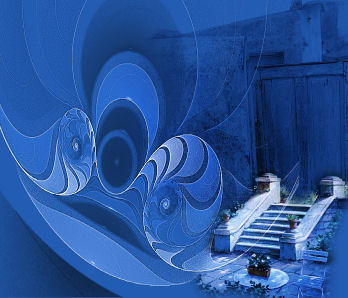
Open up the thegate.png image in your PSP workspace
Right click on the Title Bar and select COPY from the options
Right click on the Title Bar of your tag image
and select PASTE AS NEW LAYER from the options.
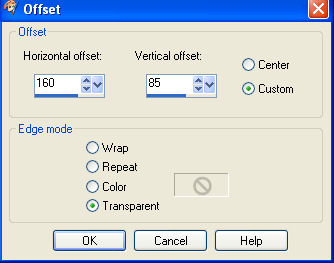
EFFECTS >>> IMAGE EFFECTS >>> OFFSET |
|
STEP 3
In your LAYER PALETTE change the
BLEND MODE to MULTIPLY |
|
STEP 4
Open up the Apos-110803-2-ak.png image
in your PSP workspace
Right click on the Title Bar and select COPY from the options
Right click on the Title Bar of your tag image
and select PASTE AS NEW LAYER from the options.
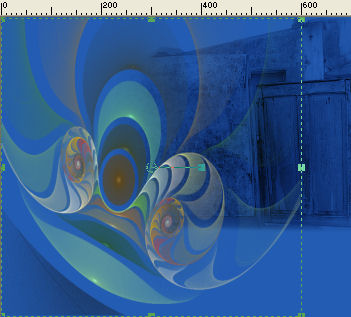
Select your RASTER DEFORM tool
Mode = SCALE
use default settings
PSPX-X8:Select your PICK tool
Pull the centre right node left to the 600 pixel mark
on your top ruler.
Pull centre top, left and bottom nodes out
to the edges of your image |
|
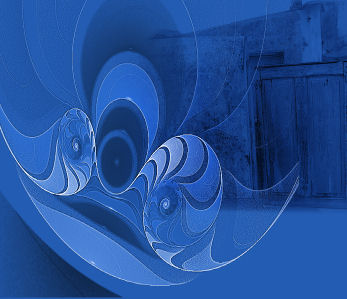
STEP 5
Click the RESET RECTANGLE arrow
Select your MOVER tool to disengage
the Deformation / Pick tool
In your LAYER PALETTE change the
BLEND MODE to LUMINANCE
EFFECTS >>> EDGE EFFECTS >>> ENHANCE |
|
STEP 6
Open up the divers14_tine image
in your PSP workspace
Right click on the Title Bar and select COPY from the options
Right click on the Title Bar of your tag image
and select PASTE AS NEW LAYER from the options.
IMAGE >>> RESIZE = 85%
Ensure "Resize all layers" is UNCHECKED
Resample using WEIGHTED AVERAGE
EFFECTS >>> IMAGE EFFECTS >>> OFFSET
Horizontal Offset = 200
Vertical Offset = - (minus) 175
Edge Mode = Transparent
In your LAYER PALETTE change the
BLEND MODE to HARD LIGHT |
|
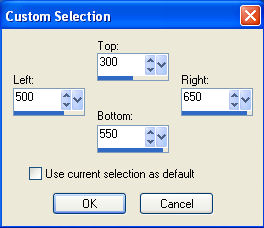
STEP 7
ACTIVATE Raster 3
Choose your SELECTION TOOL then click on the
CUSTOM SELECTION symbol
and enter these coordinates. |
|
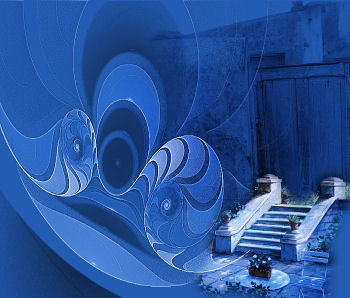
STEP 8
EDIT >>> CLEAR
DESELECT
LAYERS >>> MERGE >>> MERGE VISIBLE
Rename this layer bgd
SAVE YOUR WORK
|
|
STEP 9
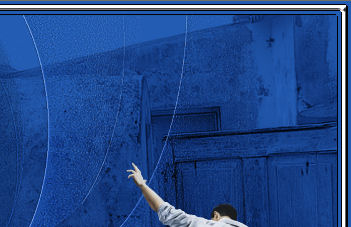
Open up the kjb_urban.png image in your PSP workspace
Right click on the Title Bar and select COPY from the options
Right click on the Title Bar of your tag image
and select PASTE AS NEW LAYER from the options.
IMAGE >>> RESIZE = 50%
Ensure "Resize all layers" is UNCHECKED
Resample using WEIGHTED AVERAGE
ADJUST >>> SHARPNESS >>> SHARPEN
, |
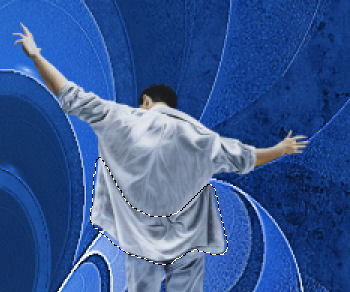
STEP 10
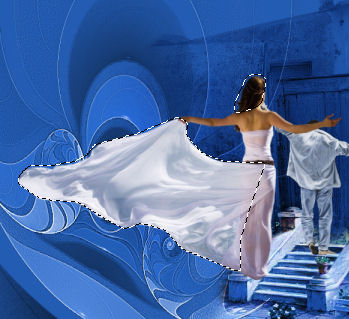
Choose your FREEHAND SELECTION TOOL
Selection Type = Point to Point
Mode = Replace
Feather = 1
Smoothing = 5
Antialias = Checked
Select the area shown |
|
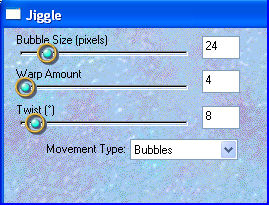
STEP 11
EFFECTS >>> PLUGINS >>> EYE CANDY 3 >>> JIGGLE
DO NOT DESELECT
Rename this layer Man 1 |
|
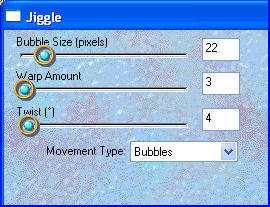
STEP 12
LAYERS >>> DUPLICATE
EFFECTS >>> PLUGINS >>> EYE CANDY 3 >>> JIGGLE
DO NOT DESELECT
Rename this layer Man 2
|
|
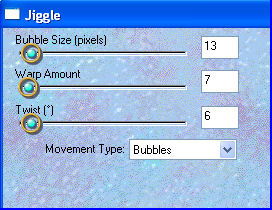
STEP 13
LAYERS >>> DUPLICATE
EFFECTS >>> PLUGINS >>> EYE CANDY 3 >>> JIGGLE
DO NOT DESELECT
Rename this layer Man 3
DESELECT
|
|
STEP 14
EFFECTS >>> IMAGE EFFECTS >>> OFFSET
Horizontal Offset = 225
Vertical Offset = 5
Edge Mode = Transparent |
|
STEP 15
ACTIVATE the Man 2 layer
EDIT >>> Repeat Offset
ACTIVATE the Man 1 layer
EDIT >>> Repeat Offset
SAVE YOUR WORK
|
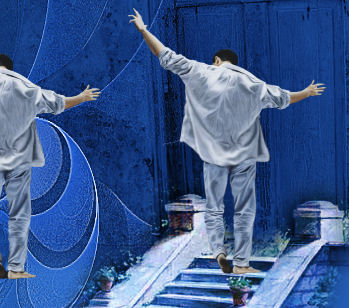
STEP 16
ACTIVATE the Man 3 layer
Open up the you ought to see her fly image
in your PSP workspace
Right click on the Title Bar and select COPY from the options
Right click on the Title Bar of your tag image
and select PASTE AS NEW LAYER from the options.
IMAGE >>> RESIZE = 85%
Ensure "Resize all layers" is UNCHECKED
Resample using WEIGHTED AVERAGE
ADJUST >>> SHARPNESS >>> SHARPEN
, |
STEP 17
Choose your FREEHAND SELECTION TOOL
Selection Type = Point to Point
Mode = ADD (Shift)
Feather = 1
Smoothing = 5
Antialias = Checked
Select the areas shown |
|
STEP 18
EFFECTS >>> PLUGINS >>> EYE CANDY 3 >>> JIGGLE
DO NOT DESELECT
Rename this layer Woman 1 |
|
STEP 19
LAYERS >>> DUPLICATE
EFFECTS >>> PLUGINS >>> EYE CANDY 3 >>> JIGGLE
DO NOT DESELECT
Rename this layer Woman 2
|
|
STEP 20
LAYERS >>> DUPLICATE
EFFECTS >>> PLUGINS >>> EYE CANDY 3 >>> JIGGLE
DESELECT
Rename this layer Woman 3
|
|
STEP 21
EFFECTS >>> IMAGE EFFECTS >>> OFFSET
Horizontal Offset = - (minus) 62
Vertical Offset = - (minus) 100
Edge Mode = Transparent |
|
STEP 22
ACTIVATE the Woman 2 layer
EDIT >>> Repeat Offset
ACTIVATE the Woman 1 layer
EDIT >>> Repeat Offset
SAVE YOUR WORK |
STEP 23
ACTIVATE the Woman 3 layer
LAYERS >>> NEW RASTER LAYER
Flood fill with BLUE #235cb3
SELECTIONS >>> SELECT ALL
SELECTIONS >>> MODIFY >>> CONTRACT = 4
EDIT >>> CLEAR
EFFECTS >>> 3D EFFECTS >>> DROP SHADOW
Vertical & Horizontal offsets = 1
Colour = Black
Opacity = 100
Blur = 0
Repeat Drop Shadow effect changing
Vertical & Horizontal Offsets to - ( minus ) 1
Click OK
,
|
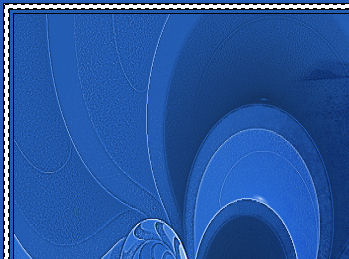
STEP 24
Flood fill with WHITE
SELECTIONS >>> MODIFY >>> CONTRACT = 6
EDIT >>> CLEAR
EFFECTS >>> 3D EFFECTS >>> DROP SHADOW
Vertical & Horizontal offsets = 1
Colour = Black
Opacity = 100
Blur = 0
Repeat Drop Shadow effect changing
Vertical & Horizontal Offsets to - ( minus ) 1
Click OK
|
STEP 25
Flood fill with BLUE #235cb3
SELECTIONS >>> MODIFY >>> CONTRACT = 4
EDIT >>> CLEAR
EFFECTS >>> 3D EFFECTS >>> DROP SHADOW
Vertical & Horizontal offsets = 1
Colour = Black
Opacity = 100
Blur = 0
Repeat Drop Shadow effect changing
Vertical & Horizontal Offsets to - ( minus ) 1
Click OK
DESELECT
|
|
STEP 26
With your MAGIC WAND
Mode = Replace
Match Mode = RGB Value
Tolerance = 0
Feather = 0
Antialias = UNchecked
Sample Merged = UNCHECKED
PSP9 - X8: Check CONTIGUOUS
PSPX - X8: There is no " Sample Merged"
PSPX - X8: Use all layers = UNChecked
Select the WHITE border |
|
STEP 27
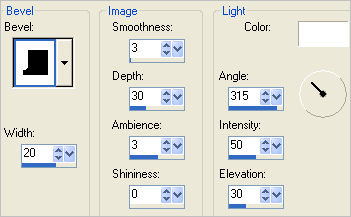
EFFECTS >>> 3D EFFECTS >>> INNER BEVEL |
|
STEP 28
EDIT >>> Repeat Inner Bevel
DESELECT |
|
STEP 29
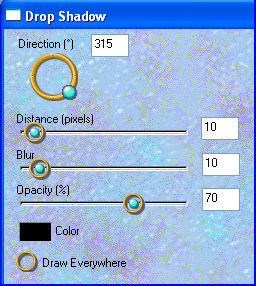
EFFECTS >>> PLUGINS >>> EYE CANDY 3 >>>
DROP SHADOW |
|
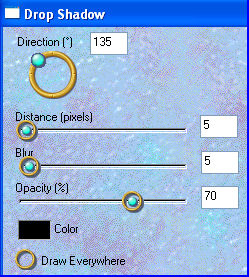
STEP 30
EFFECTS >>> PLUGINS >>> EYE CANDY 3 >>>
DROP SHADOW
Rename this layer frame |
|
STEP 31
ACTIVATE the bgd layer
LAYERS >> NEW RASTER LAYER
Select your TEXT TOOL
with font and settings of your choice
add your name
LAYERS >>> MERGE >>> MERGE DOWN |
|
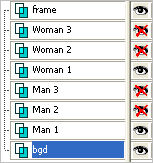
STEP 32
Set up LAYER PALETTE as shown
Right click on Title Bar and select
Copy merged from the options |
|
STEP 33
In ANIMATION SHOP
Right click the workspace and select
'Paste As New Animation' from the options.
Back to PSP.
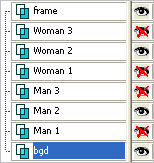
Set up LAYER PALETTE as shown
Right click on Title Bar and select
Copy merged from the options |
|
STEP 34
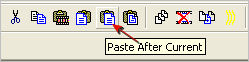
In ANIMATION SHOP
Select
'Paste After Current' on top menu
Back to PSP.
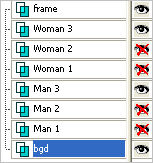
Set up LAYER PALETTE as shown
Right click on Title Bar and select
Copy merged from the options |
|
STEP 35
In ANIMATION SHOP
Select
'Paste After Current' on top menu
Edit >> Select All
Edit >> Copy
Edit >> Select All
Edit >> Paste After Current Frame
You will now have 6 frames
|
STEP 36
Click on the folder  on the top menu and locate the folder with your supplies. on the top menu and locate the folder with your supplies.
Locate the TreasureS1199BlingSPSPT08b.gif and select OPEN
Edit >> Select All
Edit >> Copy
Edit >> Propagate Paste
ACTIVATE your main animation frames
Edit >> Select All
Scroll the arrow on the bottom of the frame to first frame
( F:1)
Edit >> Paste into selected frame
Place somewhere in top left corner (Placement isn't important)
 , , |
STEP 37
(We're going to repeat the process)
Edit >> Paste into selected frame
Again...place somewhere in top left corner |
|
STEP 38
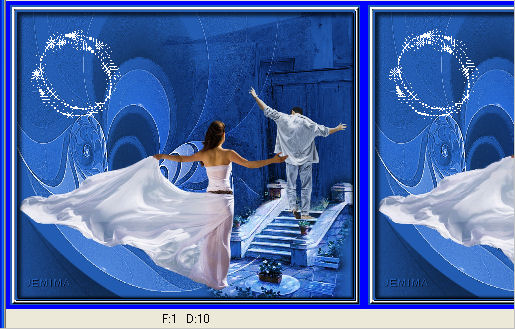
You can stop here OR like me ...
paste it once more following the above instruction.
|
|
STEP 39
View >> Animation
and while it is still running,
File >> Save As
Locate the folder in which you wish to save it.
Name your animation.
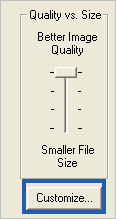
Click the Customize button
... then select Optimized Octree... click OK
 ... ...
With the Gif Optimiser keep pressing NEXT
until you get to the last one... click FINISH
Close the Animation
Close the frames.
Close Animation Shop |
|
|
|
|
RESIZING ANIMATIONS
Click on the Title Bar of the frames
Animation >> Resize animation
Select width and height in pixels
Click OK
Save your animation |
|
|
|
|
|
|